How to Make an Origami Star Box in Easy Step by Step Instructions

Introduction:
Origami boxes are great paper crafts to make for storing small trinkets such as candies and small accessories. In this instruction, we’re going to make an origami star box. This 4 pointed star shaped box is a bit tricky to make, but this step by step instruction will guide you on how to make it. Once finished, you may use it as a décor on your table for storing small stuff like paper clips or you can make it into a gift box.
Make the star box sturdy by using a thick piece of paper. You may use a single sided colored paper such or a paper with different sides to follow the instructions better.
Create a square base
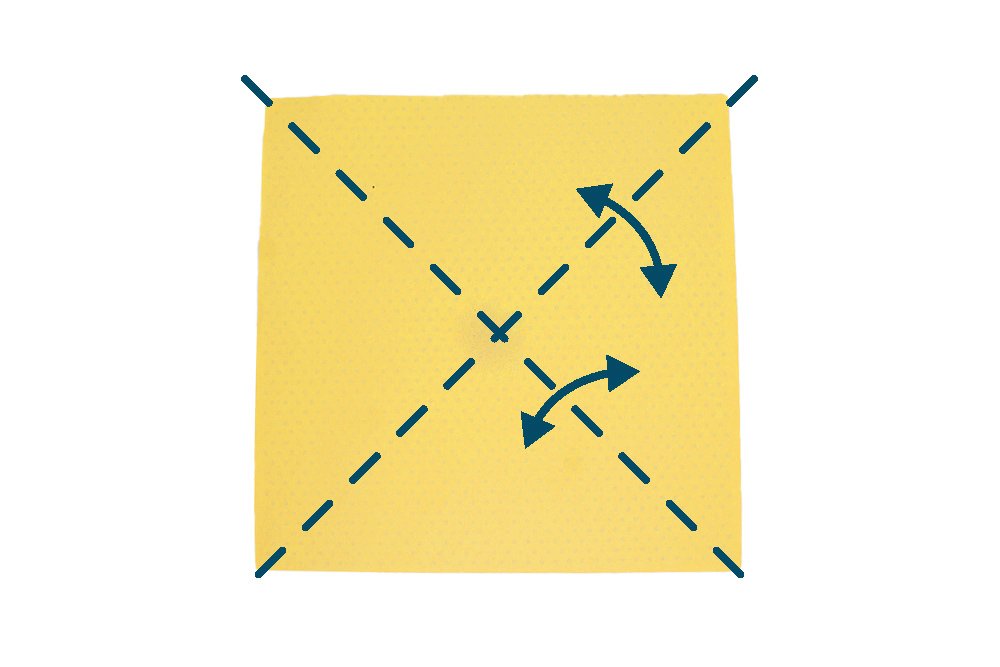
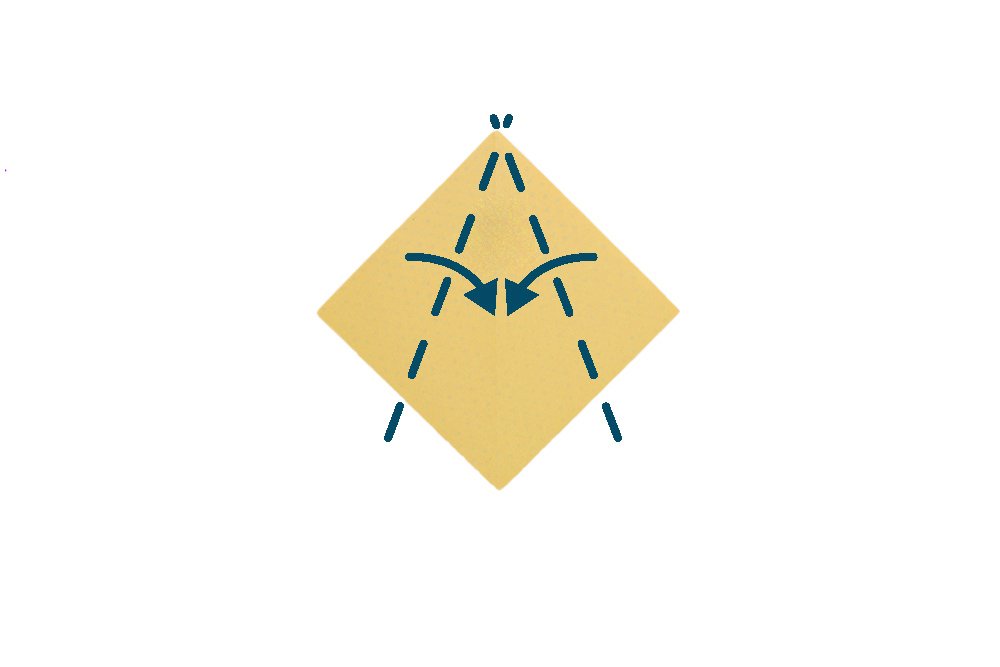
Get a square piece of origami paper. Lay it on a flat surface and fold the paper diagonally along the dashed lines. Crease the paper well and unfold.
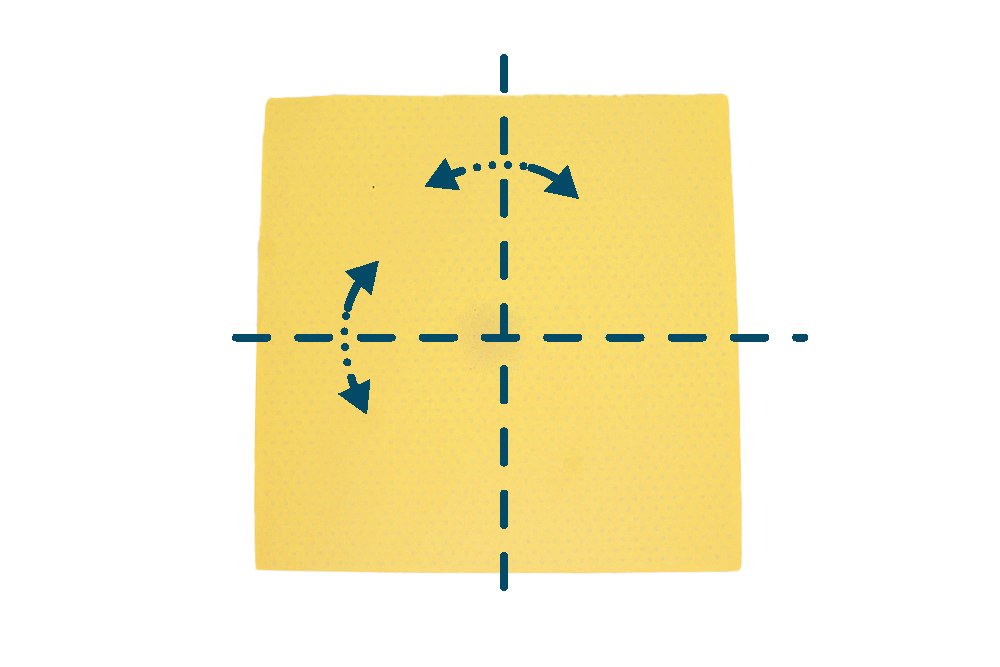
The second step is to make crease marks horizontally and vertically. Mountain fold the paper crosswise and lengthwise in half. Crease well and unfold.
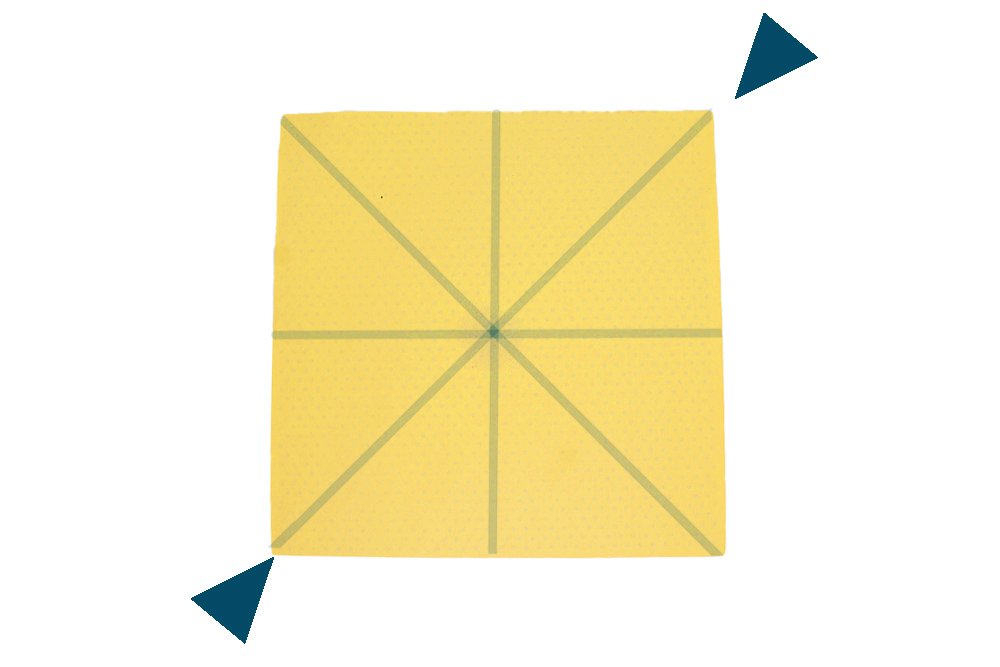
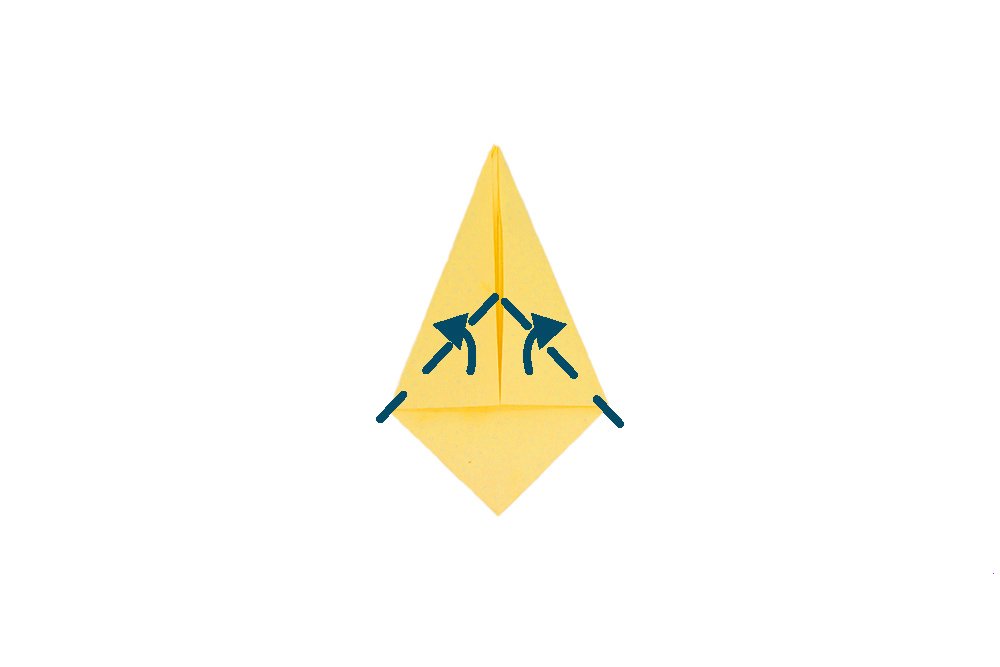
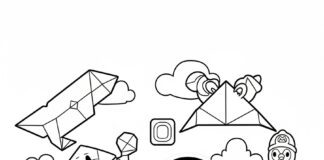
Carefully collapse the paper along the crease lines made. Bring the top right corner and the bottom left corner together. It should naturally fold into a square because of the crease marks made in the previous steps
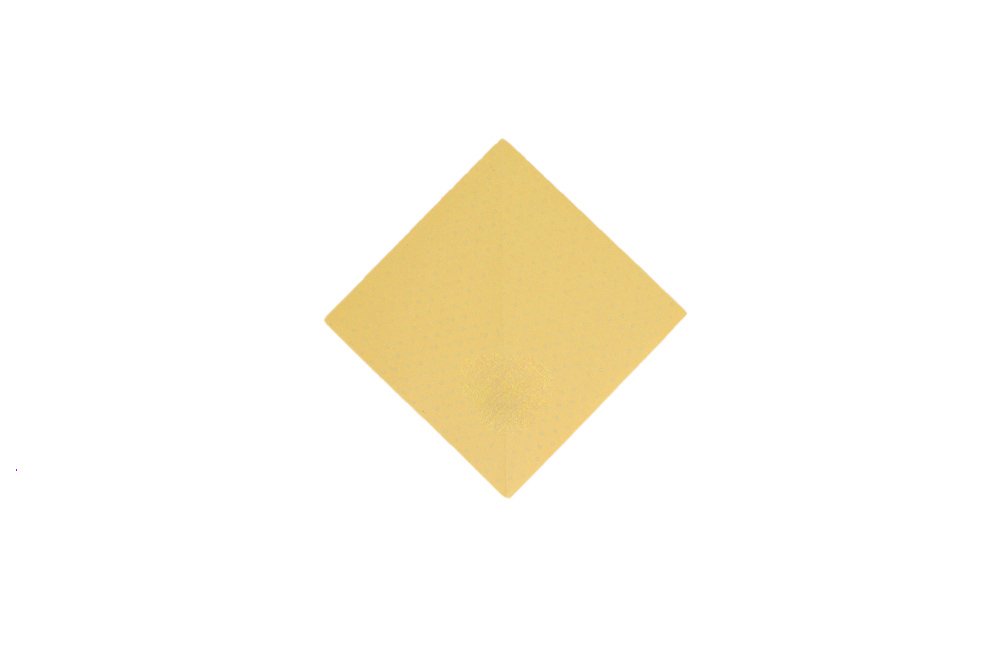
The square base of the origami star box is done! Rotate it into a diamond like the image above, and then proceed to the next set of steps.
Make a squash fold
Fold the left and right corner of the outer flap to the center. Make sure to fold the outer layer ONLY.
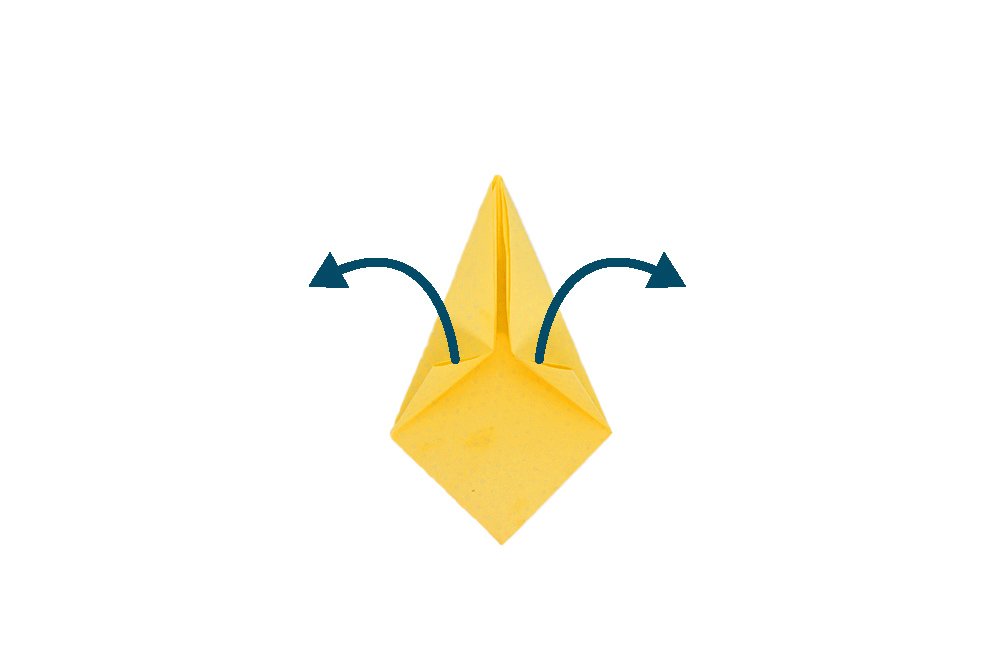
Fold each flap of the outer layer up towards the outer edge of the model and crease well.
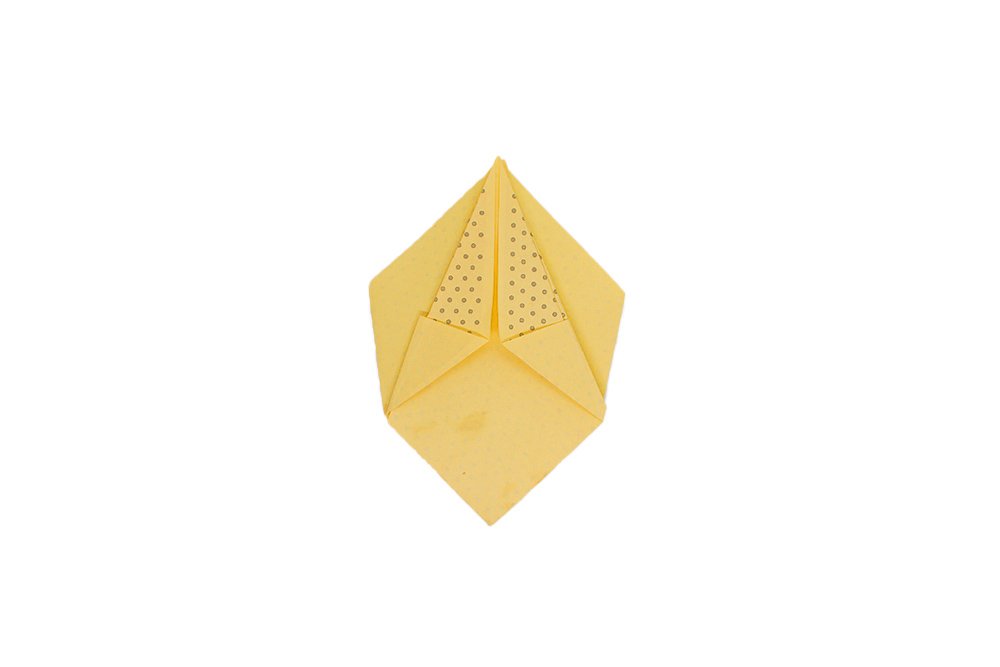
Pry open the inside of the flaps you made in the previous step and make a squash fold. Once squashed, the origami paper should look like the right below.

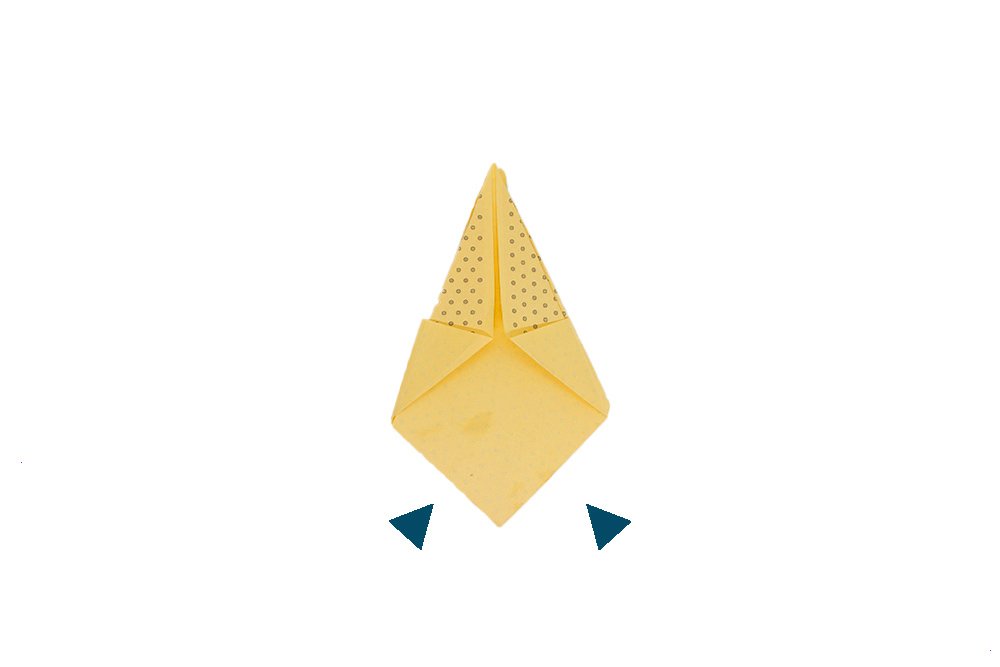
Tuck the flaps inside. Make sure to tuck (mountain fold) the outer flaps ONLY along the dashed lines
Repeat the squash fold on the back side of the origami paper as well. (Starting from step 5)
Shape the origami paper into a star box

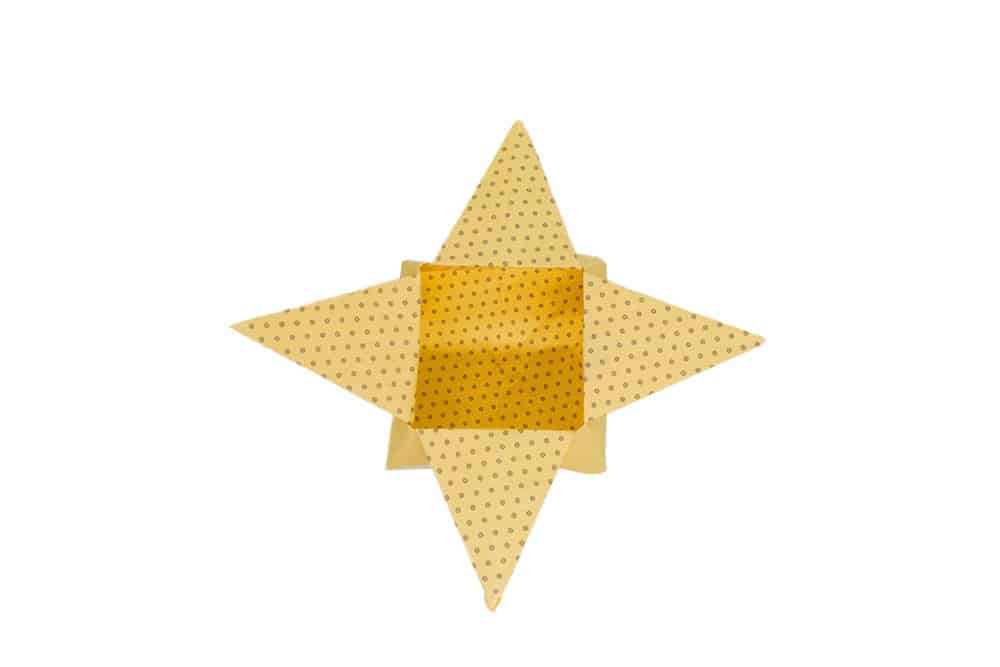
Fold along the dashed lines as shown. Crease the paper well and unfold. This will be the base of the paper box.
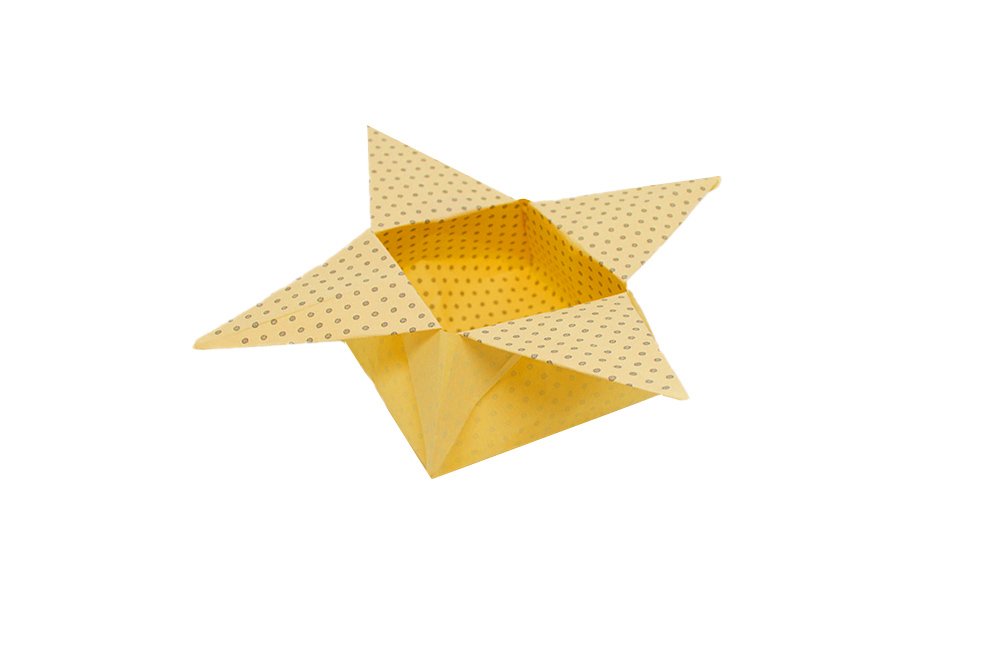
Push the bottom part upward to make the base of the box. See the next step on how it should look like after.

Almost done! Fold each of the top corners downward.
When viewed from the top it should resemble a four pointed star.
Your origami star box is done!
Extra Tips
- You can put small trinkets inside or make it as a gift box if you like.
- Experiment with different sizes of paper and different methods to make boxes.

I wanted something to put my pencil shavings in. Took 2 minutes to make this. Thanks for the pretty box haha
Absolutely adorable! I needed a quick little box for my erasers!
It’s super easy to make but it did take me a minute to do the folding at the middle but over all it’s easy.
I’m doing this as party souvenirs, so I’m going to use this technique for the box and wrap it on transparent paper with a bow.
Brilliant 👍👍👍