Discover How to Make a Flapping Bird Origami

Introduction:
Learn to make an origami flapping bird! If you’re familiar with the traditional Japanese origami crane, then this activity might be a lot easier for you. This flapping bird is the simpler version of that bird origami. What’s great about this paper origami is that it can flap its wing when you pull the paper correctly.
The origami flapping bird may resemble the traditional crane, but it is much easier to make. Just follow the instruction below so you can have your bird origami to play with.
Have fun while folding the guide and enjoy even more when you are done with the origami flapping bird. Goodluck.
Make a square base of the flapping bird origami
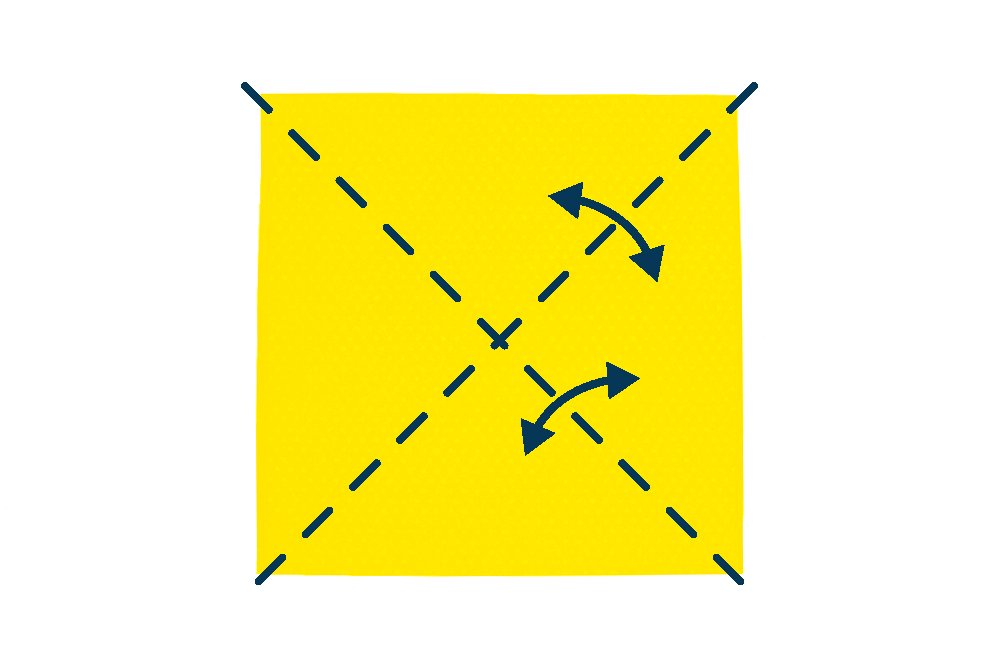
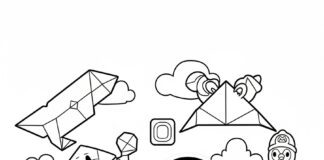
Get a piece of origami paper, preferably a paper that has one color on one side. To make this bird origami, you will need to make a bird base. To do so, crease the paper diagonally along the dashed lines.
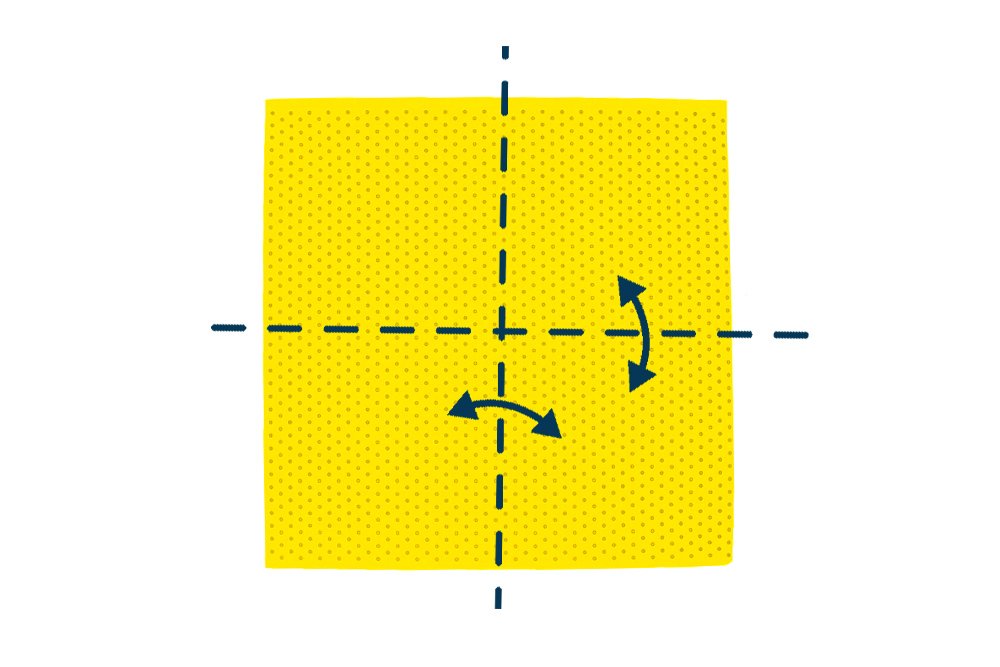
In Step 2, crease the origami paper along the dashed lines. To make the crease, fold the paper crosswise and lengthwise in half, then unfold. Orientate it into a diamond after.
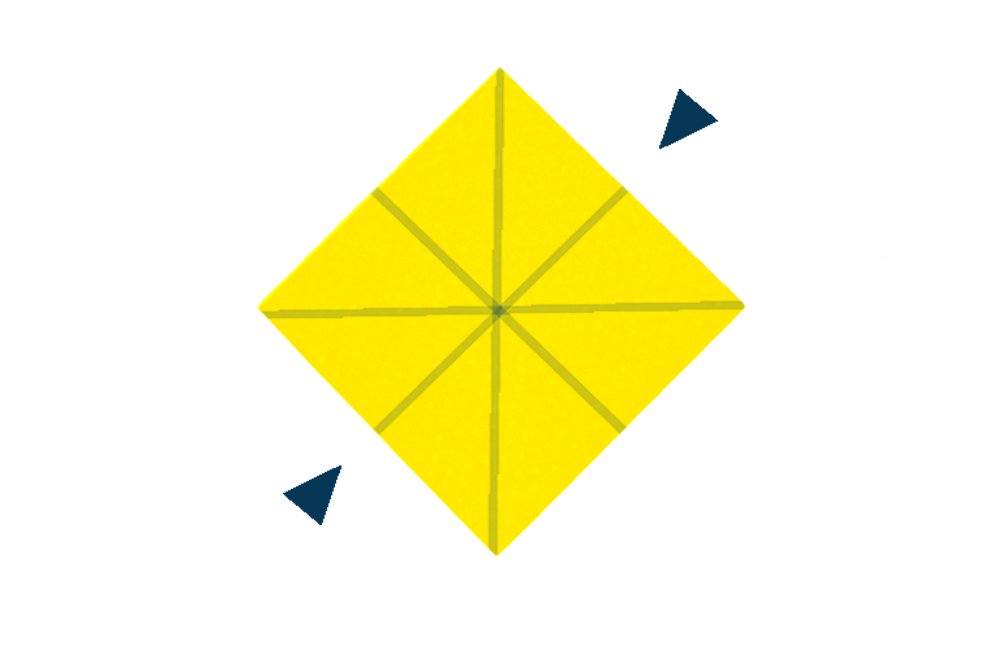
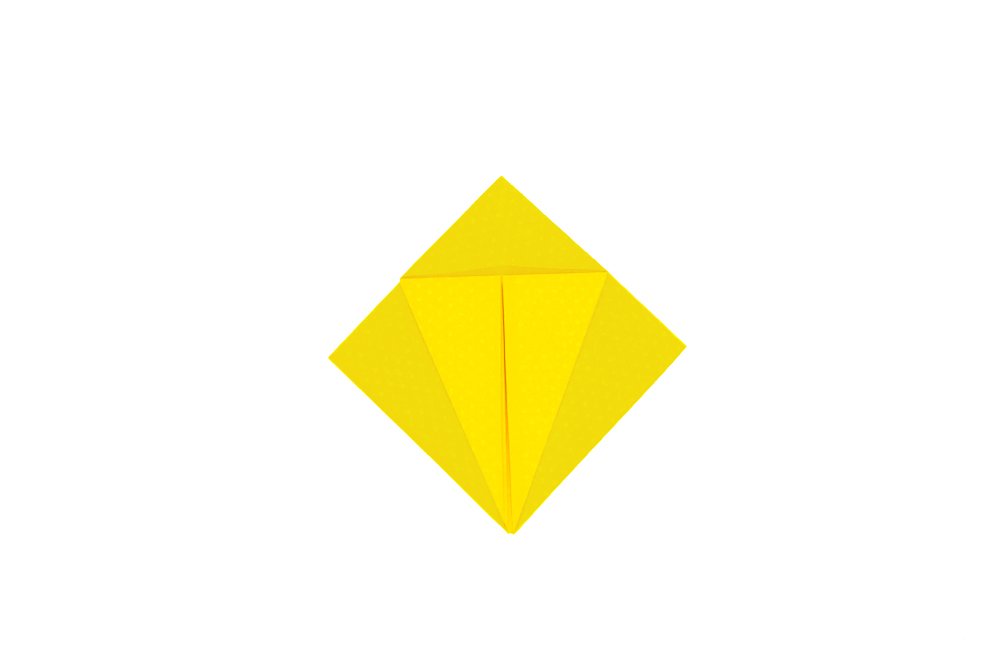
The creases of your square origami should look like this. To make a bird fold, you need to make a square fold first. Push the paper into a smaller square by bringing together the bottom left corner to the top left corner.
Once you bring the corners together, the paper should look like the image above. Now flatten it into a square.
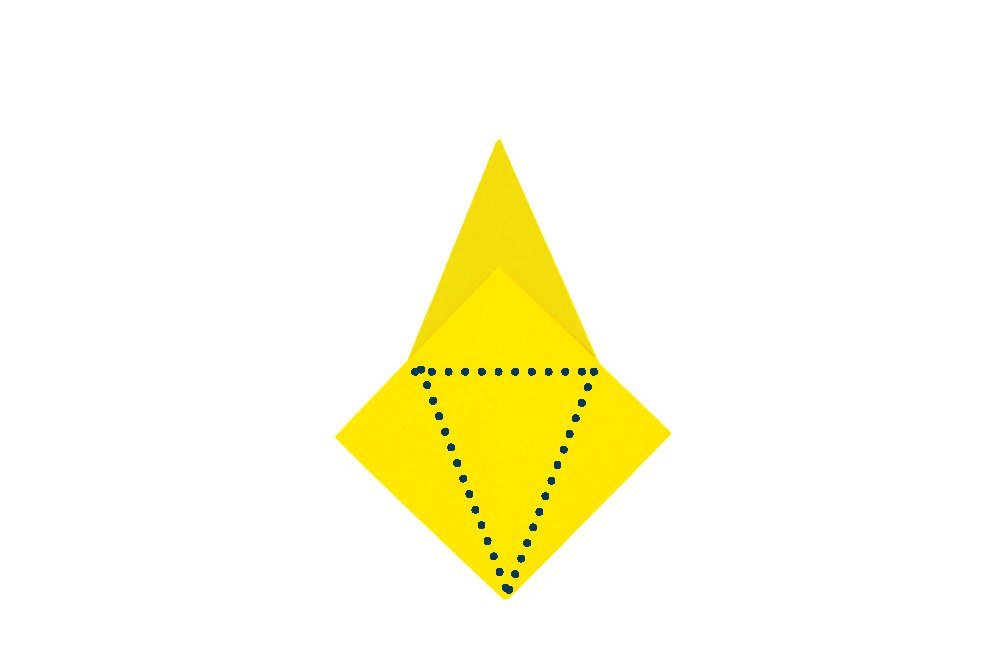
Bring the left and right corners to the middle crease. Fold the top layer ONLY
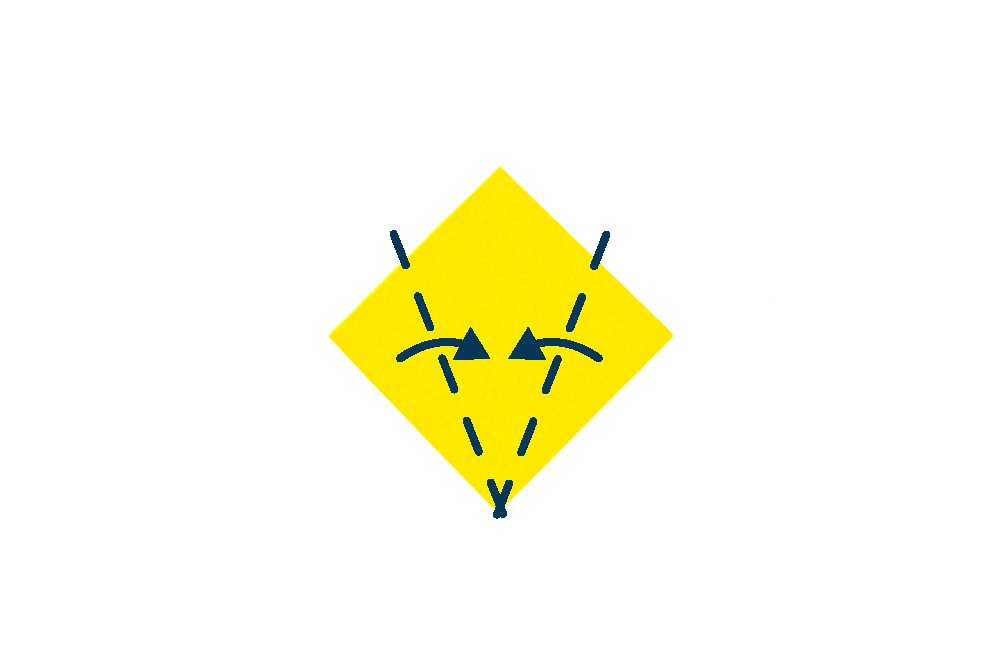
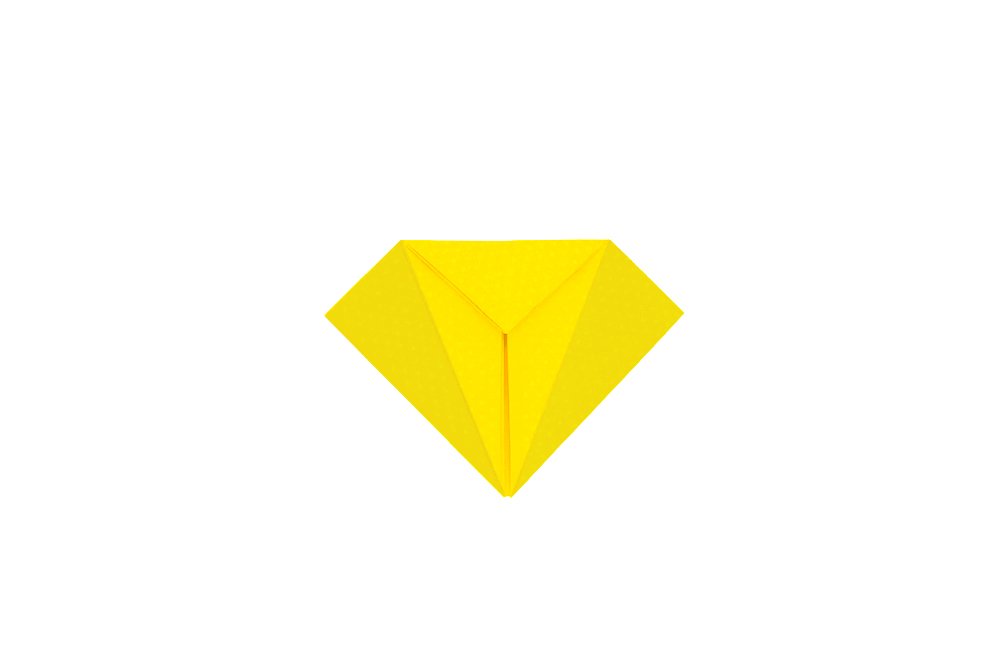
Create the petal fold
Fold the top corner downwards.
Unfold the 3 outer flaps made from the previous two steps.
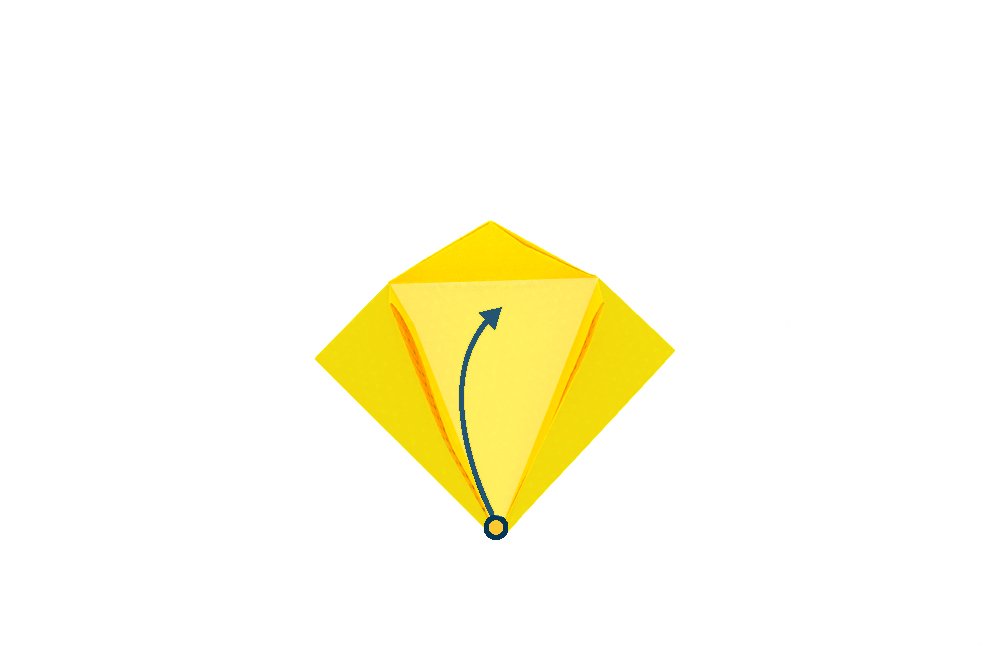
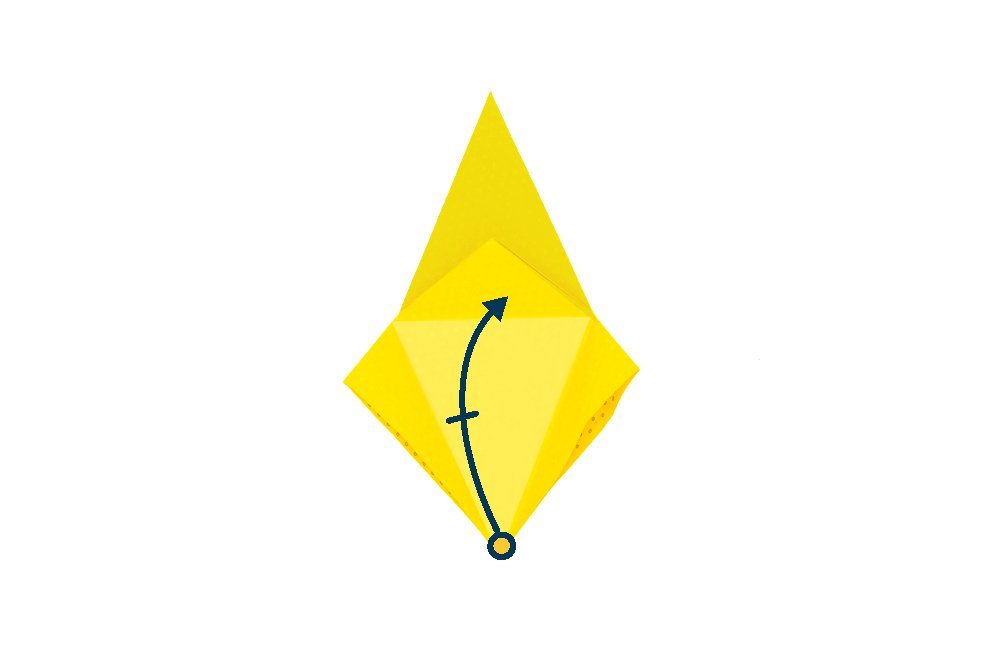
Gently lift the bottom corner of the outer flap to the top.

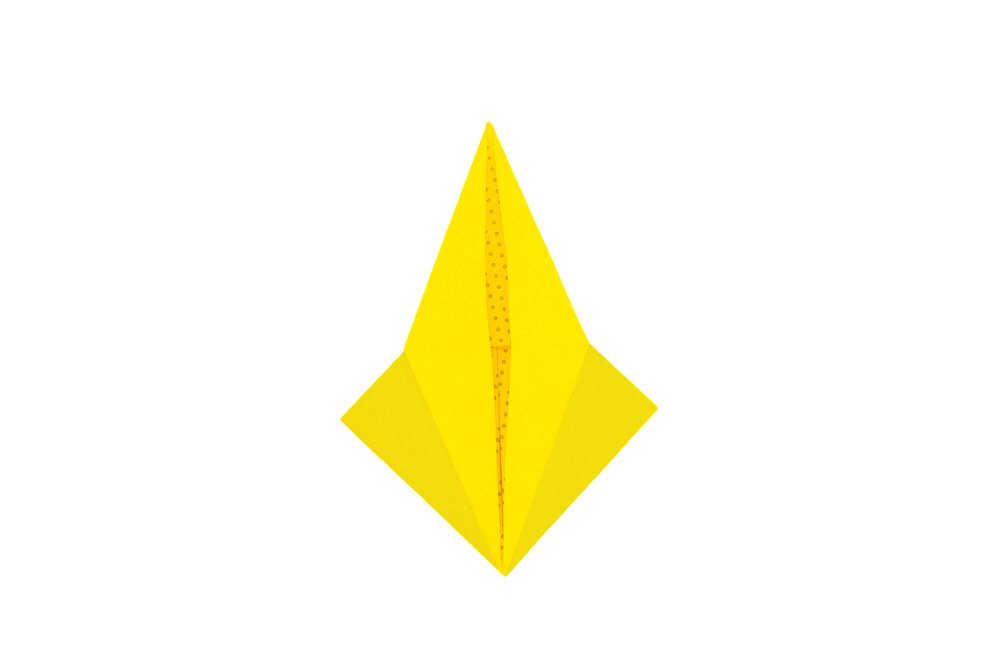
Keep bringing the bottom corner to the top. It should now look like the image above.
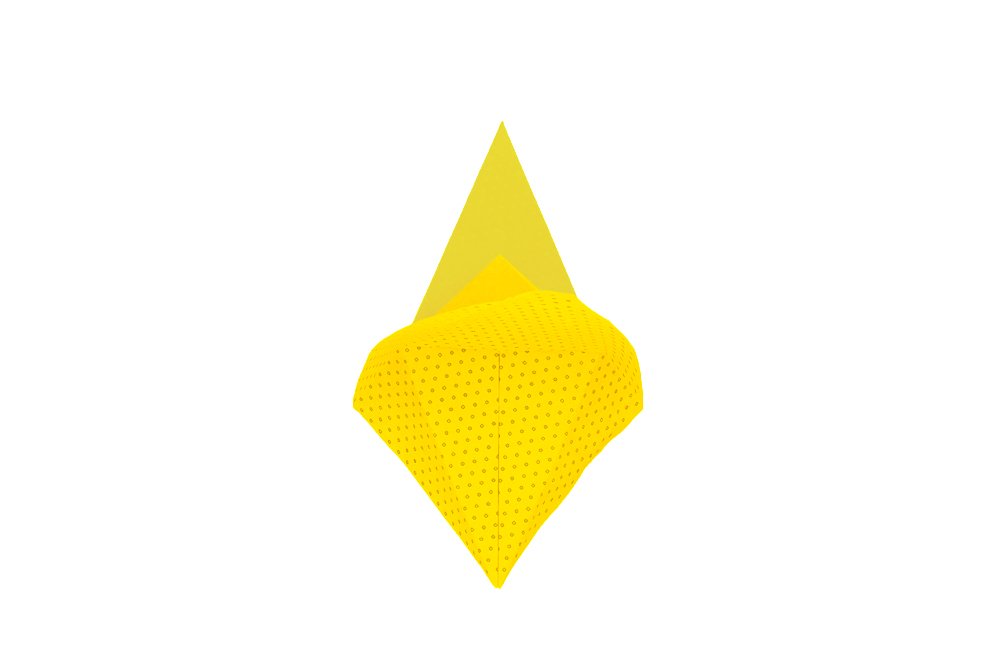
Turn the origami paper on the other side.
Do the exact process that you just did with the first side. Fold in the three corners on this side to make crease marks. Crease well and then unfold.
Gently lift the yellow dot again.
Keep bringing the bottom corner to the top. It should now look like the image above.
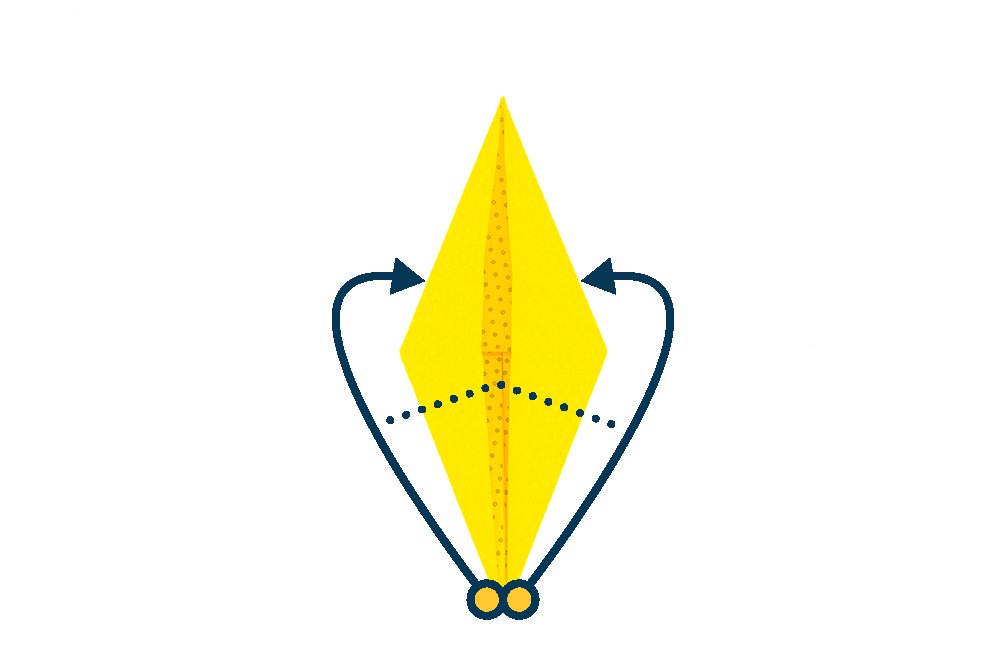
This is what the petal fold should look like. The next step is to make a reverse fold on both sides’ bottom corners. Crease along the dotted lines first. Then, follow the direction of the arrows to make the reverse fold.
Create the head, wing and tail of the origami bird
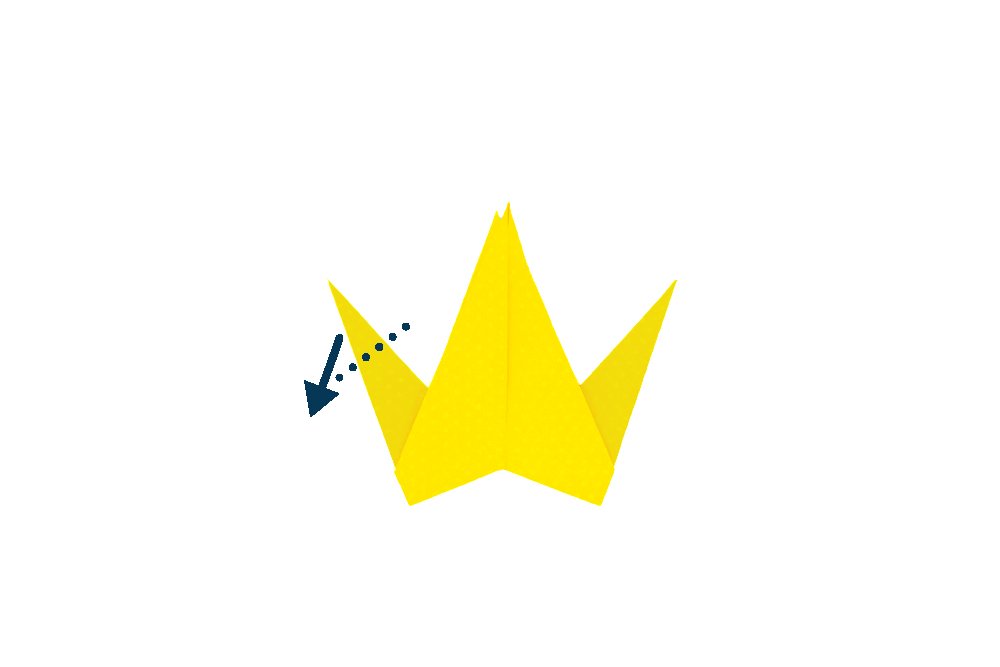
The left corner will be the head of your origami flapping bird. Make an inside reverse fold to form the head. To make an inside reverse fold, pry open the top tip. Then push it down inwards to the center, then flatten.
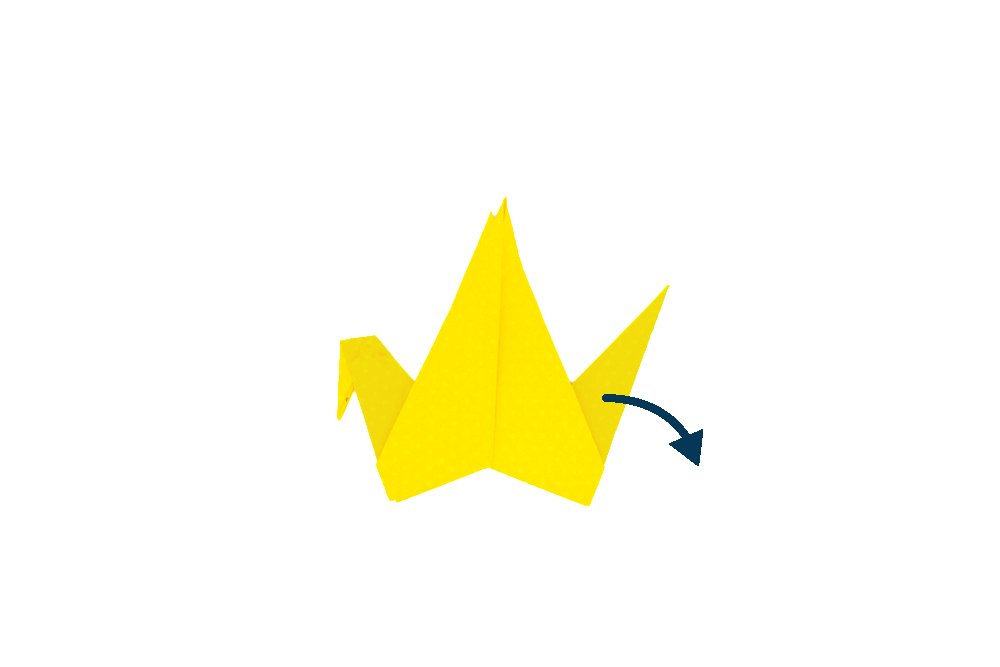
Pull the right tip downwards to make the tail.
The outer layers will be the wings of the bird origami. Fold the front wings downwards.

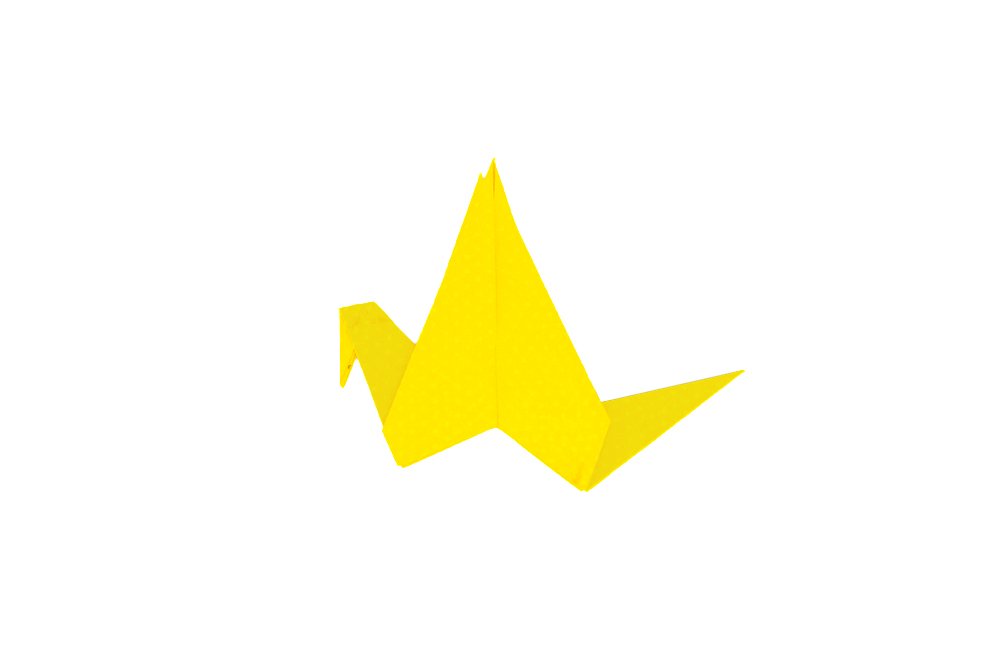
Almost done! Repeat the fold on the back wing.

Your origami flapping bird is done! To make the wings of your bird flap, hold the tail up and down. Congratulations, did you enjoy making the flapping bird?
Extra Tips
- Take your time and be patient. Follow the steps closely but don't forget to have fun.
- Fold straight and apply enough pressure. If you make mistakes and need another piece of paper, get another piece of paper. It simply won't look good if there are unnecessary crease lines.
- Don't forget to check our other origami guides.

This is great! Bit hard definitely but great
Thankyou very much. I know how to do it now🤓🤓
Arghhh couldn’t do it. Any tips?
The flapping bird and the traditional crane is the same right?
That was super duper amazing!!!! this remind me of the game flappy bird