- Dollar Bill Origami
- Easy Dollar Bill Origami
- Folding Instructions
- Money Gifts
- Origami Money Star Tutorial
5 Pointed Modular Money Origami Star Instructions

Introduction:
Challenge yourself with this intricate dollar bill origami. You will be making a five-pointed star origami using five pieces of dollar bills for this activity. You will need five-dollar bill pieces because a piece of a dollar bill is one segment of this origami star.
If you don’t have any dollar bills on hand, you may use any rectangular piece of paper. The downside of not using a dollar bill is that the finished origami star’s proportions will be slightly different from the illustration above. However, this can be fixed by using a rectangular piece of paper with a ratio of 1:2.35.
We hope that you’ll enjoy this tutorial.
Make the base of the money star's unit
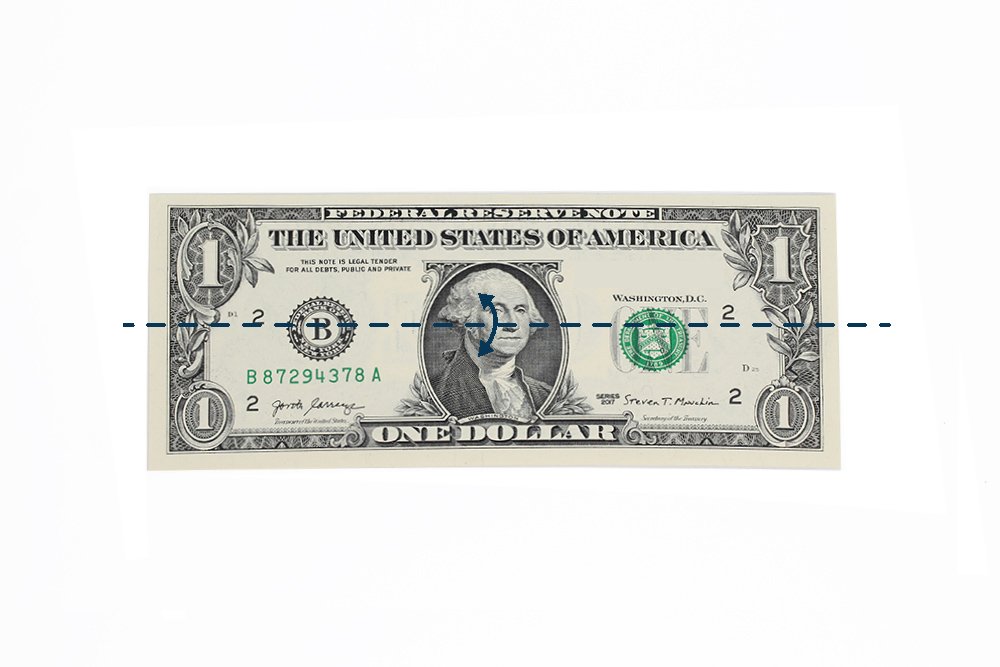
Welcome to our origami money star guide. The first step is to get a dollar bill of your choice then find a flat surface wherein you could begin folding the bill. Then make a horizontal crease mark by folding the bill in half crosswise and unfolding after.

Fold the dollar bill lengthwise in half. Crease it well but don't unfold.

Make another vertical crease mark by fold by bringing the right edge of the topmost layer to the left edge. See image above on how it should look like.
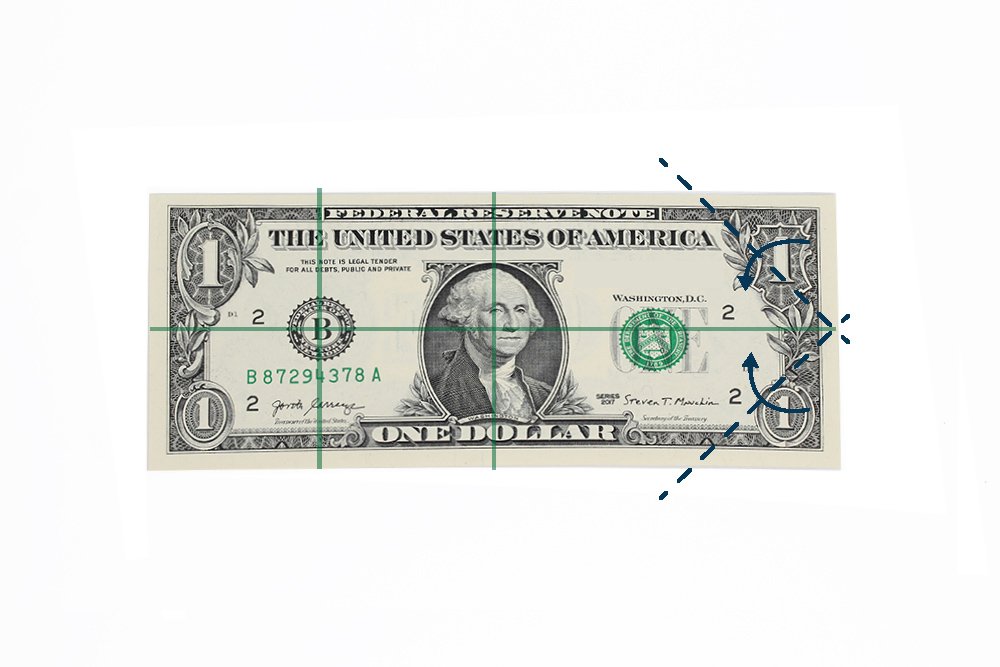
Then unfold the dollar bill. The creases made should look something like this. Bring the corners of the right side of the dollar bill to the middle crease made in the first step.
Bring the right corner to the leftmost vertical crease line. Follow the yellow dots as shown above.
Once folded it it should look something like this. Flip the dollar bill to the other side.
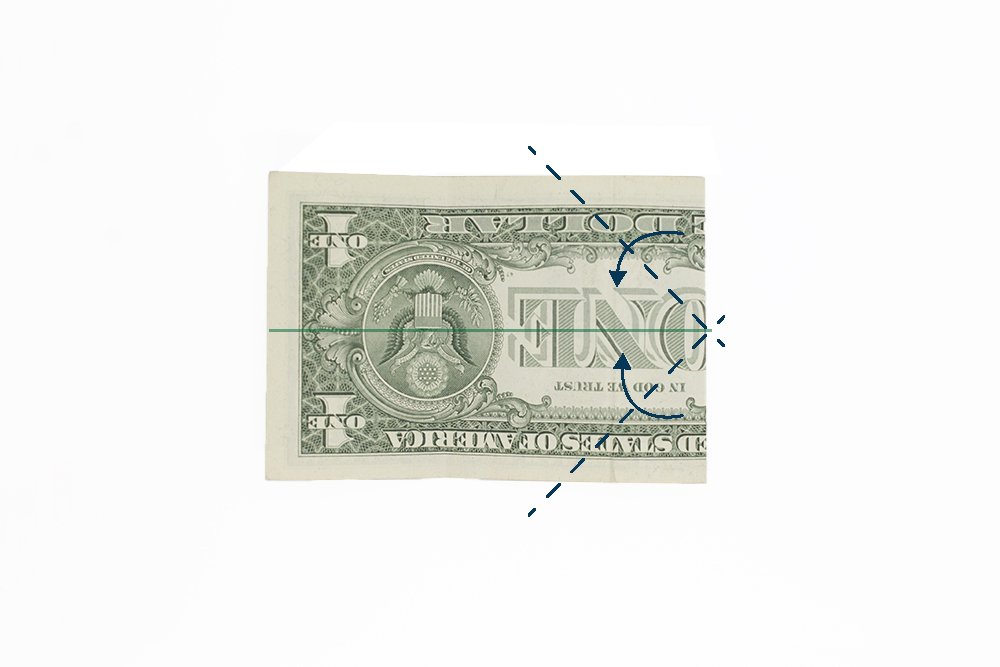
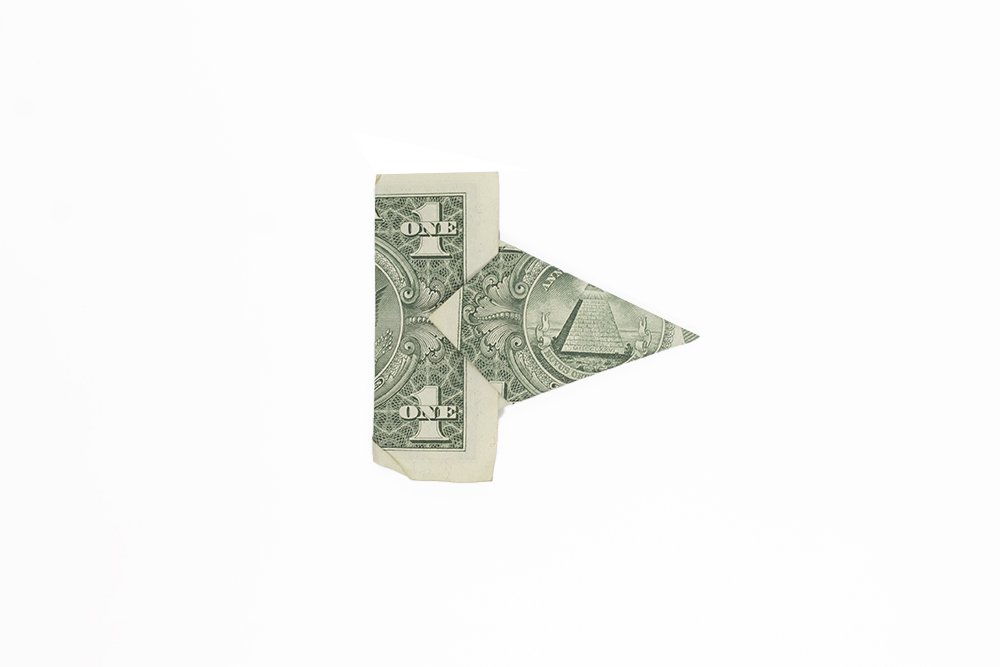
Bring the right corners to the horizontal crease line. Fold it along the dashed lines as shown.
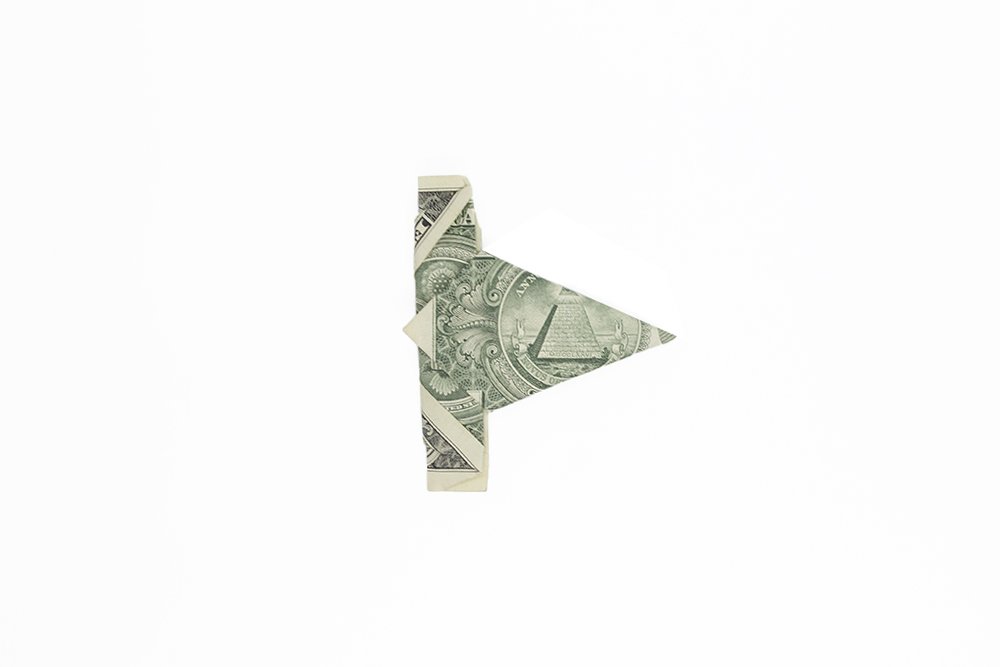
Bring the top and bottom corners to the horizontal crease line again. Diagonally fold the corners towards the middle.
Create a unit of the money origami star
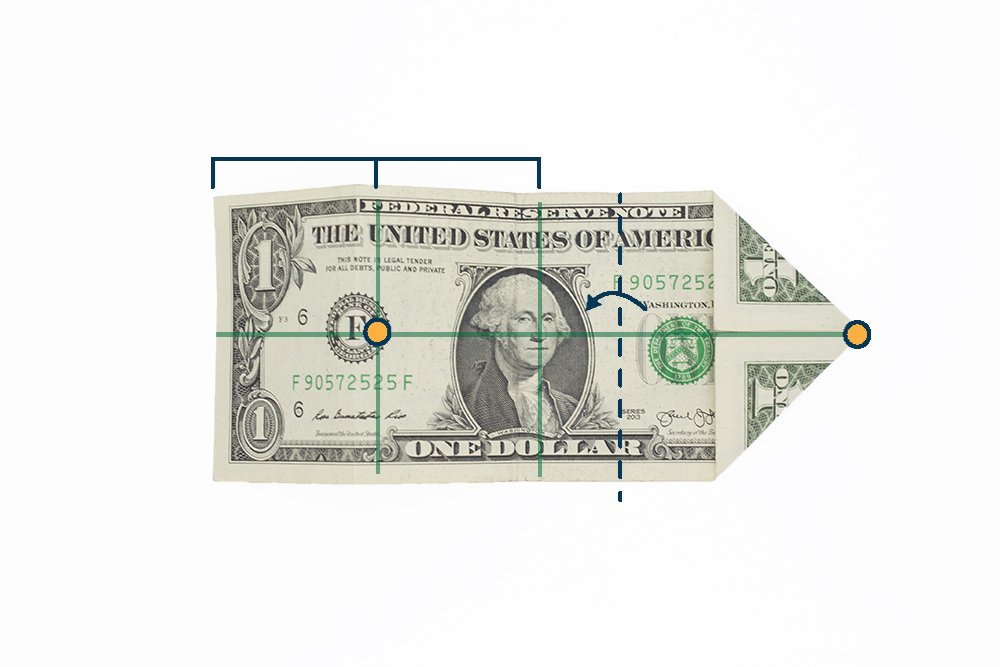
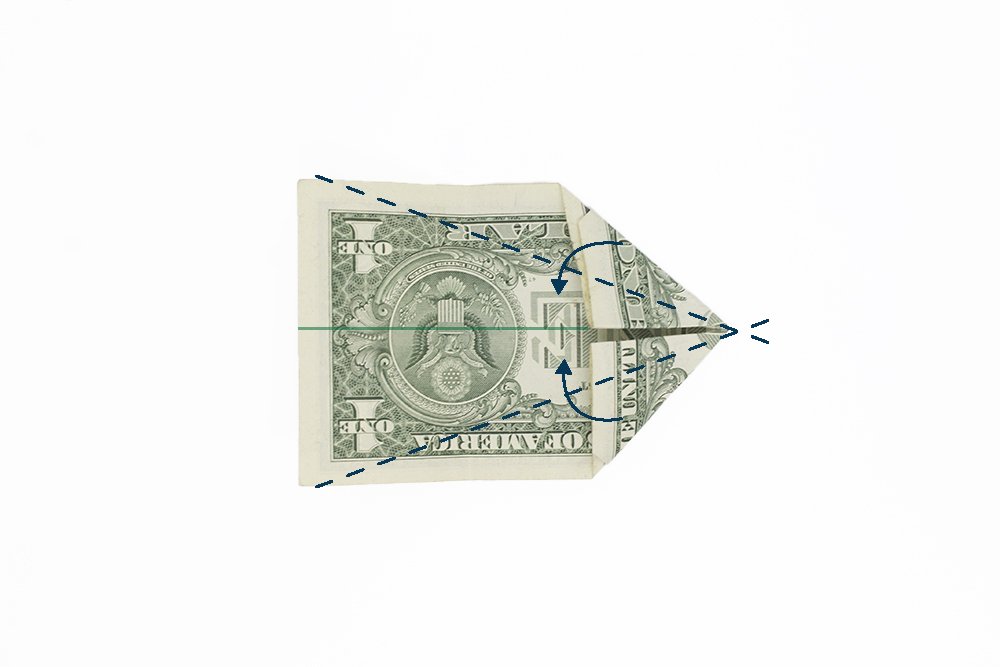
You should have something like the image above at this point. Turn the dollar bill to the other side again.
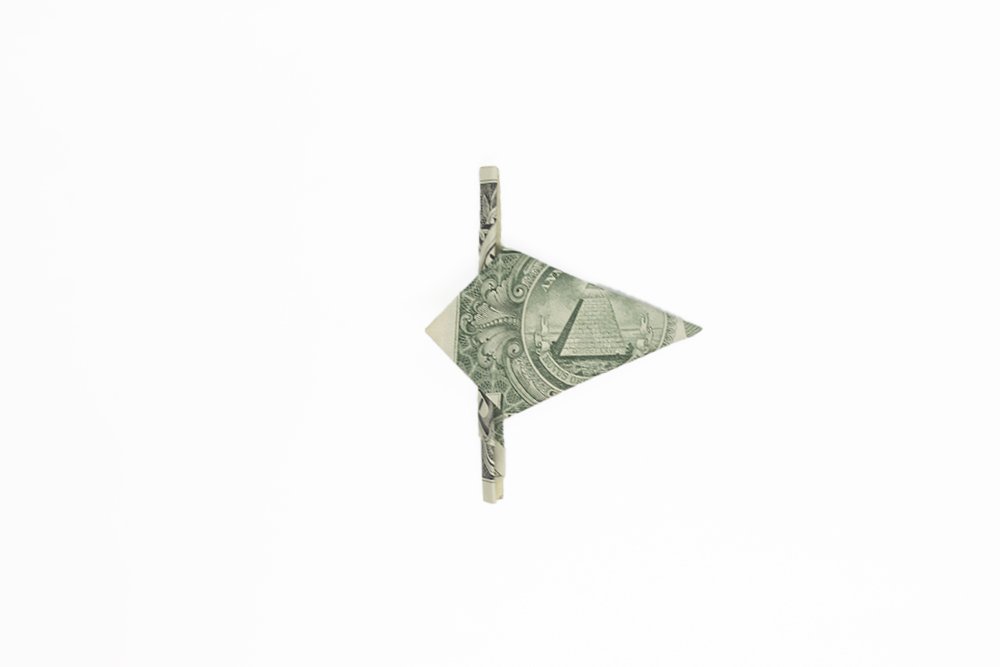
Insert left side to the pocket of the right side.
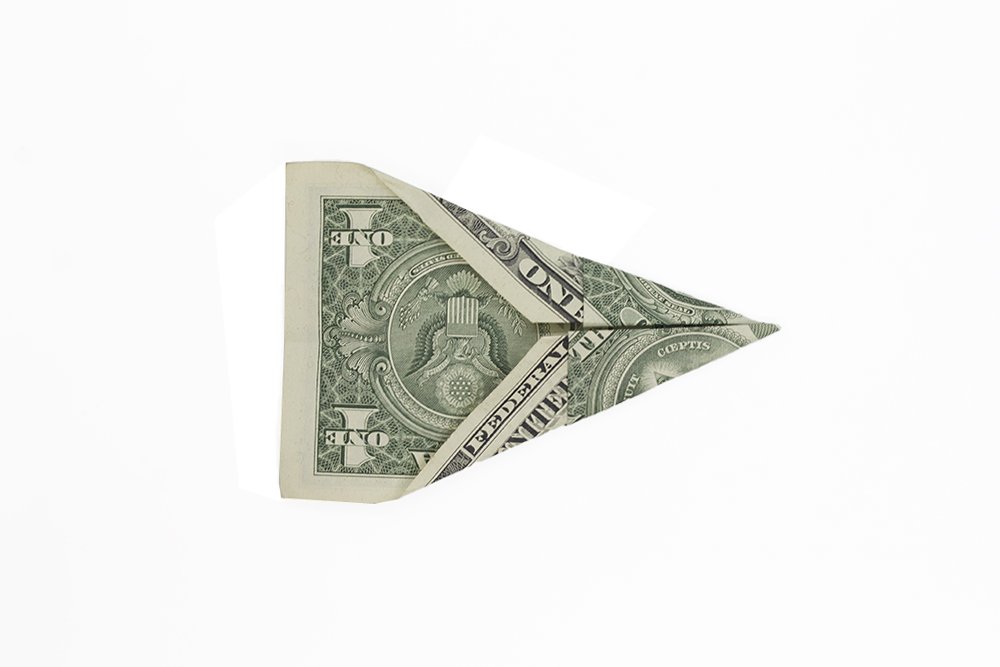
Again, fold the left edge again to the pockets. The left part of the dollar bill will be the legs of each segment. It will used to connect each of the five segments together to form the dollar bill origami star.
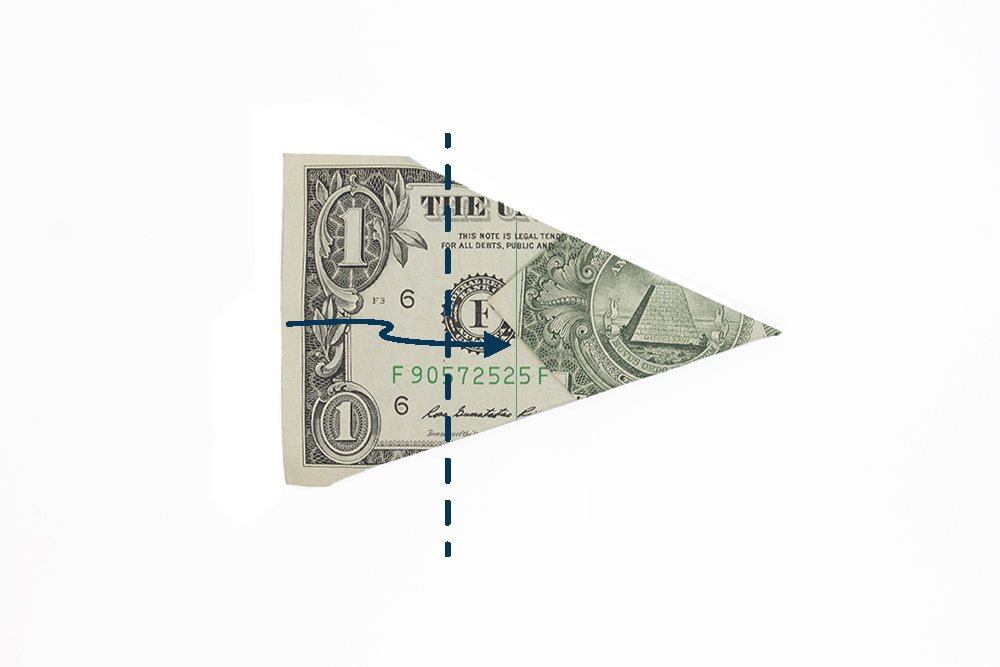
To make it slimmer, fold the legs again to the right and then secure it to the pockets.

Fold the legs in half again to make it slimmer.
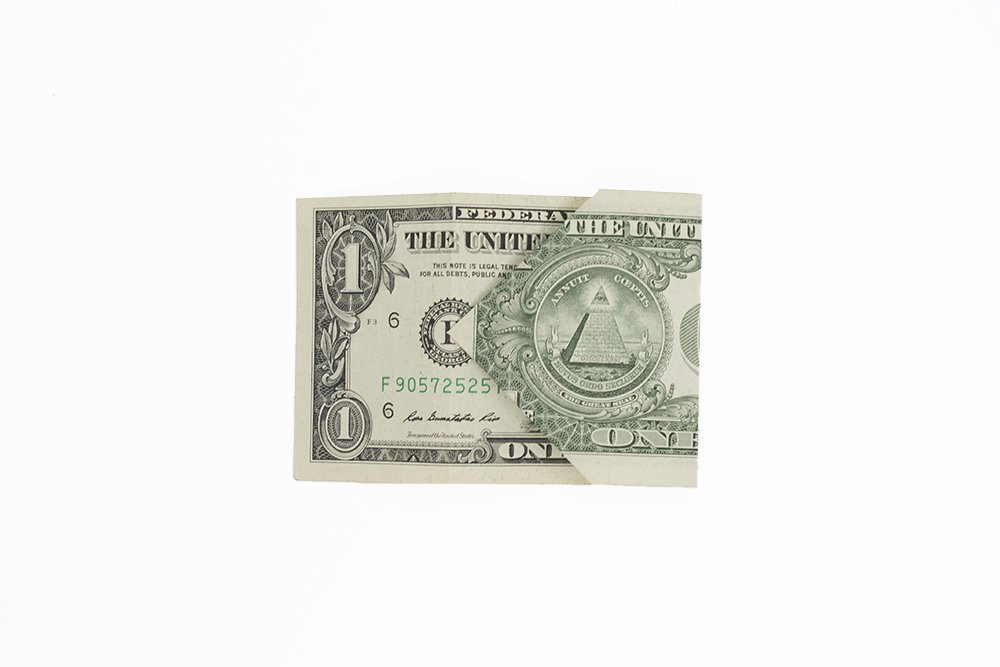
A unit of the modular star us done! Get a pair of clothes peg or clips.
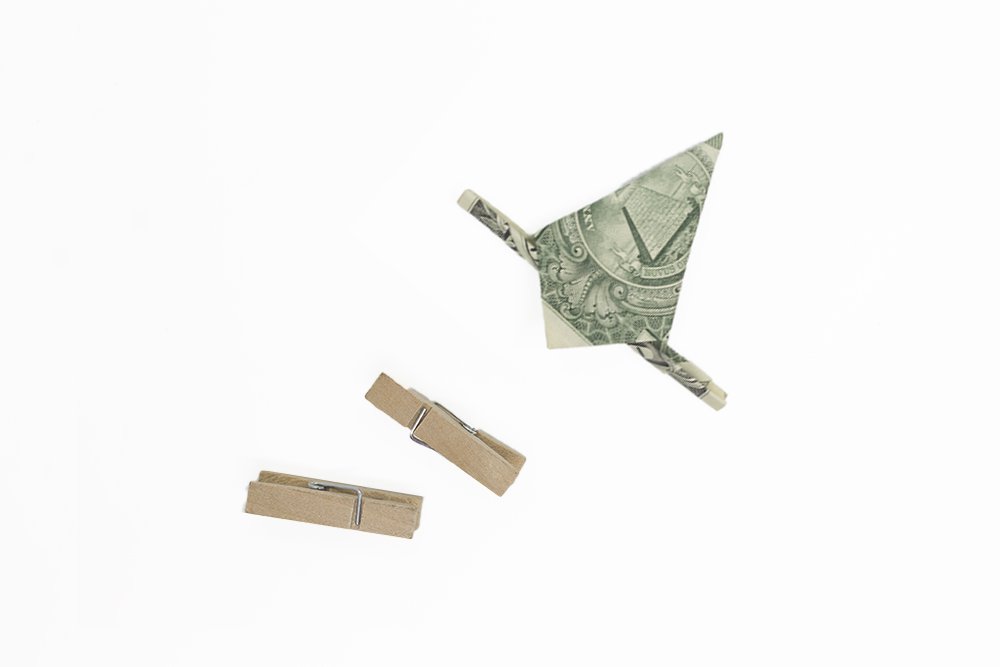
You would want the legs secured and that is why you will have to use the pegs.
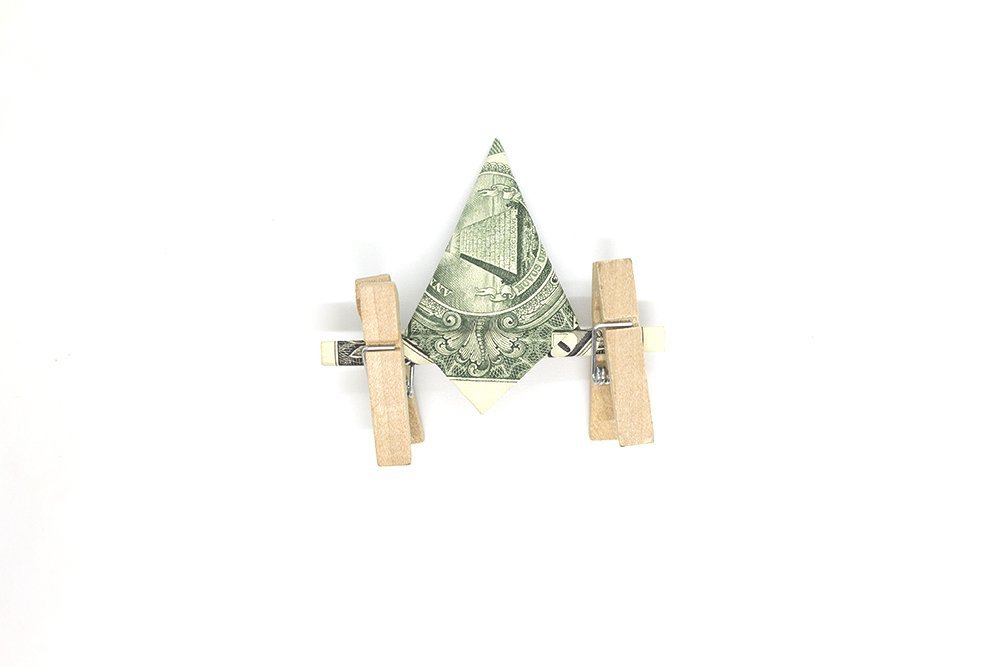
Secure the left and right legs like so. Great job so far! Now what you'll need to do is make four more of these and combine them.
Combine the parts of origami money star

Make four other origamis that is the same with the last one you made.
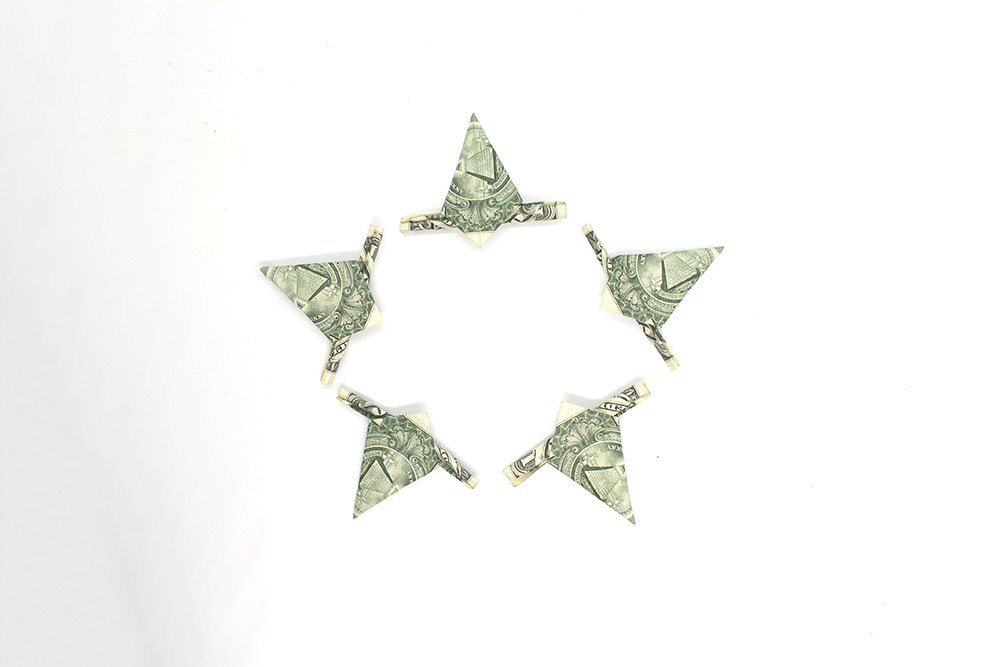
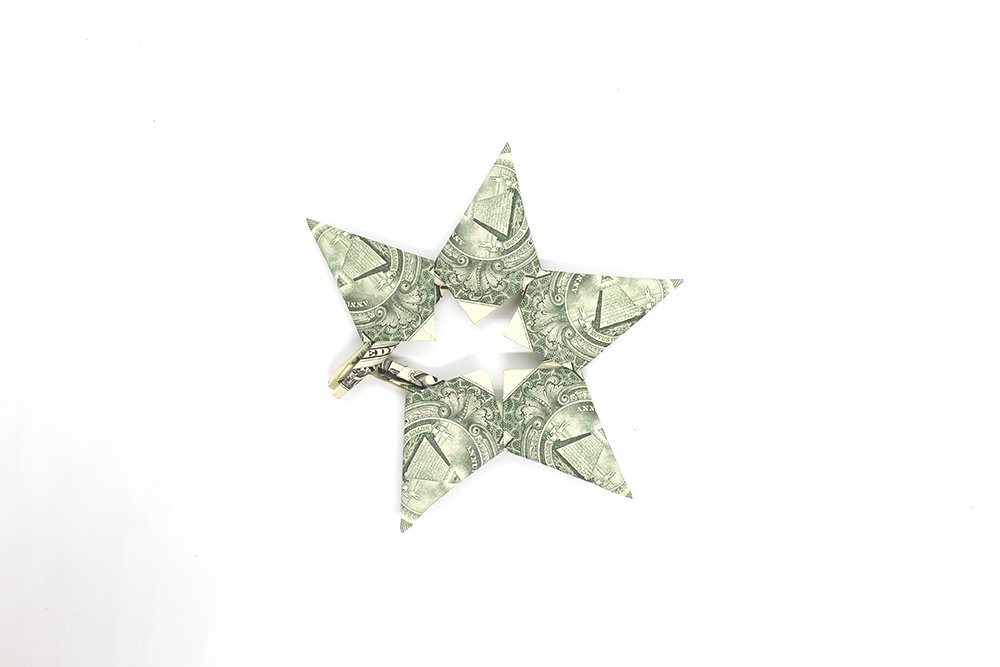
Arrange them in a pattern similar to the picture above. The arrangement should resemble a star.
It doesn't matter which star you connect first as long as you connect them all properly.
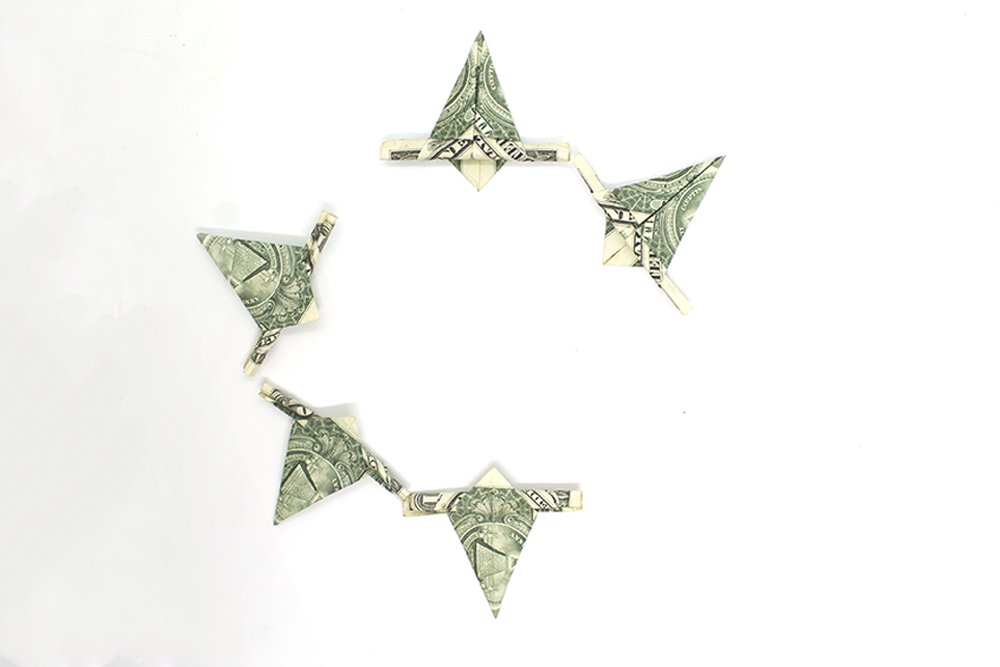
Secure two parts together. In this example, it was done by inserting the left leg of segment to the right pocket of another.

Then connect the other two parts.
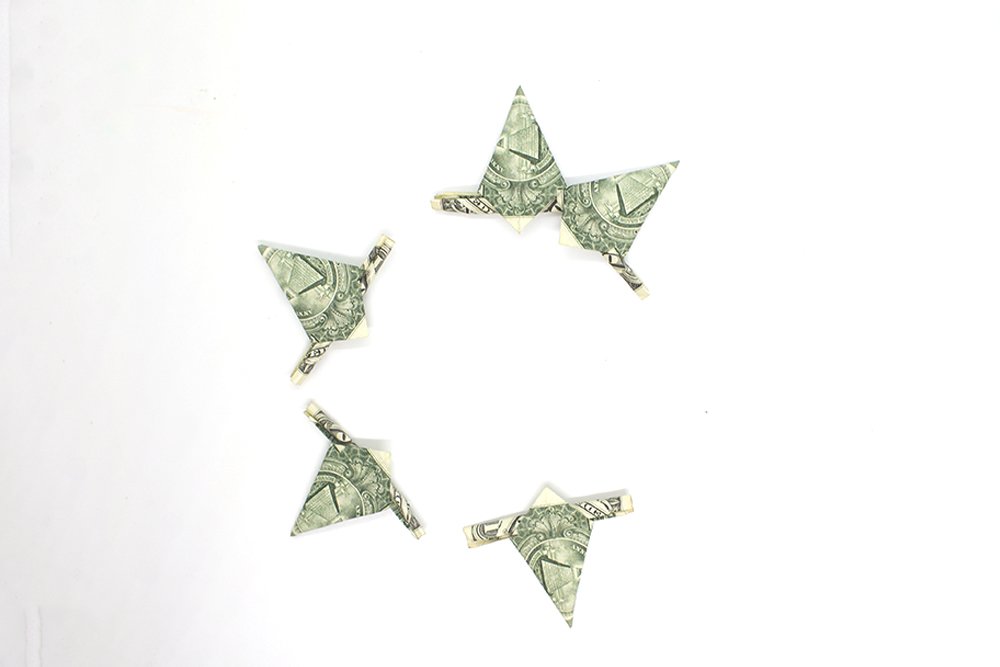
Insert the final segment by connecting the legs to the adjacent pockets. Insert one leg to a pocket.
Then insert the leg of a part into the pocket of the last origami star unit.

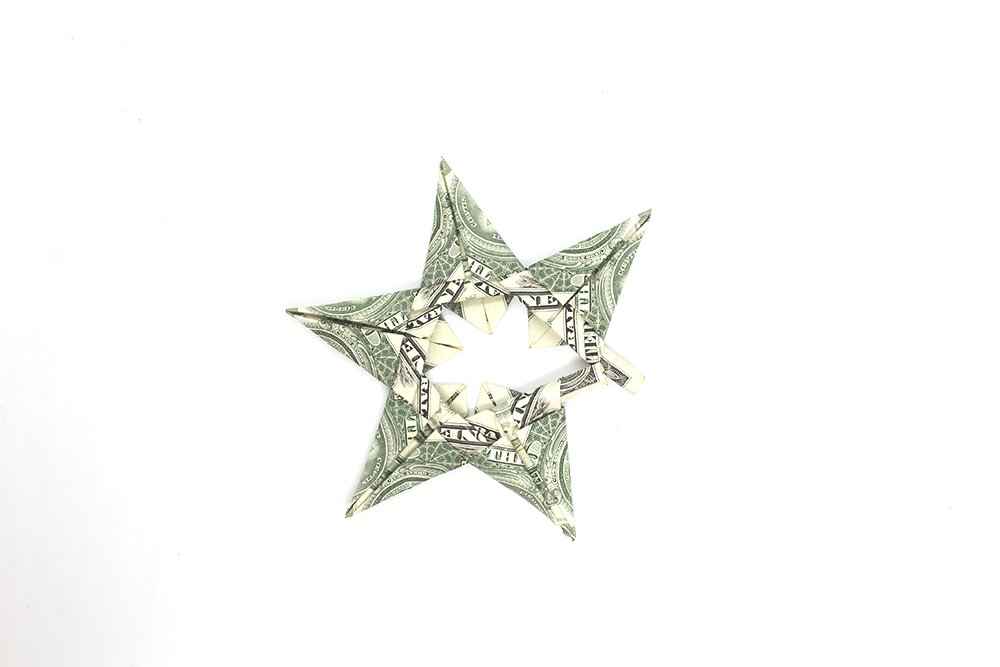
Almost done, flip it to the other side.

Congratulations! Your dollar bill origami star is done. For more cool dollar bill fold instruction, check out the suggested articles below.
Extra Tips
- This tutorial will always be here so you could come back in case you forget a step. And if you're stuck with a particular step just drop a comment down below - we'll help ASAP.


Awesome star fold! didn’t know you could make it with dollar bills.
thank you for sharing this guide. Now I have an idea about what prizes i can give 🥳
😩 i suck at folding
wonderful guide. Me and my sister been visiting your site often because it keeps us entertained.
Good for you kids. You should all explore crafts and other hobbies aside from staring at screens all day