Learn a Creative Way to Make a Flower-Shaped Gift Box

Introduction:
Ever wanted to create a gift box? You’ve come to the right place to learn how to make one quickly and easily with the detailed steps we’ve provided with pictures!
Create a stunning flower-shaped gift box using a colored piece of paper (those that have patterns are better). Using this simple box is a beautiful and thoughtful way to wrap small presents such as candies and accessories. It’s simple to make yet it improves the delivery of your small gift/s.
What you’ll need is minimal. First, you’ll have to get a pair of scissors, and some paper. And you’ll have to print the template which you can download below. Also, don’t forget the treat!
Have fun reading this guide!
Tools
- Scissors
- Pen or pencil
- Tape or glue
Supplies
- Printable template
- Sheets of paper(any sturdy paper of your choice)
- Small goodies(small trinkets, sweets, etc.
Download Area
Download TemplateCreate the flower-shaped cutout
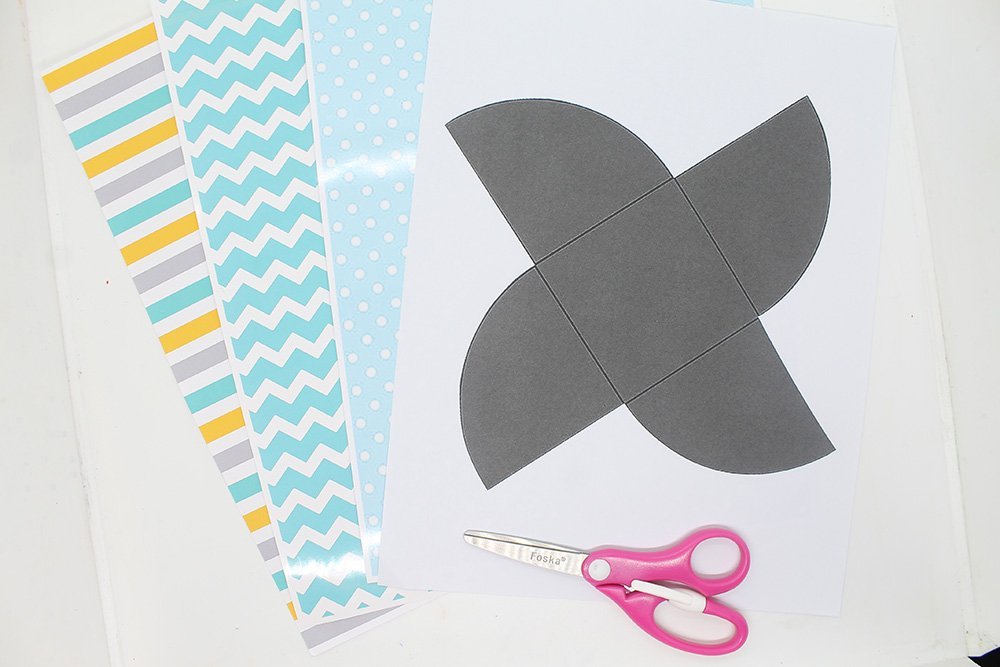
The first thing that you should do is gather all the supplies needed for this activity. Download the printable and don't forget to ready your scissors.
Next, cut the shape out of the paper. It doesn't matter if it's just plain bond paper as this is just a guide for you to create a cutout.
Plate the shape that you cut from the printable on top of a colored paper of your choice and get tour pencil or pen. In this example, a blue glossy paper was chosen. These types of paper look better than regular colored paper.
Now, if you have a glossy type of paper you might want to place the template on the other side because it is easier to draw on that surface. Then trace the shape with a pen or pencil, otherwise just trace on any side.
After you have traced the shape, carefully follow the lines and cut. And you should have a nice windmill like object in front you. Good job!
Place a small trinket inside
Next, place a treat on the center of the plain side of the glossy paper. If it's a simple colored paper then any side would do. You are close to finishing the gift bag!
Fold the petals together to form a gift box
You are going to overlap the petals. Begin by folding one petal to the center.
Then overlap it with the other petal.
Do the same for the third petal. Also, you are now on the third and final stage of the craft.
For the last petal, put it under the first petal and then secure it with some tape or glue.
And congratulations! You have made a flower shaped gift box. See that was easy, wasn't it?
We hope that you've enjoyed this making the gift box. Please drop a comment below and tell us how your friends or family reacted when you gave the box.
Extra Tips
- You could improve your flower-shaped gift box by adding decals or ribbons. Adding props for aesthetic's sake is alright.
- Have fun while making the gift box.
- One excellent thing you could do is to add a note inside the box along with the gift. It will surely make someone happy.


It’s a cool gift box
I love this idea 🥰
where can i get the glossy paper?
made my mom happy with this simple gift box – best decision in some time that i made so far
Thankss DIY mag, you guys are awesome