Introduction:
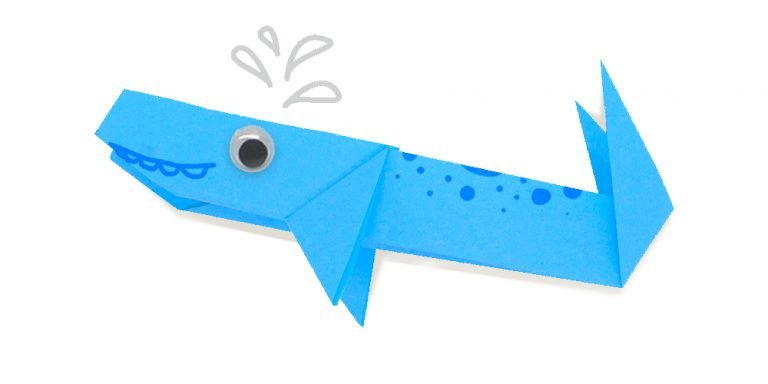
Making a paper origami of a whale is fairly easy. This origami does not require many folds, and you only need a pair of scissors and a piece of paper to make this.
Fun fact: the blue whale is the largest creature in Earth’s known history. A newborn blue whale might weigh between 5000 lb. to 6000 lb.
Anyways, you must be excited now to begin working on the origami whale. So, just follow the step-by-step instructions below, and you can have your paper whale. Enjoy!
Make Crease Lines
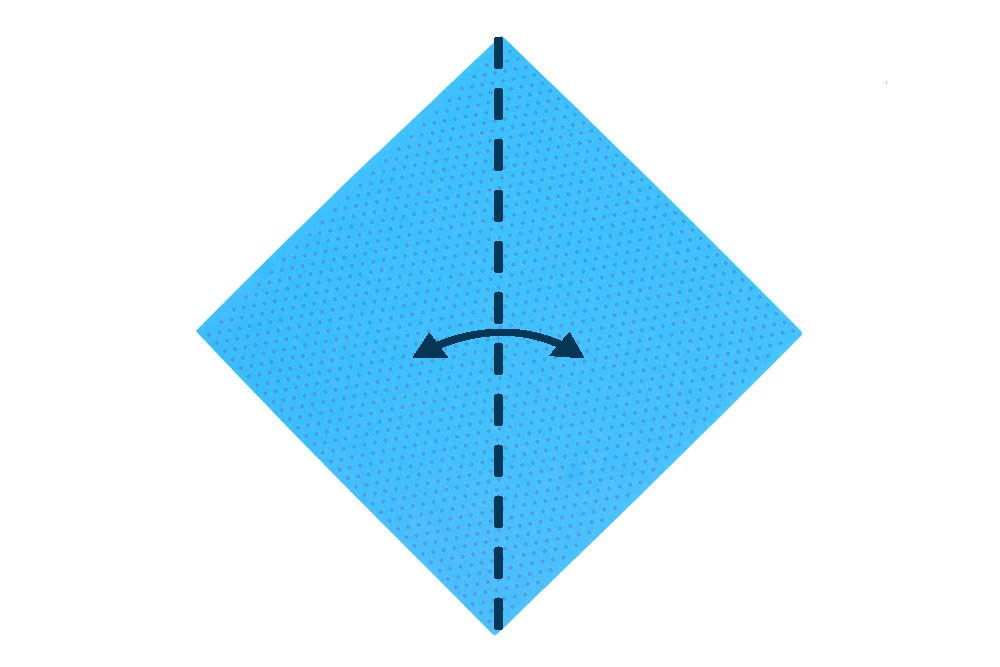
Get a piece of square origami paper. To make this origami whale, it is better to use paper with different sides to follow the following instructions easily. Fold the paper in half as shown. Crease the paper well and unfold it.
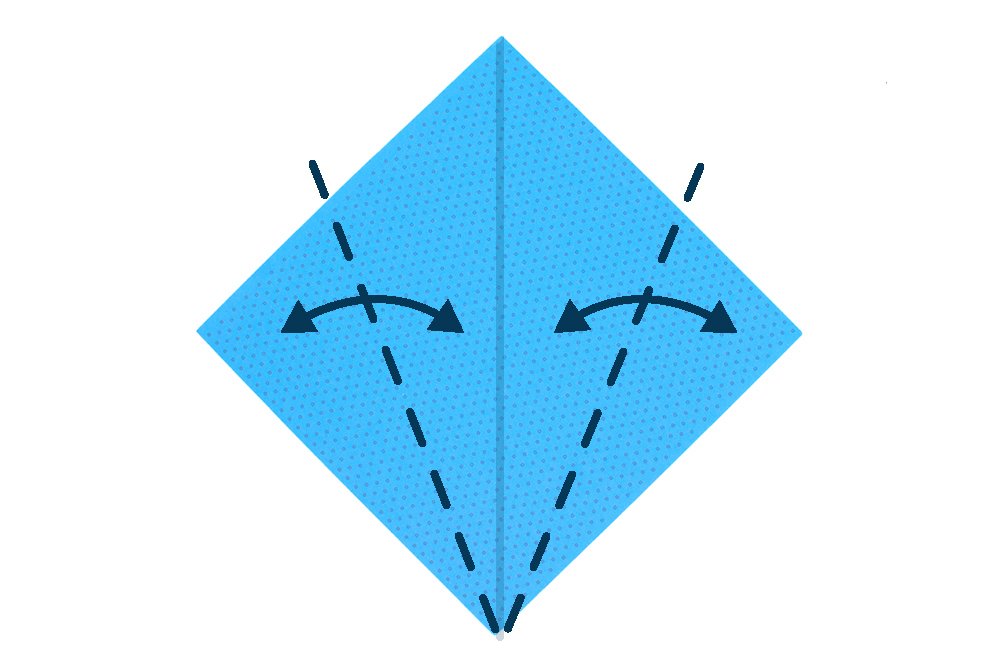
Bring the left and right corners to the middle crease. For this step, fold the bottom part by following the dashed line as shown. Crease the origami paper well and unfold
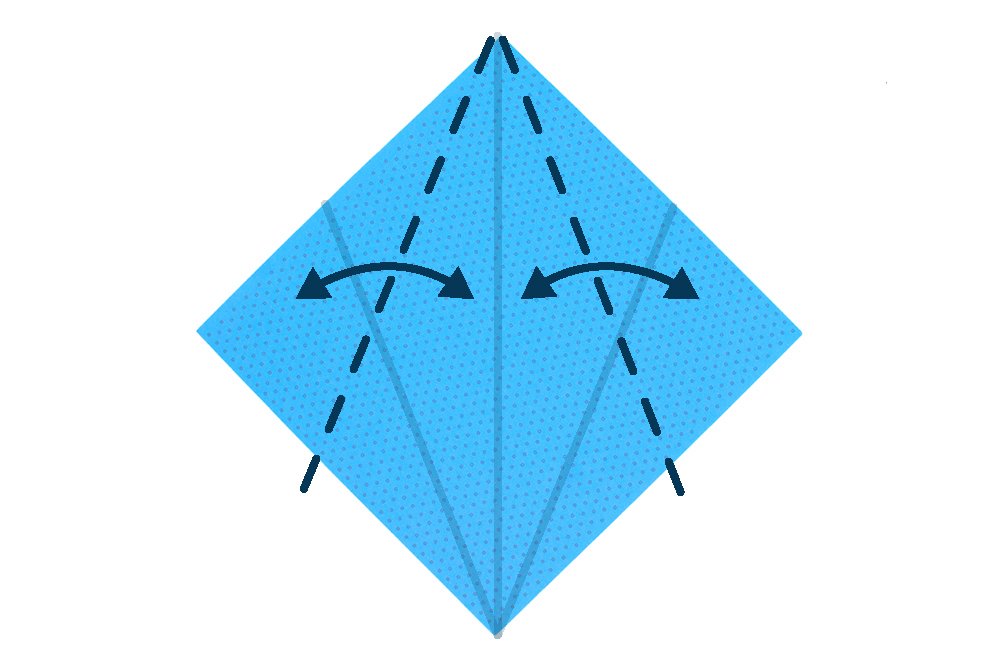
Repeat the previous step except now, start at the top area and bring the left and right corners to the middle crease.
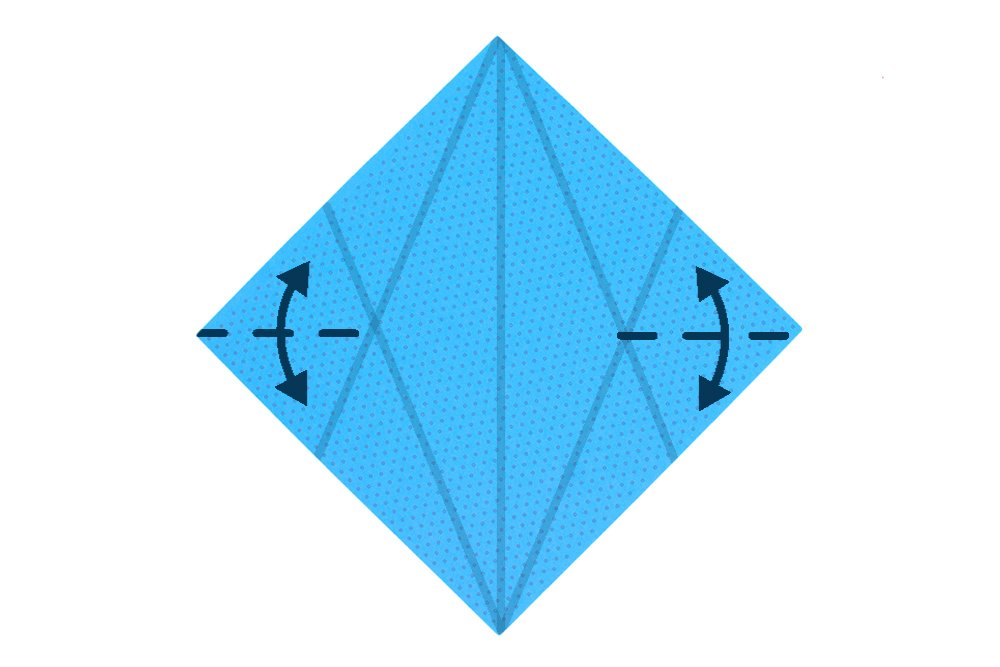
Make the two horizontal creases as shown. The simplest way is to fold the paper in half but only crease on the dashed lines.
Cut the Paper Twice
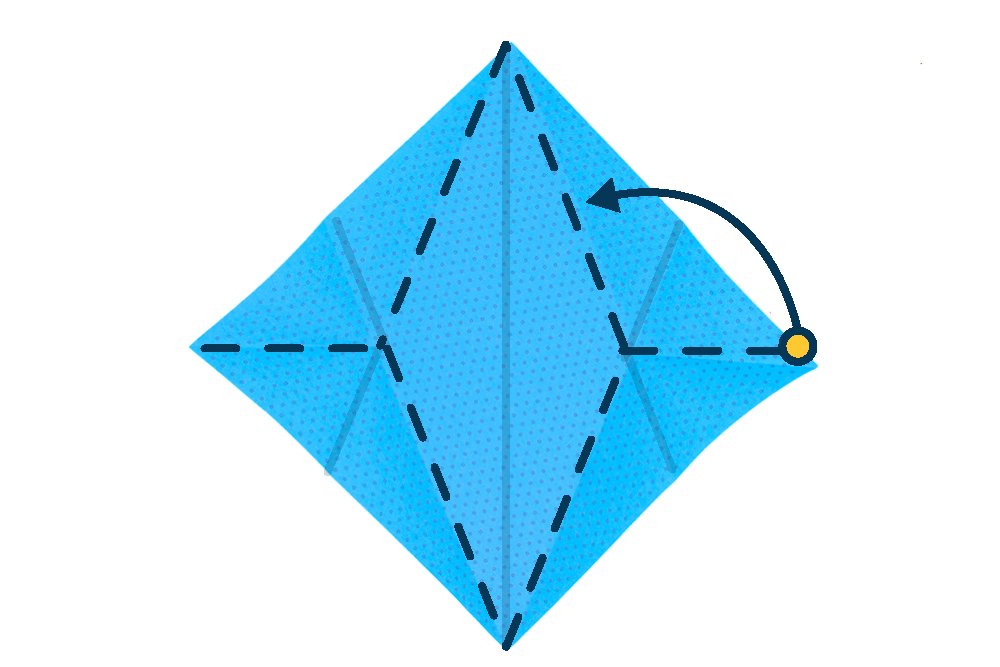
Once the creases are made, you are going to make a fish base. To make this base, bring the sides of the right area to the middle crease line. After doing so, squash the “extra flap” to one side. See next step on how it should look like.
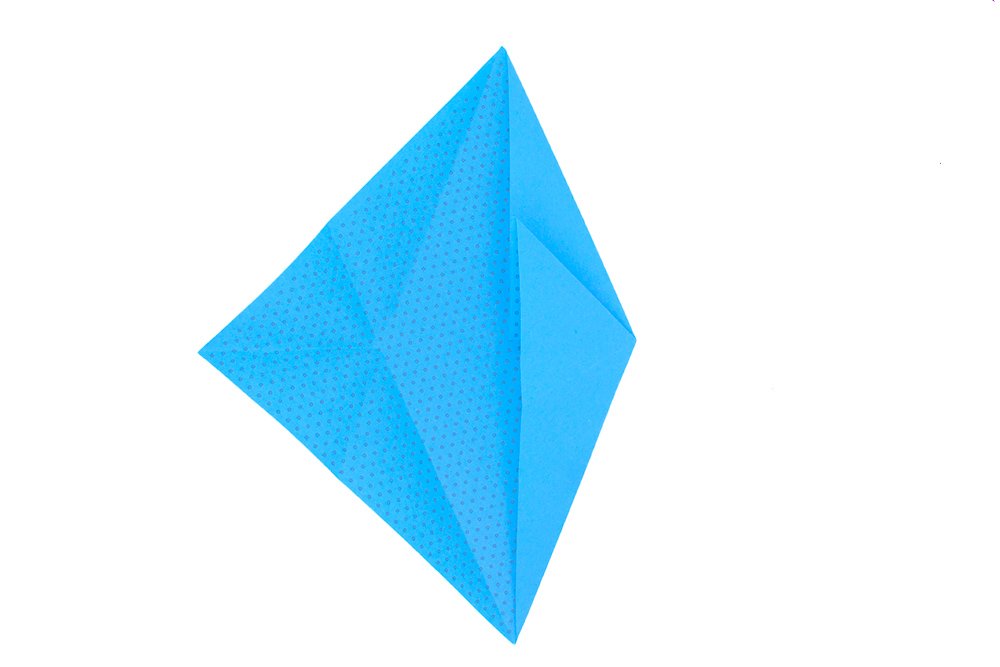
The right side should look like this. Repeat previous step on the left side. Bring the sides of the left area to the middle crease line. After that, squash the “extra flap” on one side.
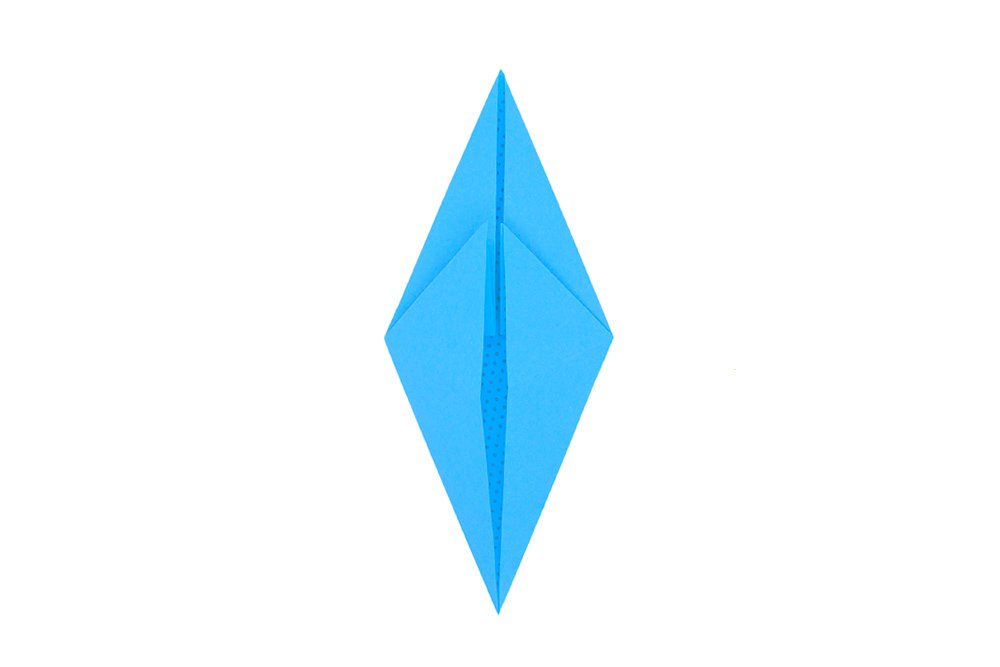
Your origami fish base is done! Now flip the paper around.
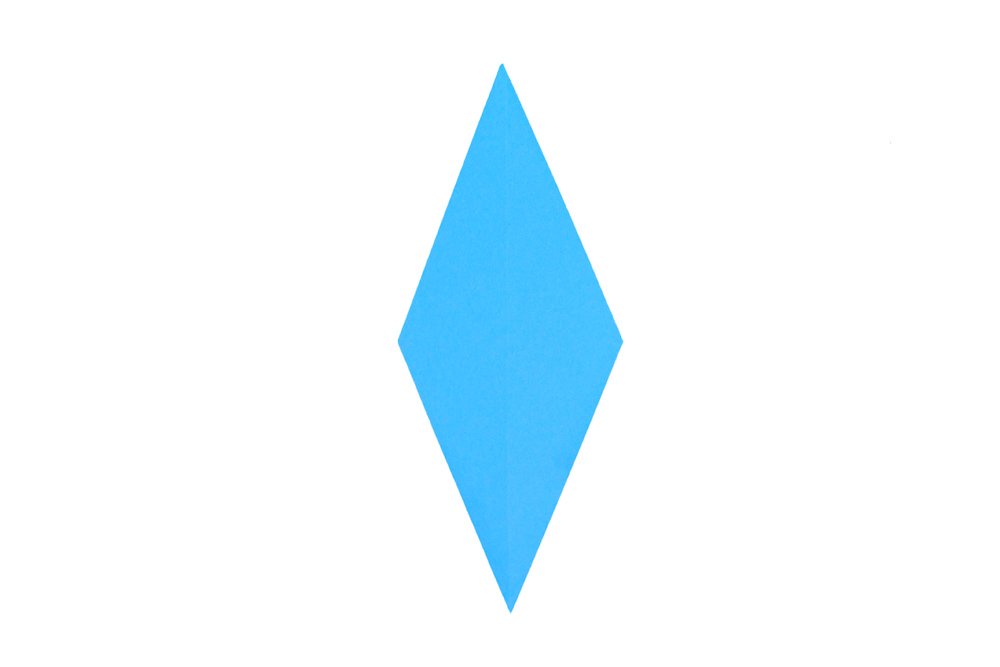
Fold the left and right corners of the origami whale to the center crease line.
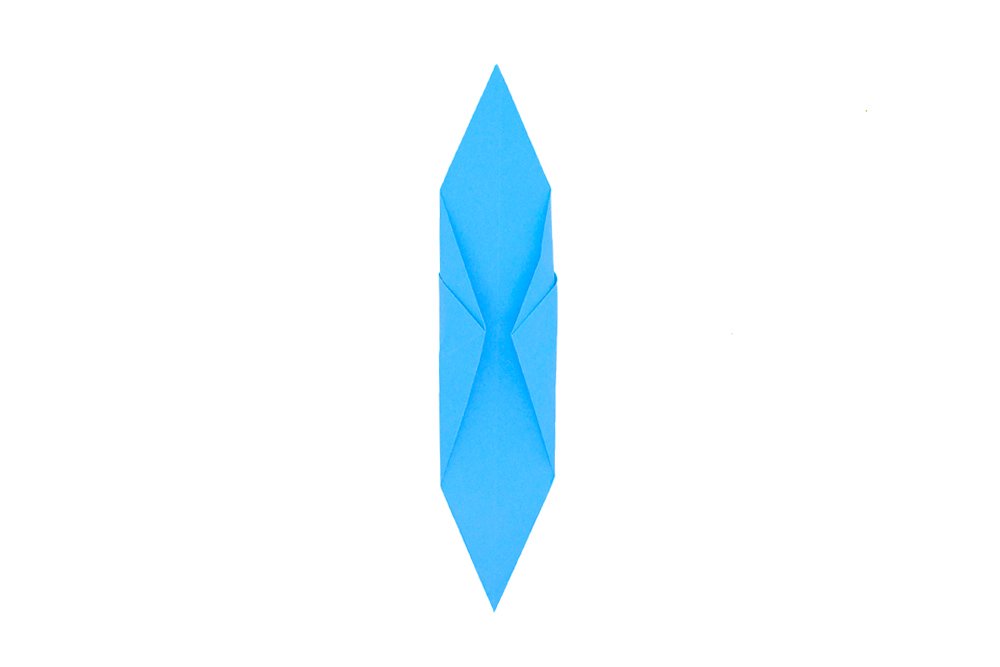
Flip the origami whale around. Then, turn the paper 90 degrees counterclockwise.
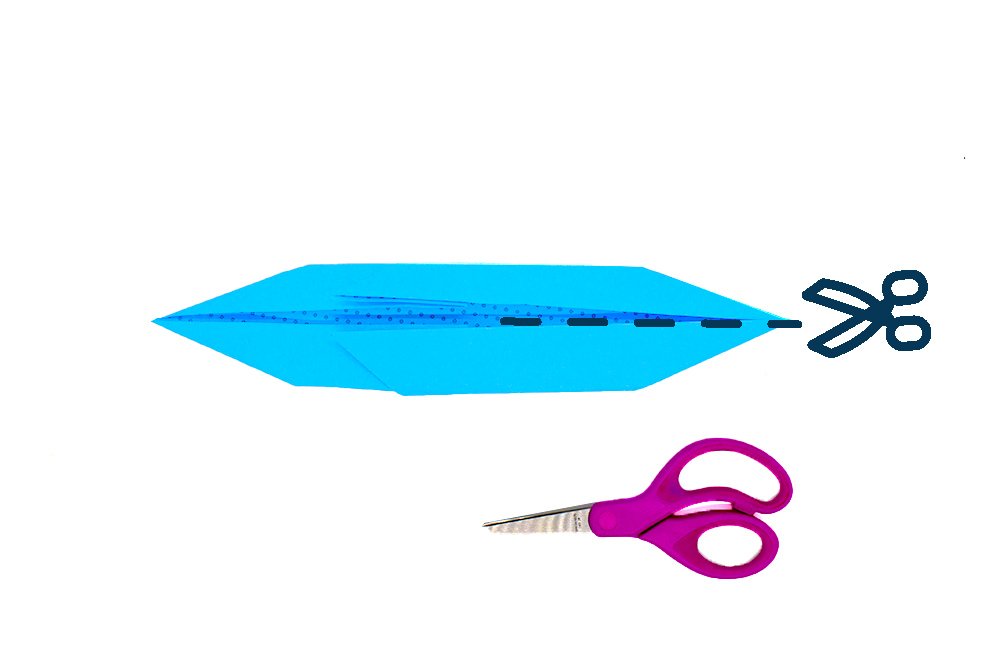
The orientation of your origami paper should look like this. Get a pair of scissors and cut a slit along the dashed line. This will be the origami whale’s tail.
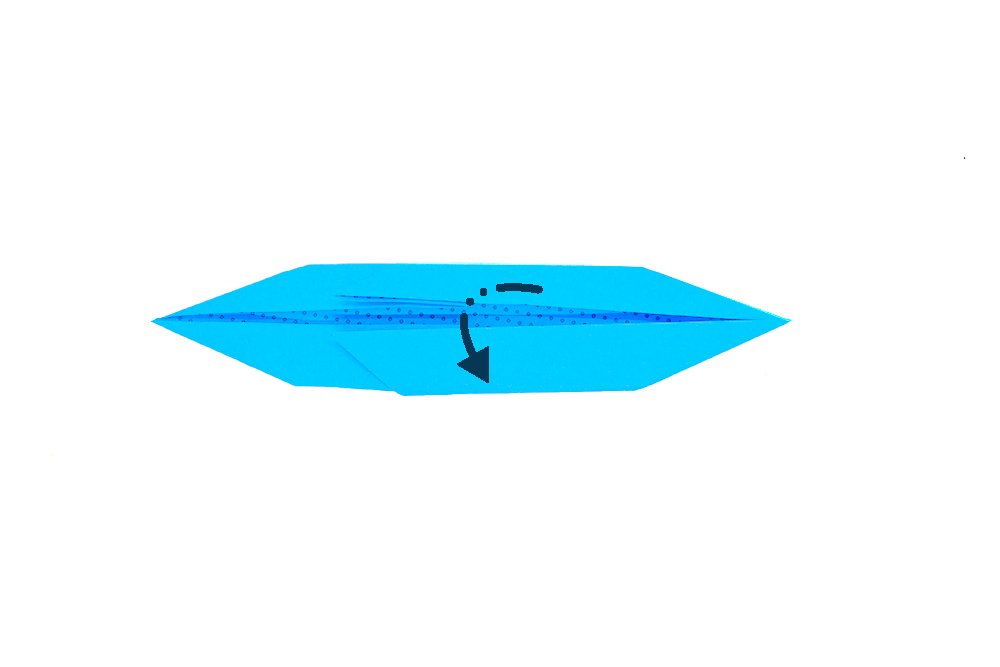
Mountain fold the origami whale in half. Follow the dashed line and the direction of the mountain fold.
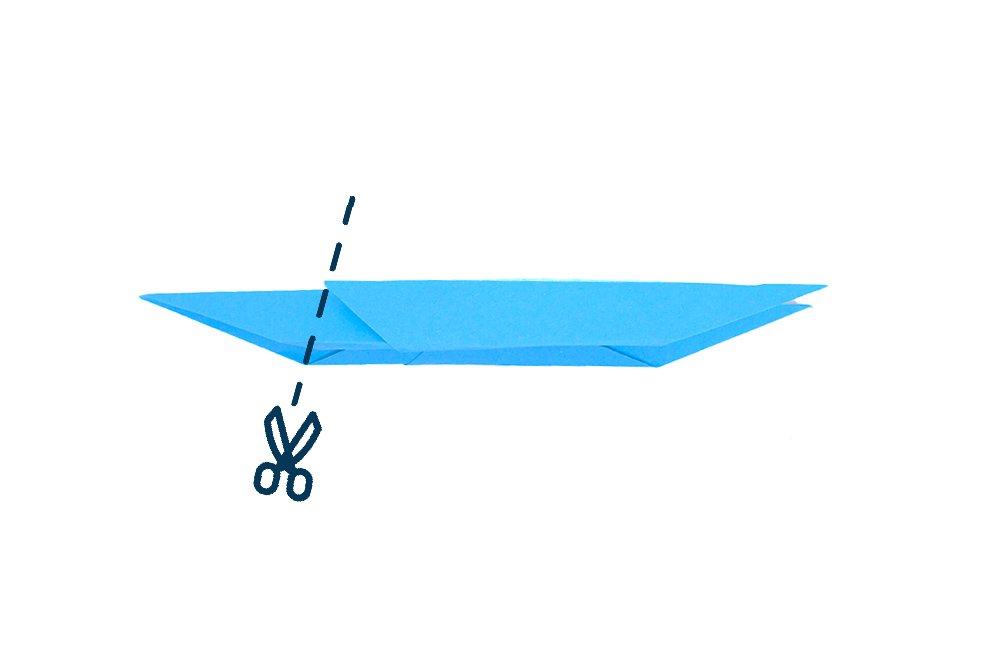
Snip the left area of the origami paper to shape the head of the whale. Follow the dashed line in the illustration to know where to cut. Great job, you've cut the paper twice now so it's time to proceed to the next set of steps.
Make the Fins and Tail of the Origami Whale
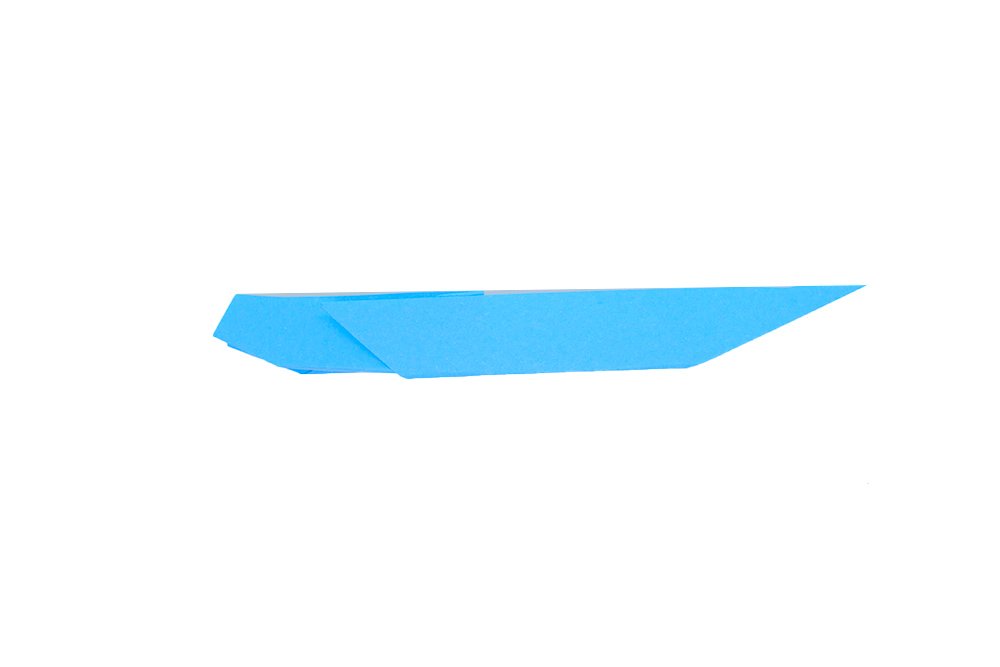
Once cut, the head of the sperm whale should look something like this!
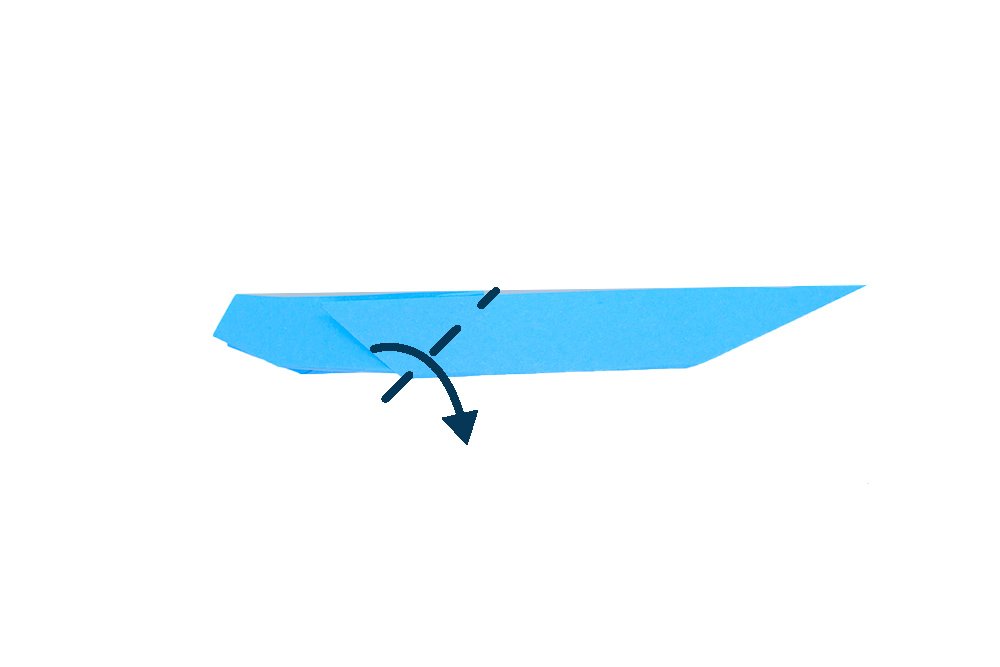
Fold downwards along the dashed lines to create a fin
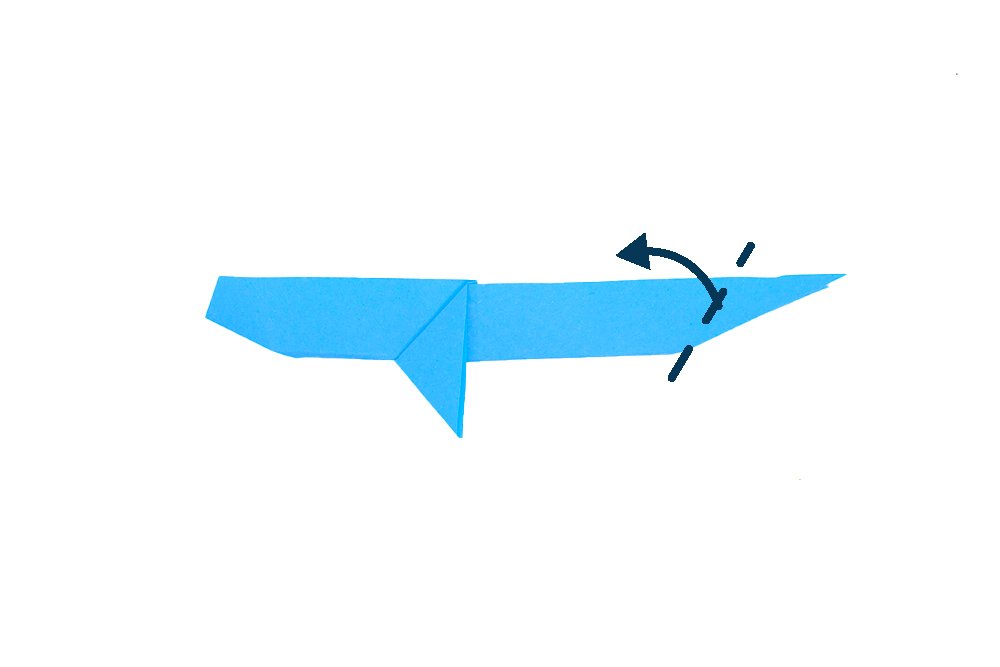
Fold upwards along the dashed lines again. This will make the fluke tail.
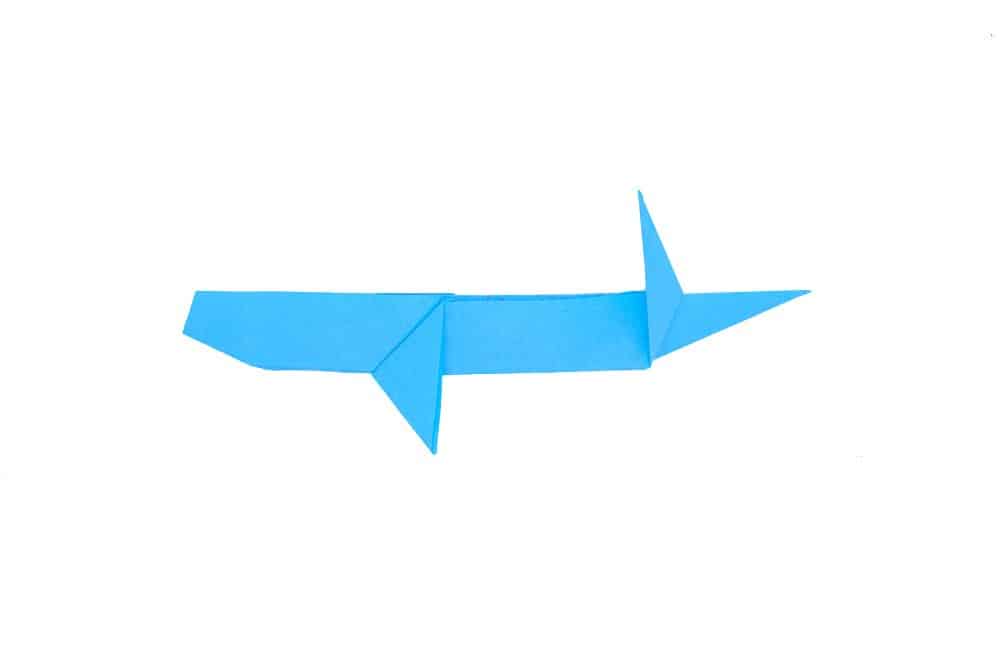
The fin and tail of your origami whale should look like this. Now flip the paper around.
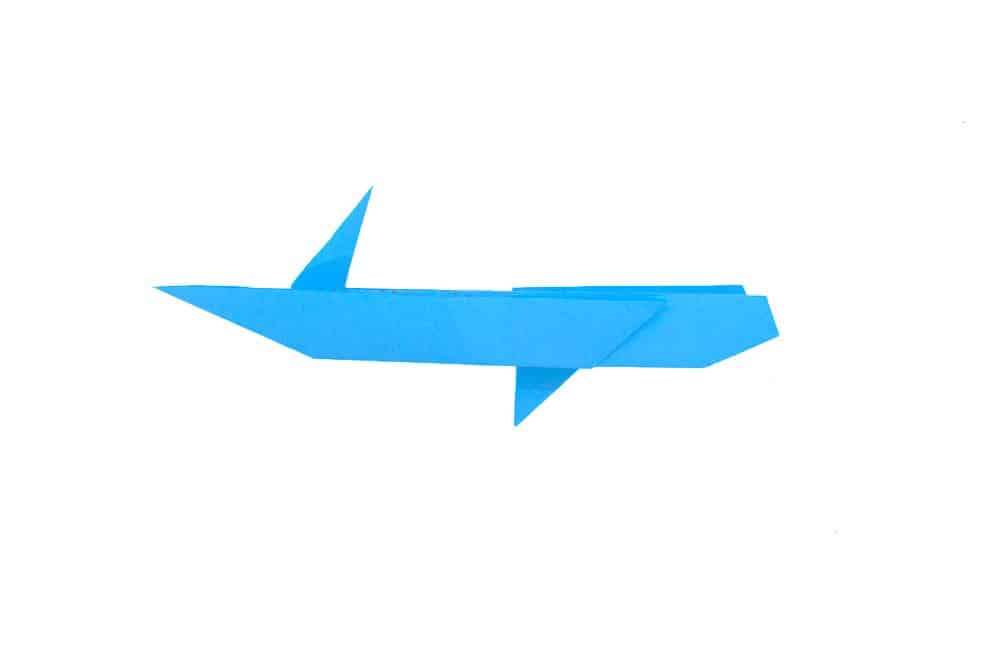
The last step is to shape the flipper and fluke tail of the whale on this side. Repeat the previous steps on this side of the mammal. Fold the outer layer ONLY. Turn the paper around after.
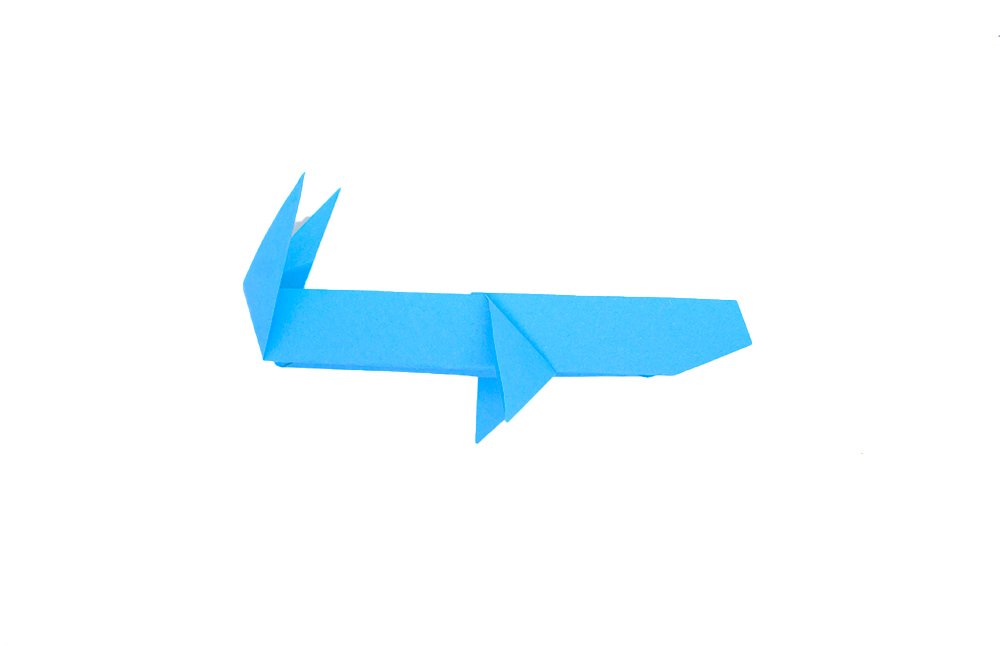
Your origami whale is finished! If you look closely, it looks likes a Sperm whale. Explore new ways to make sea creature out of an origami paper here!
Extra Tips
- Get some art materials and make your origami whale even more beautiful.
- Take your time and be patient. Follow the steps closely but don't forget to have fun. Also, young kids should be supervised when using scissors.
- Fold straight and apply enough pressure. If you make mistakes and need another piece of paper, get another piece of paper. It simply won't look good if there are unnecessary crease lines.

