How to Fold a Rectangular Origami Envelope Where You Can Put Letters
Introduction:
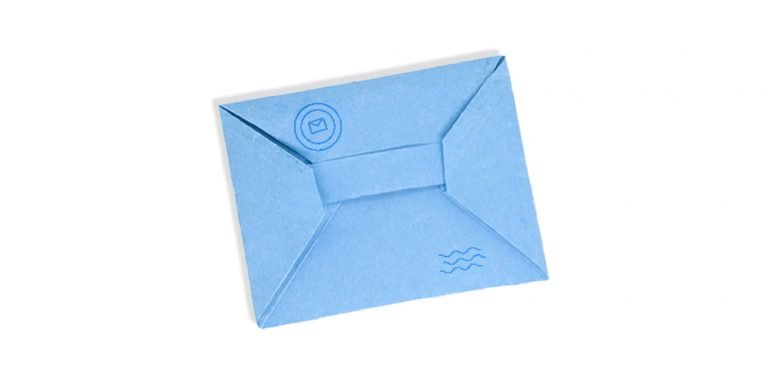
For this origami tutorial, we are going to make an origami bar envelope. A traditional way to reach out to someone is by writing them a letter. Using this paper envelope, you can write or draw a message to someone privately.
To do this, you will be needing a rectangular piece of paper, preferably with a 2:3 proportion. It is better to use a paper that has color on only one side so that you can write on the white side while the colored side will be the only one visible outside once finished.
Create the base of the paper envelope
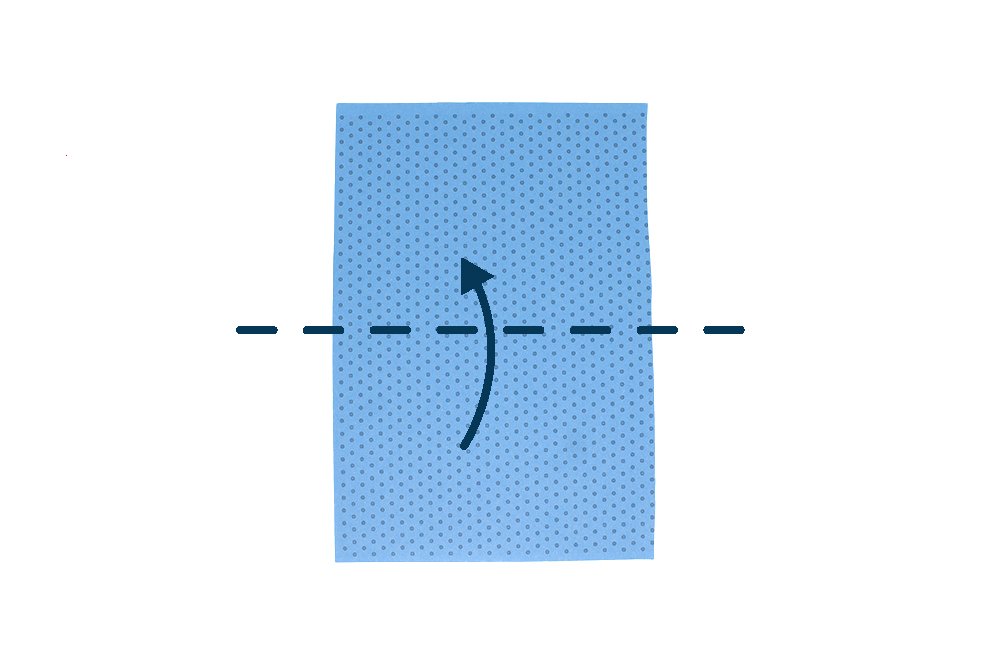
Get a rectangular piece of origami paper. Bring the bottom side to the top side.
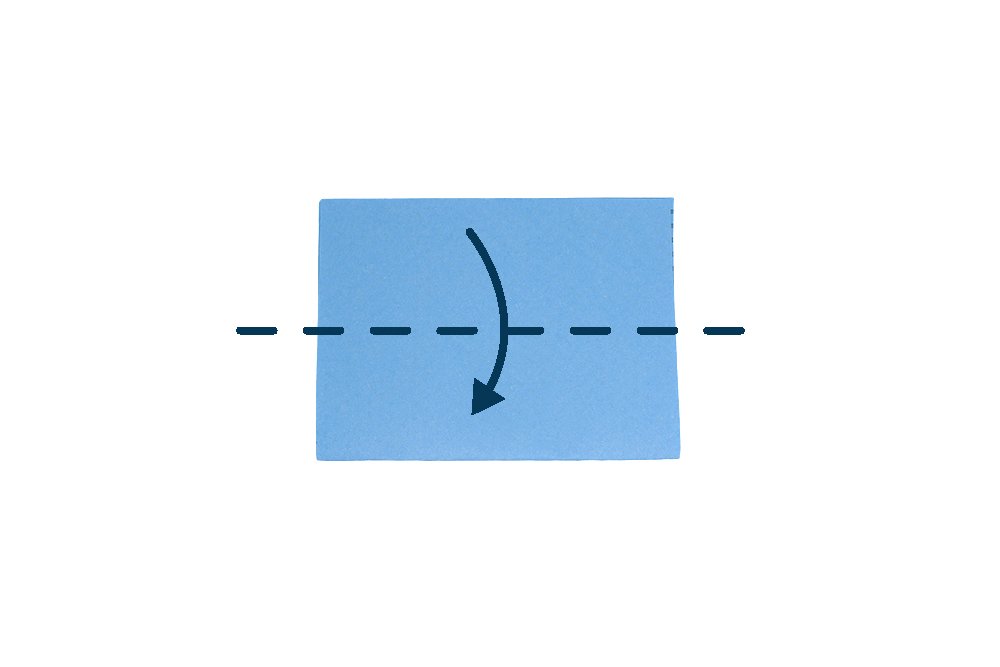
The second step is to fold downwards the top layer in half. Make sure to fold the top layer ONLY.
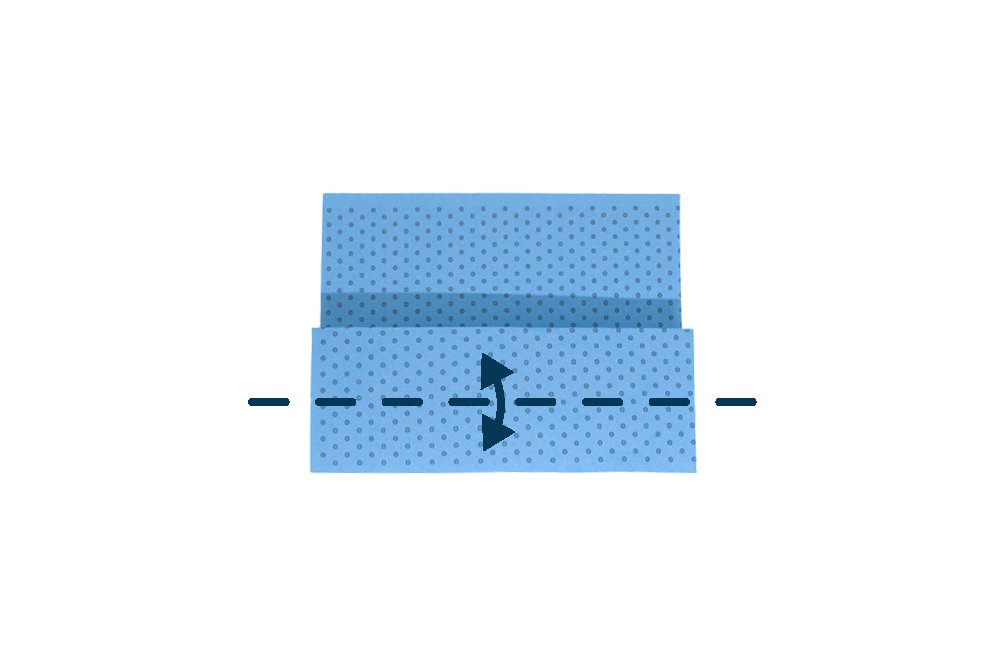
Again, fold downwards the top layer in half. Crease the paper well.
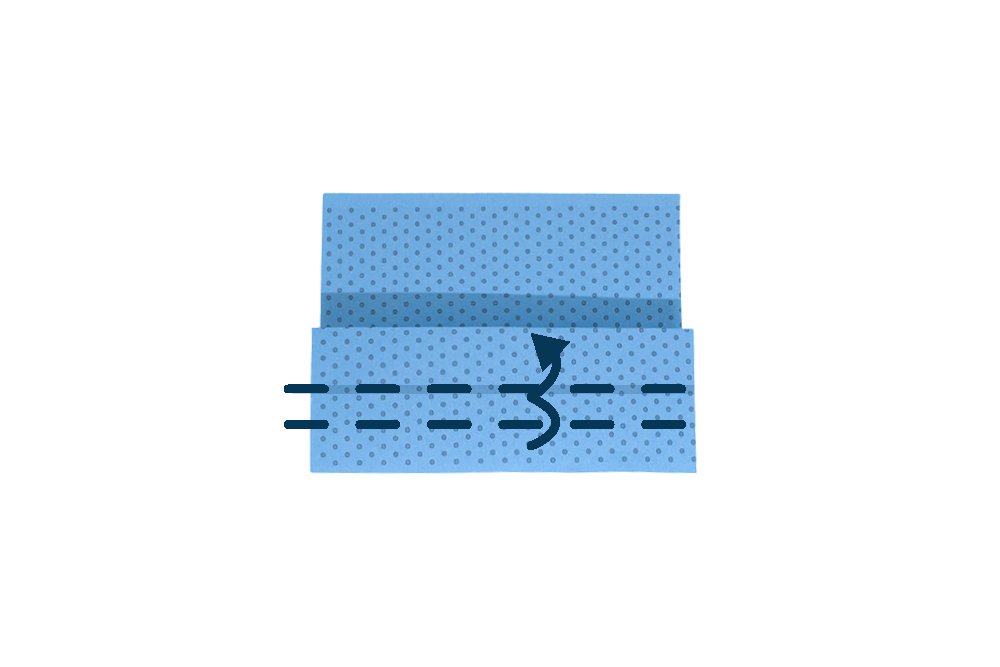
Fold twice along the dashed lines shown. Use the creases made as a guide.
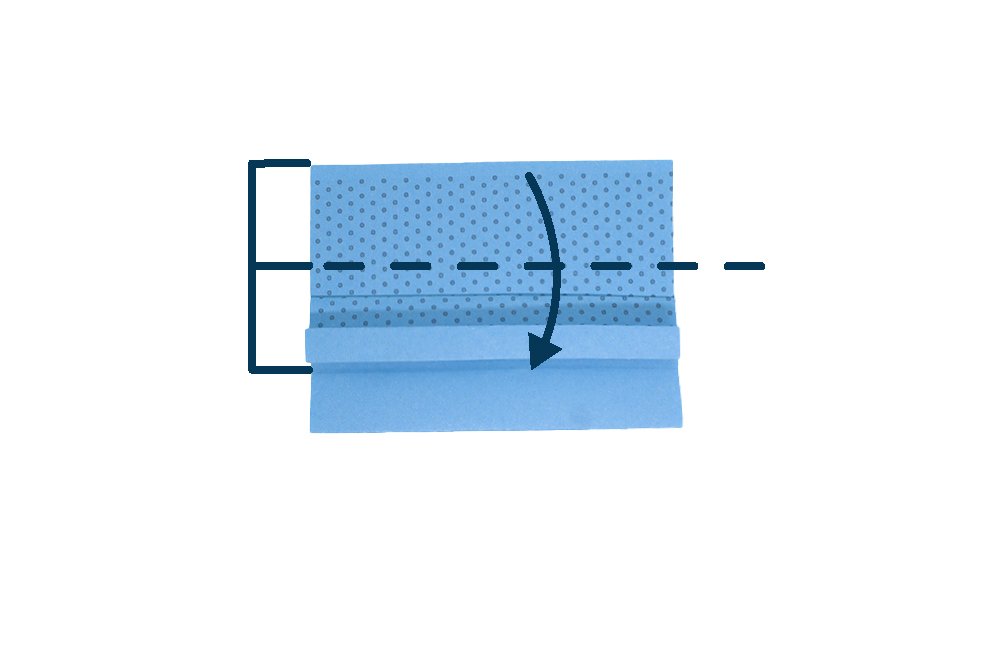
Bring the top edge of the bottom layer downwards. Follow along the dashed line as illustrated above.
Make the corners
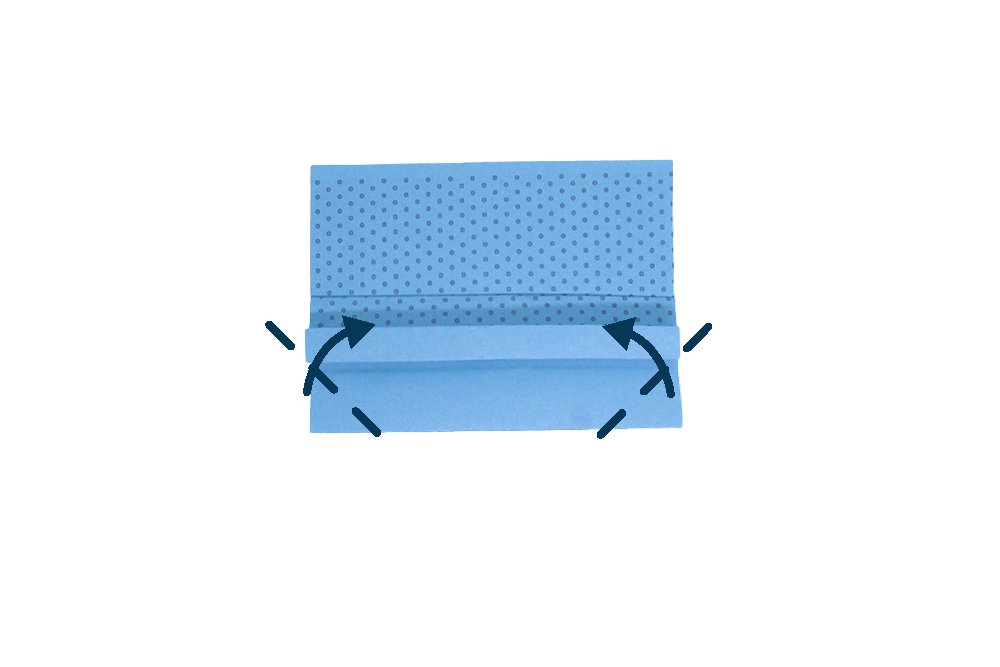
Diagonally fold along the dashed lines of the left and right corner.
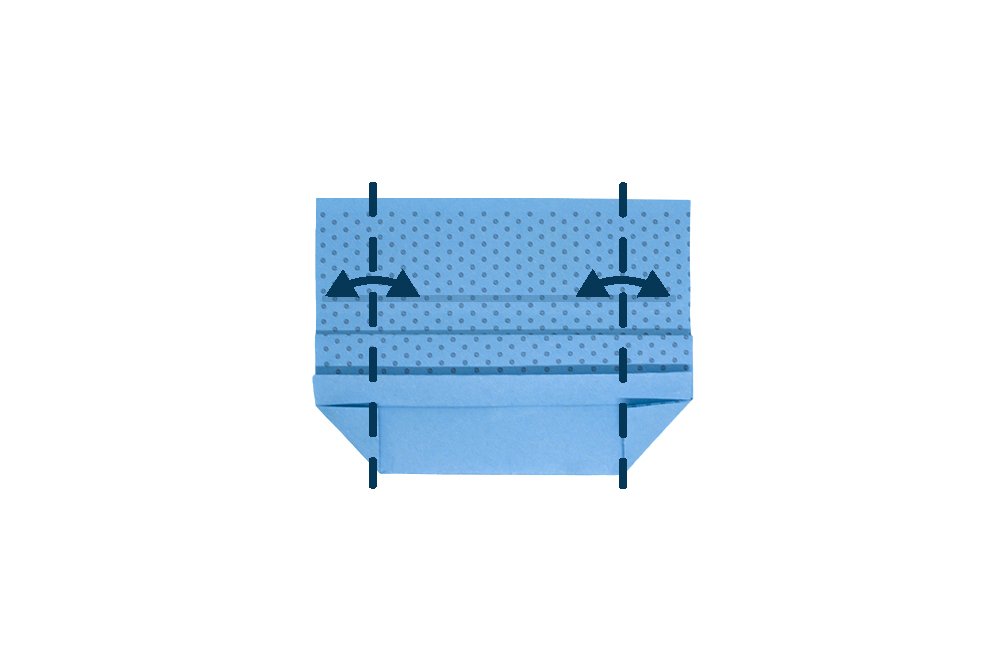
Fold the left and right sides using the folded triangles in step 6 as a guide. Crease the paper well and unfold.
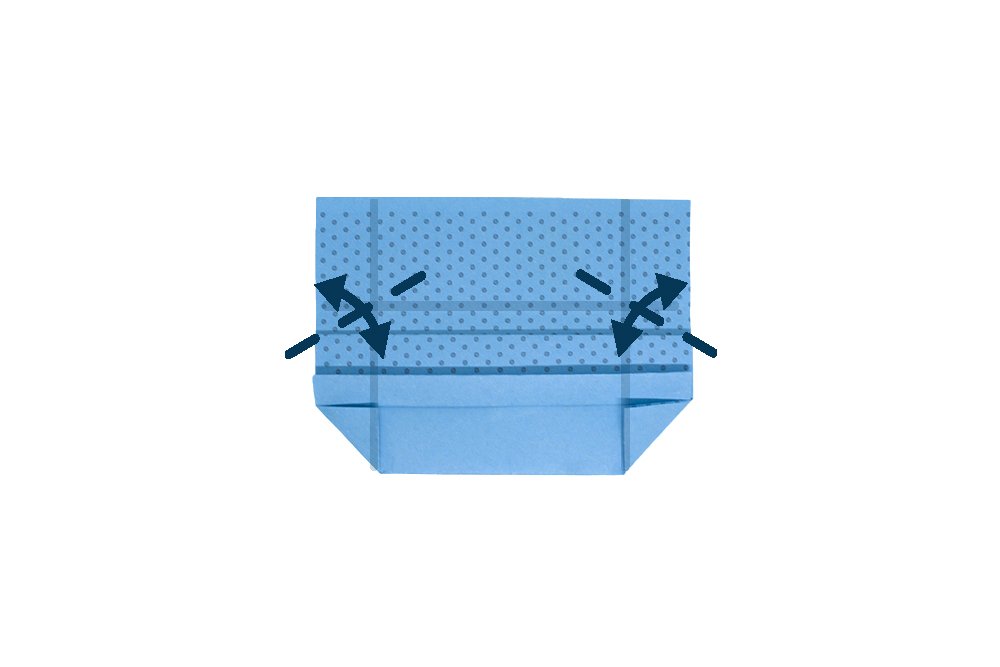
Using the crease lines made as a guide. Fold diagonally along the dashed lines as shown.
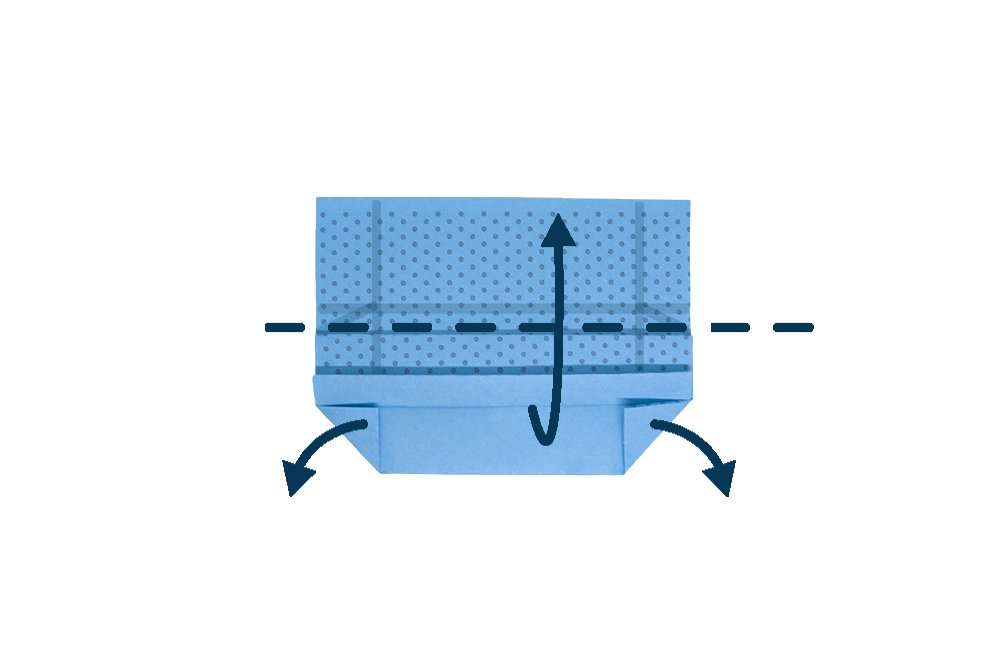
Unfold the corner triangles, then unfold it along the dashed lines shown.
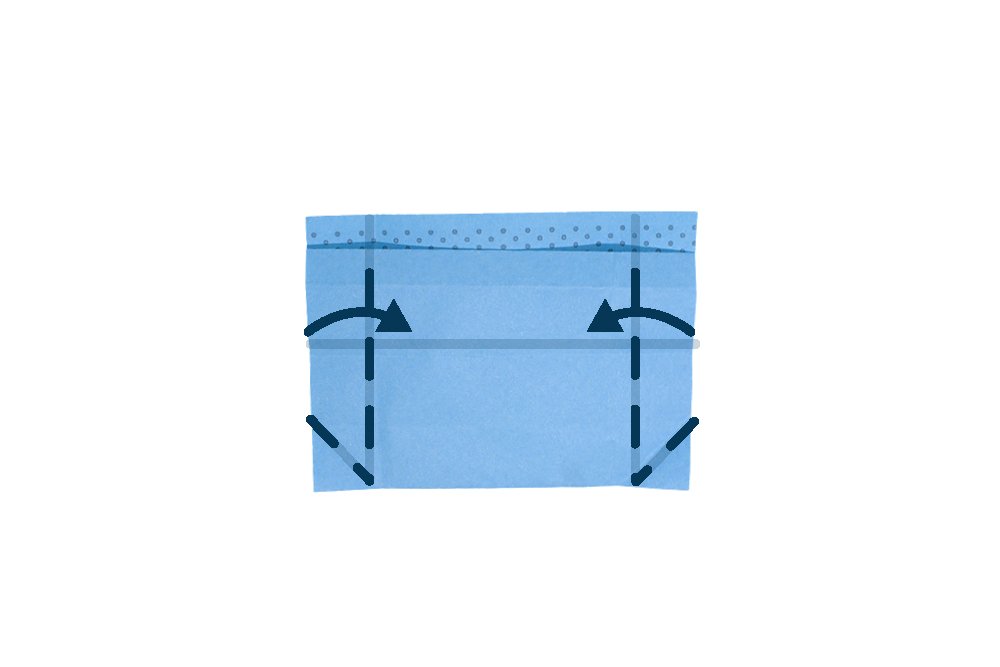
The origami should now look like this once unfolded. Using the creases made as a guide. Fold the top layer edge inward, then flatten the bottom corner triangles.
Shape the envelope
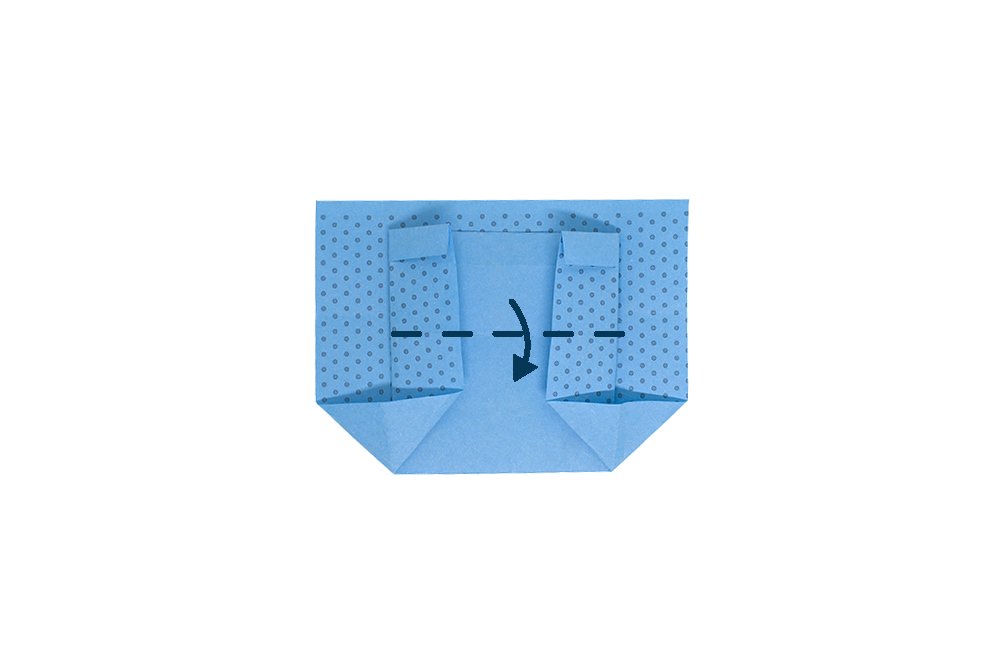
Fold the top layer downwards along the dashed lines as shown. Make sure to fold the top layer ONLY.
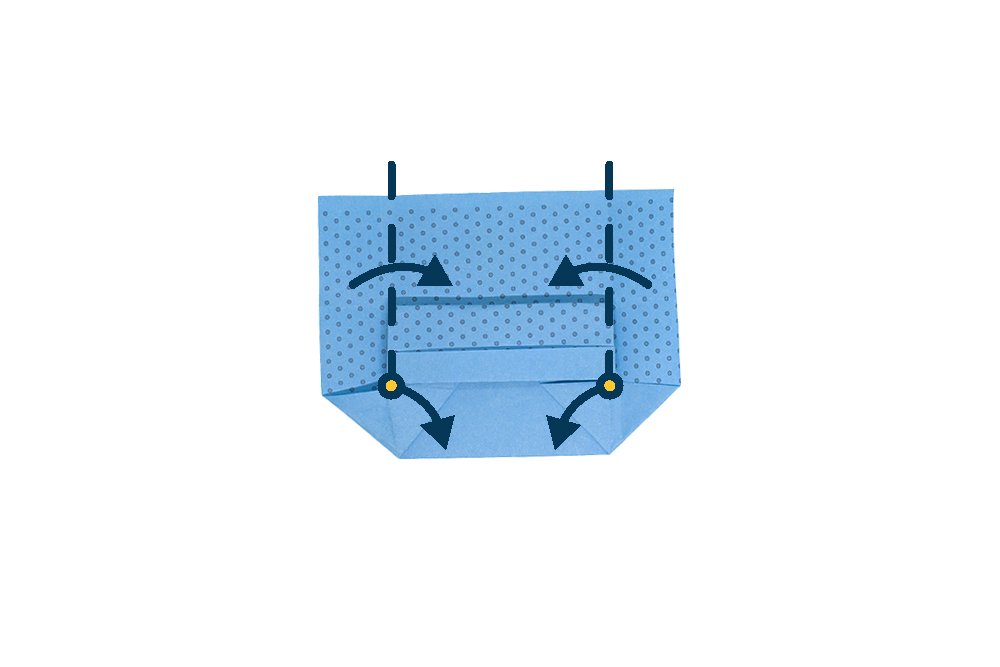
Fold the left and right edges inwards of the back layer and then lift the bottom triangles downward as shown.
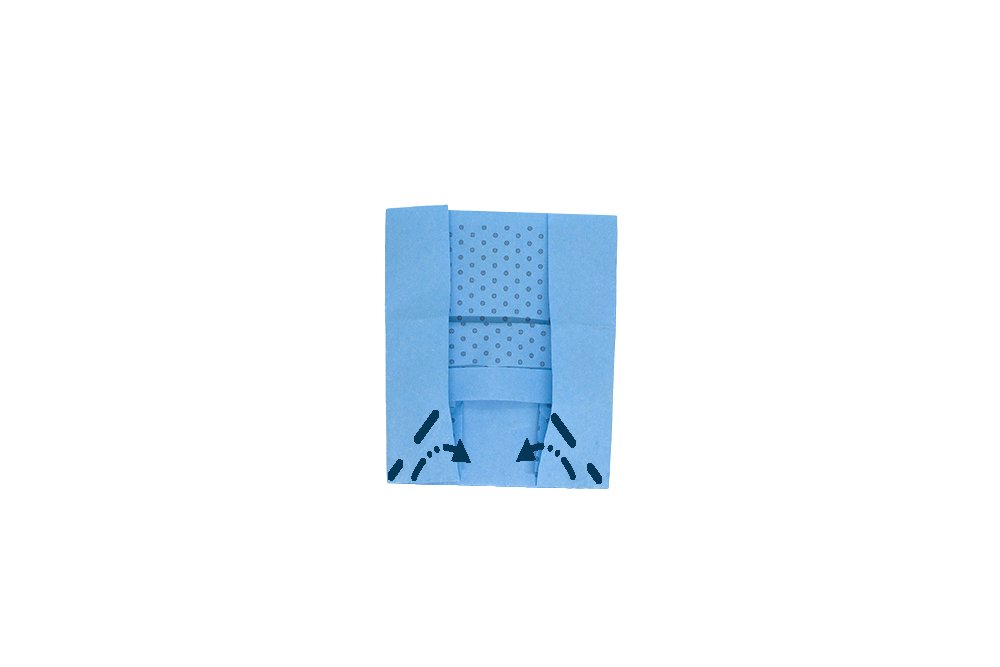
Tuck the corners inside along the crease lines as shown. Follow the dashed line as illustrated above.
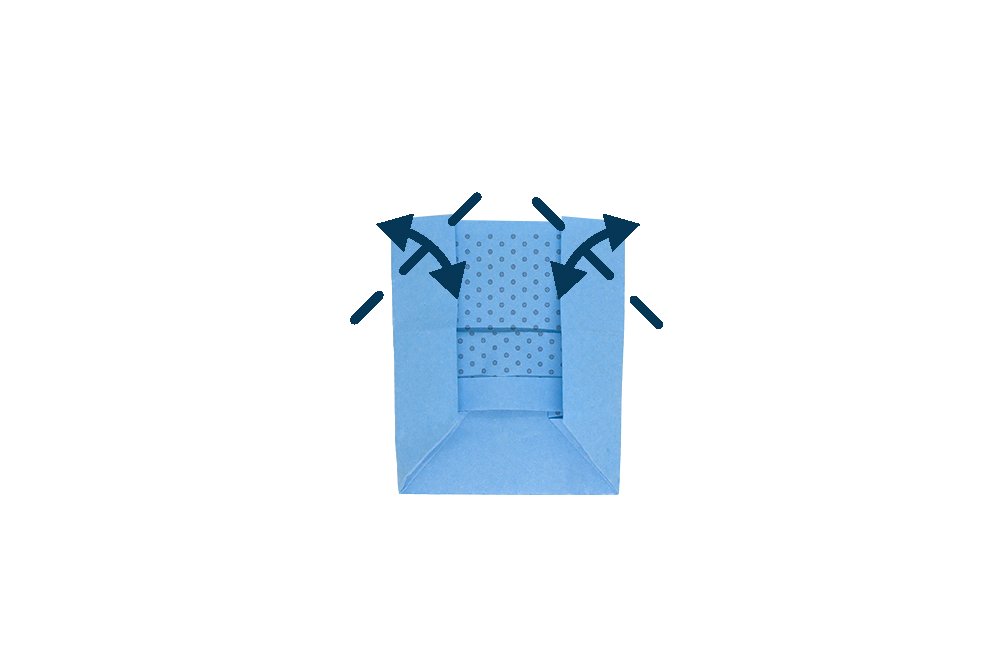
Make diagonal creases along the dashed lines by folding and then unfolding the paper.
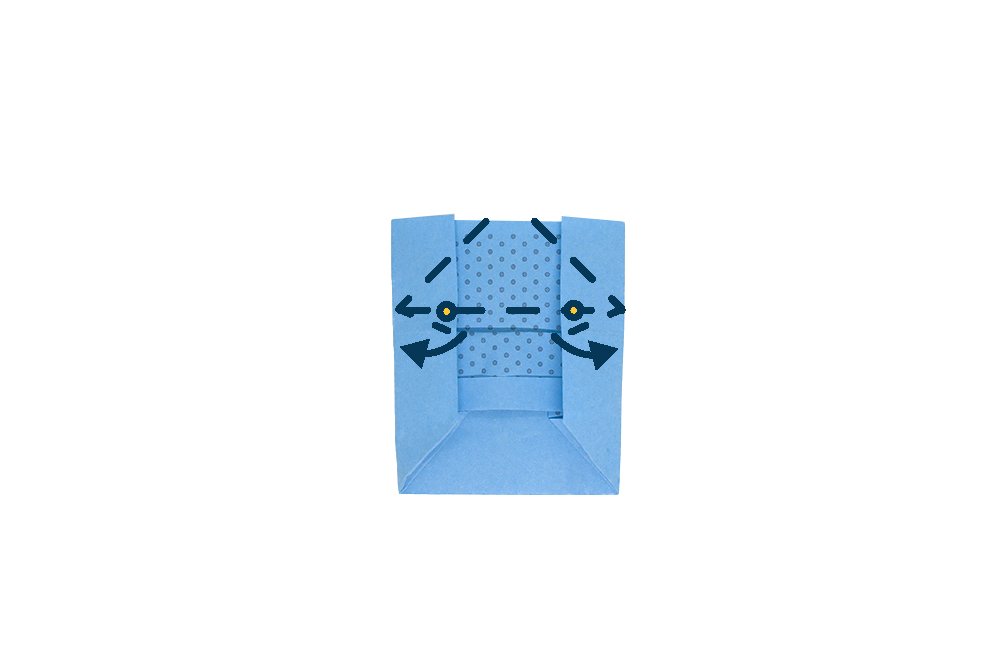
Lastly, hold the piece along the yellow dots. Bring the yellow points downward towards the inside of the envelope.
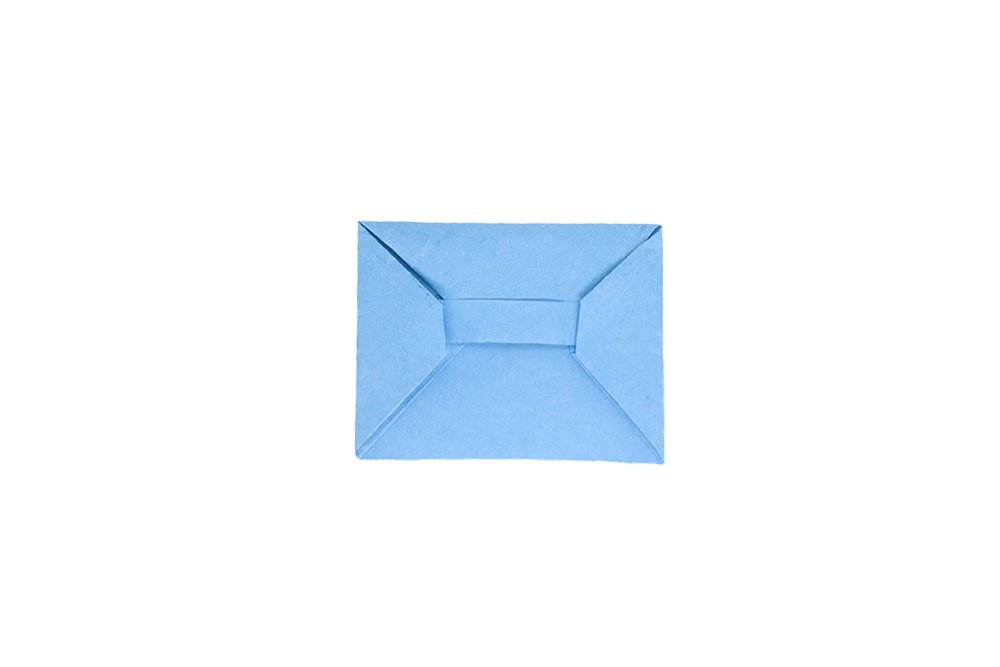
Your origami bar envelope is finished! Close it by tucking it inside the pocket.
Extra Tips
- If you're using a one-sided colored paper, face the colored side downward. If you would like, you can put a message on the white side beforehand.




About to give it a go and share with friends
Tysm! I legit ran out of envelopes and this helped.
Finally I ve been looking this for my planner. I need a pouch for my secret notee
I should be doing my homeworkk, but here I am :))
great btw
cutie wootie