- 3D-Origami
- Cool Origami
- Folding Instructions
- Origami
- Origami Christmas
- Origami for kids
- Origami Halloween
DIY Origami Crown | 3D Paper Hat Instruction for Beginners
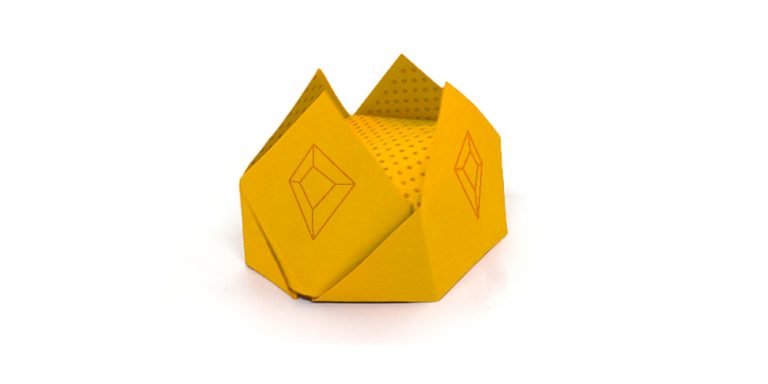
Introduction:
Making a crown can be easy by following the instructions below. For this origami crown, you will only be needing a square piece of paper. Any size will do, but if you want to wear it as a hat instead of using it as a decoration, then use an extra-large piece of paper.
This is an easy origami that you can make in less than a minute once you are familiar with the steps. It’s also pretty easy.
Once you have folded it, you can add some details to your origami crown. Have fun and let’s start folding.
Create the square base of the paper crown
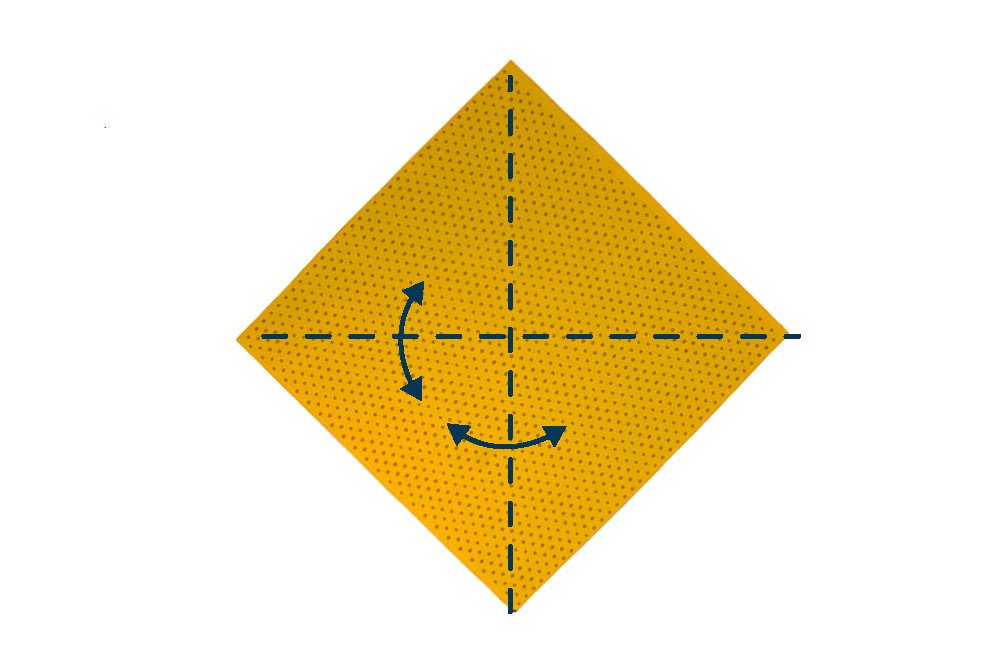
Start with a square origami paper and rotate it into a diamond. If you’re using a single sided colored paper, face the white side upwards. Fold crosswise and lengthwise in half. Crease it well and unfold.

The second step is to bring all 4 corners to the center. The center is where the crease lines made in step 1 intersect one another. First, bring the top corner down.
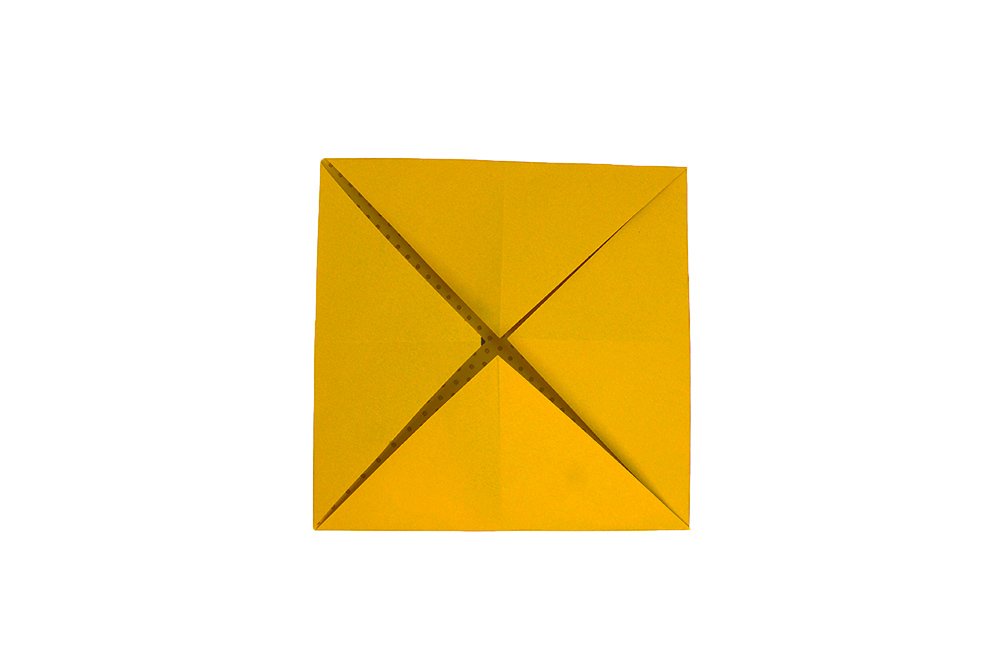
Now that you have folded the corners towards the middle, flip the paper to the other side. Good job!
Fold the origami paper Into a diamond
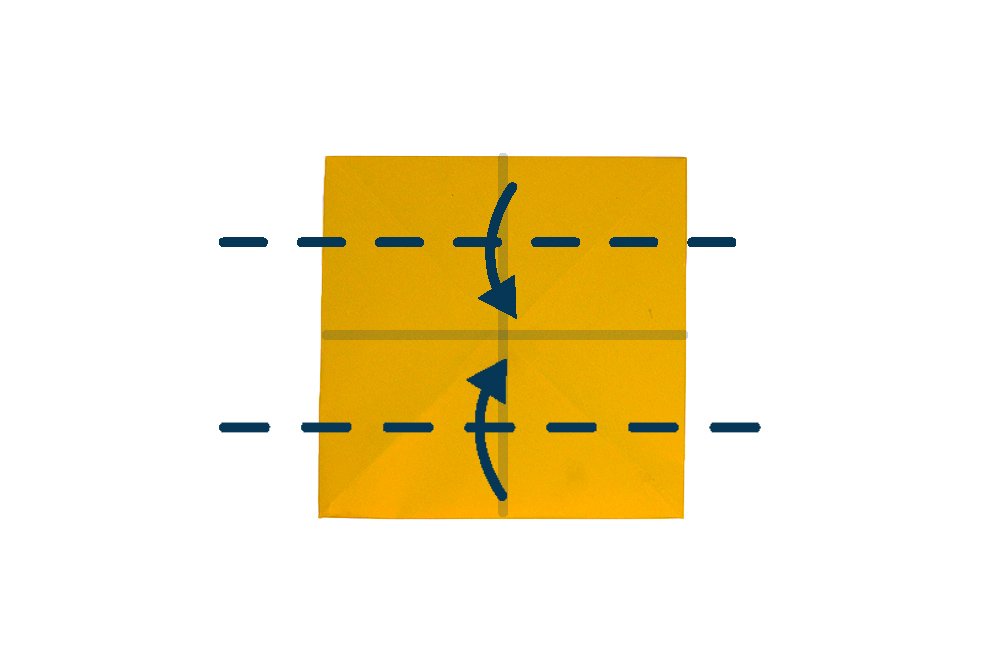
Bring the top and bottom edges to the middle crease line. Follow along the dashed lines as shown.

The origami paper should look like the illustration above. Fold the bottom triangle upwards.
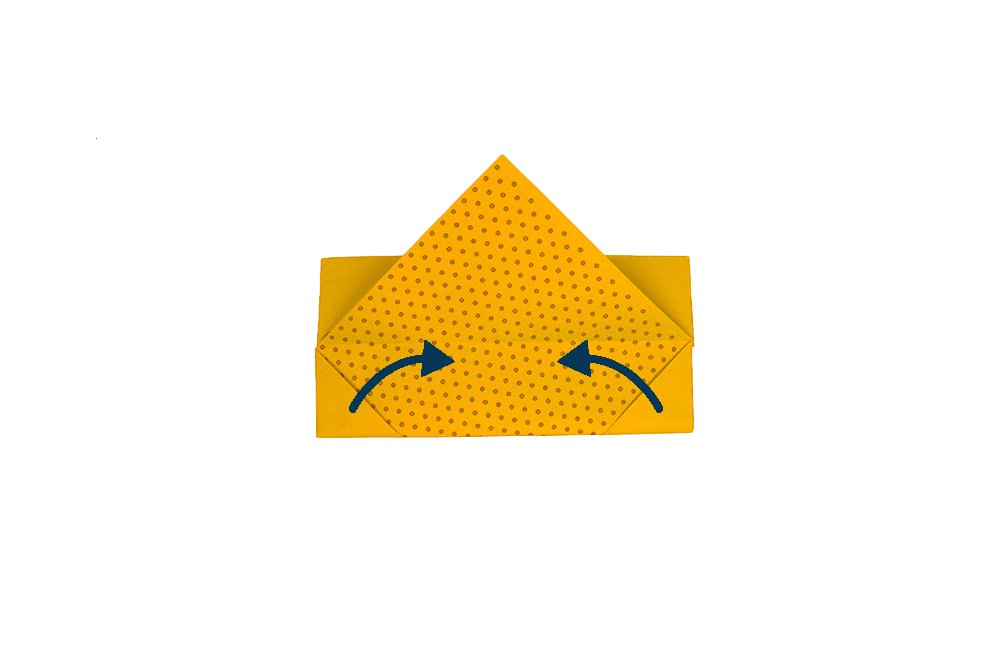
Diagonally fold the bottom left and right corners upward.

Bring the top corner of the topmost layer to the bottom side.

Rotate the origami piece 180 degrees counterclockwise.
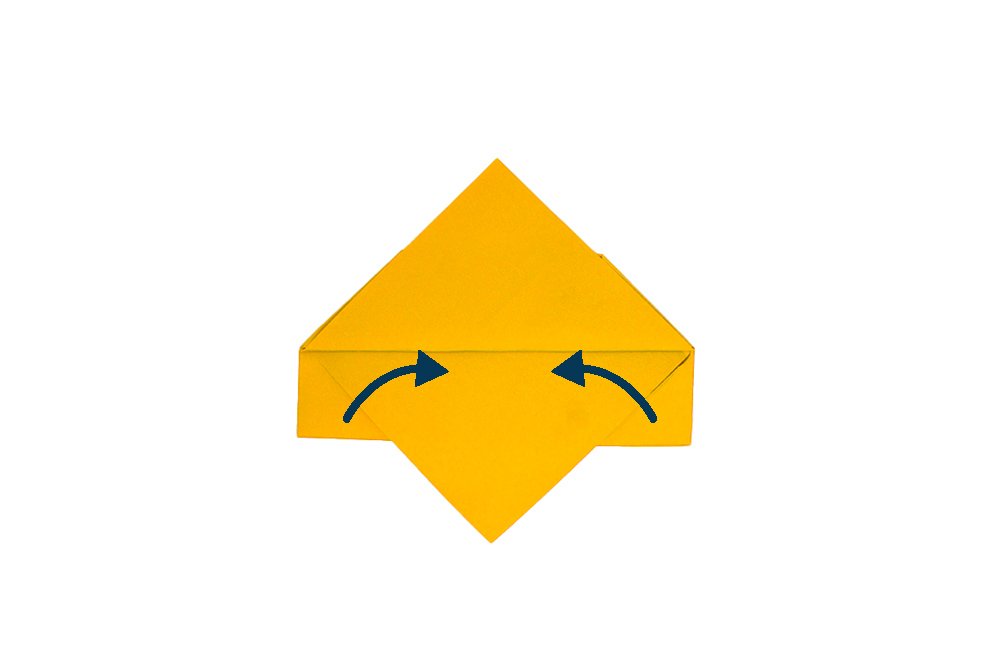
Diagonally fold the bottom left and right corners upward. Tuck it inside the bottom flap.

Great job! Your paper should look like this. It's time for the last set of steps already. Pry open as illustrated above.
Shape it into an origami crown
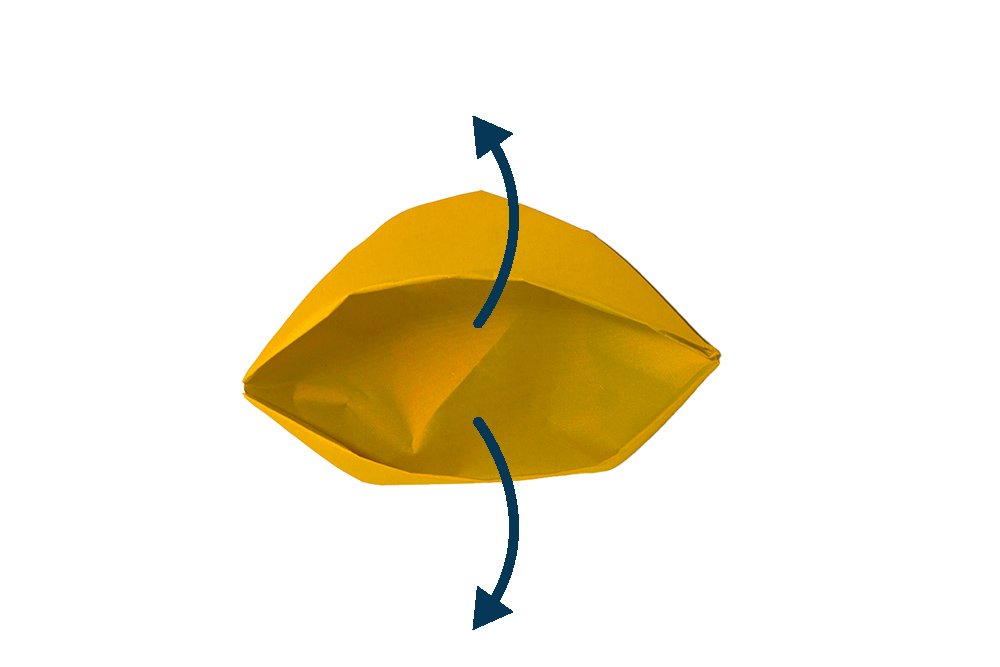
Keep prying it open until it looks like a square.
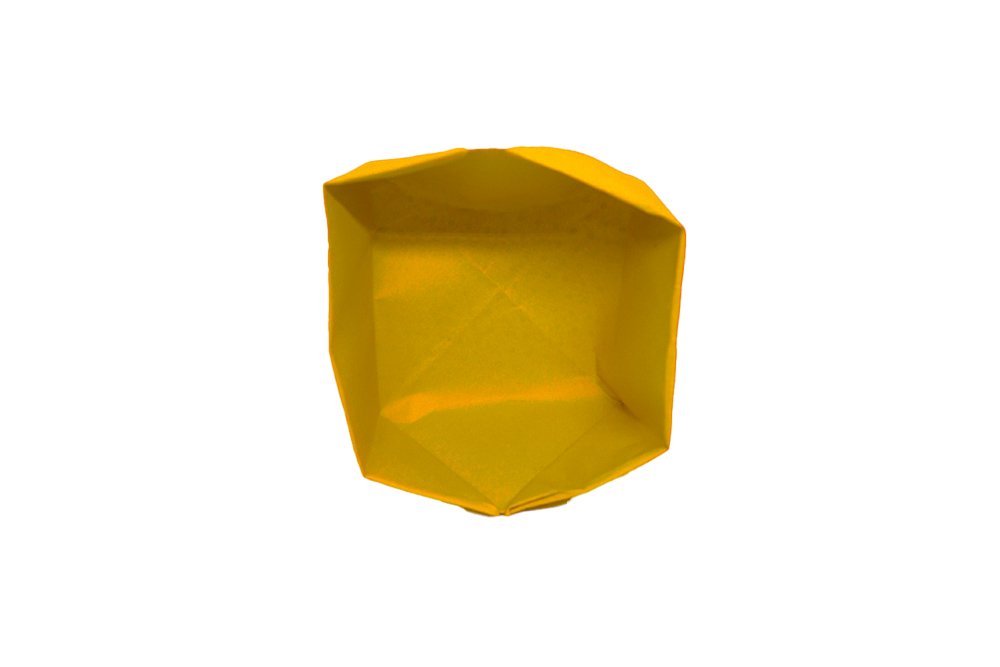
Shape it into a square by pulling it outwards and pushing it inwards.
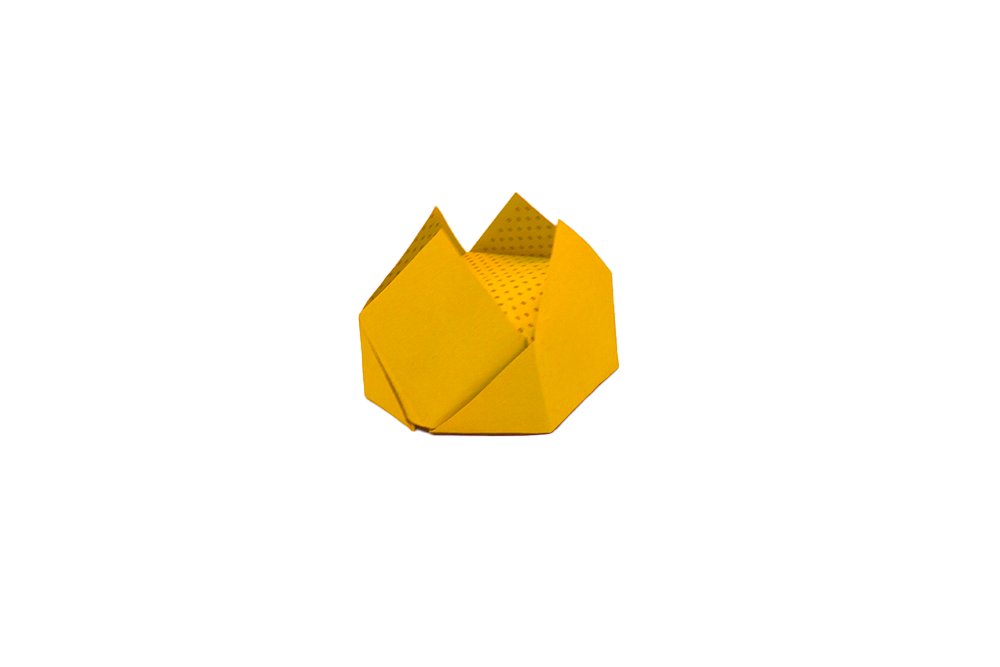
Flip it over and the paper crown is done!
Extra Tips
- Be creative with the way you design the origami crown.
- Be patient, follow the steps closely, and have fun always.
- Check out our other origami guides.
- Do you have pets? Create a royal costume for them! Use a smaller piece of paper to make cute crown hats for your cat, dog, hamster, or bird!



Nice!!
Thank you for such a clear and a detailed tutorial 👌
Gonna use this for my niece’s princess costume! Thanks
Thanks for this guide 😄😄😄
This origami crown is awesome! Have a lot of fun making several of this
Lets go! 👑👑hehe