A Complete Guide on Making an Origami Paper Boat
Introduction:
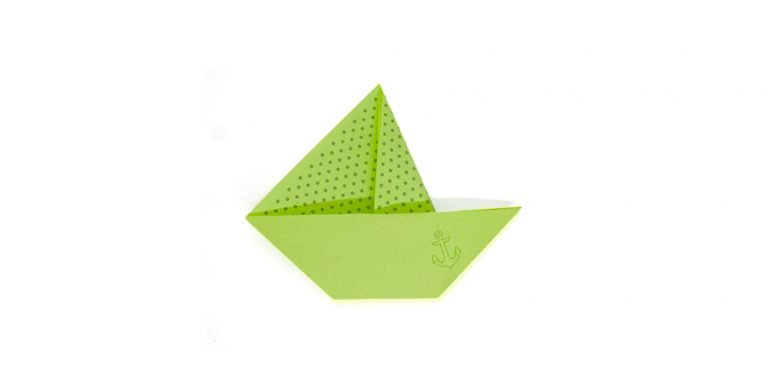
In this origami tutorial, we are going to make an origami boat. There are various ways to make a paper boat. One of them is this 10 step origami boat. The folds in this instruction are easy to do, and you only need a piece of square origami paper to make this paper boat.
Have fun learning the steps. And remember, there are a lot of origami in this website. If you feel like you are up to the challenge to to master the more complicated ones then just browse through our dozens of instructions.
Make crease lines at the origami paper
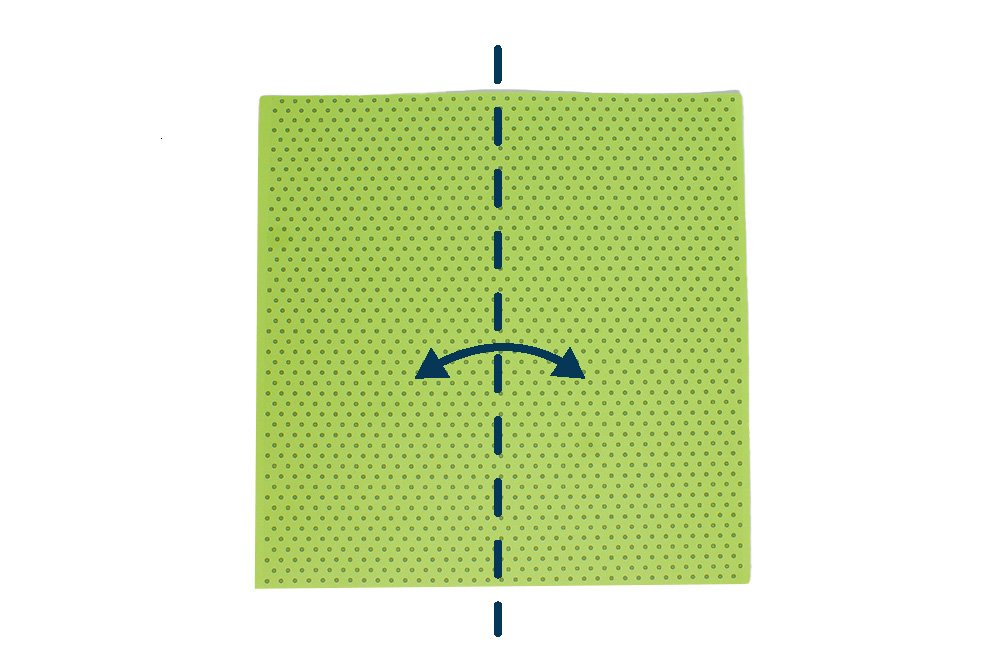
To make an origami sailboat get a square piece of origami paper and lay it flat. Fold the paper in half by bringing either the right or left edge towards the other. Unfold it to make a nice crease line in the middle.
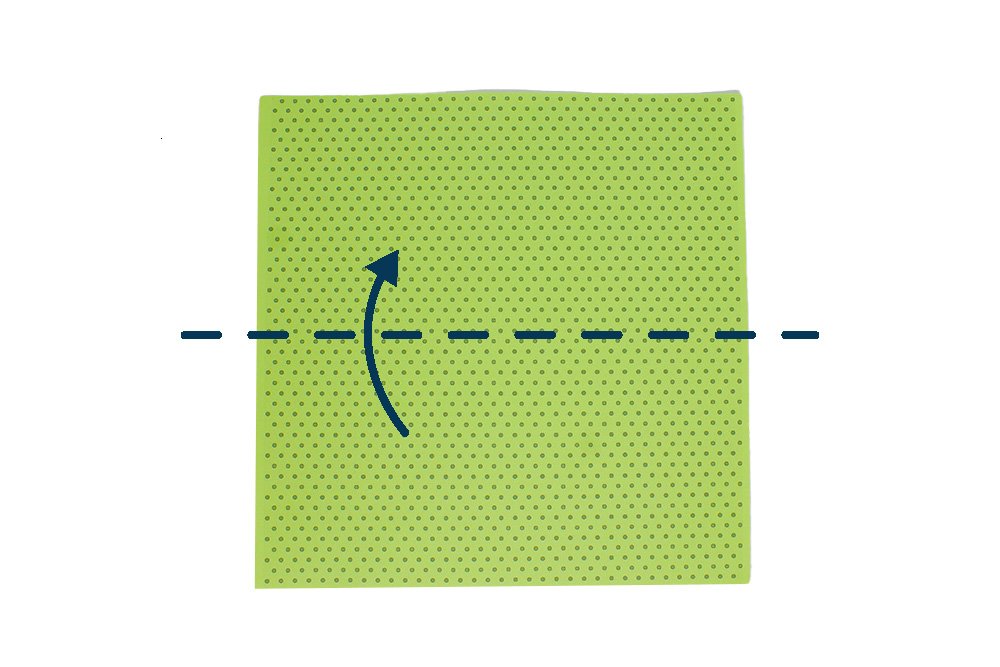
The next step is to fold the paper crosswise in half.
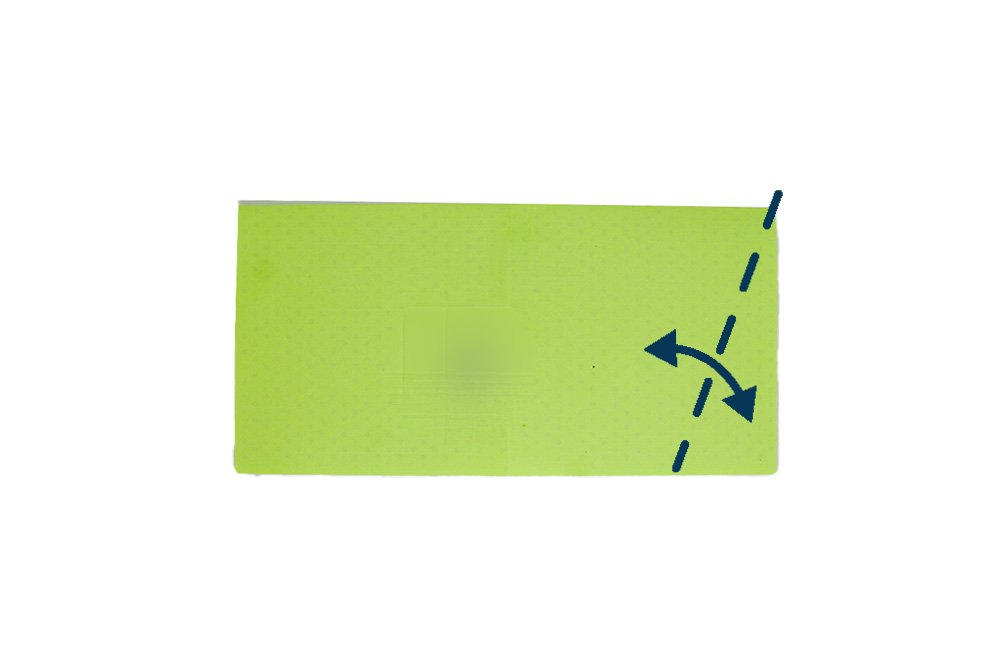
Make a diagonal fold starting from the bottom right corner, then bring it upwards. Follow along the dashed lines for guide.
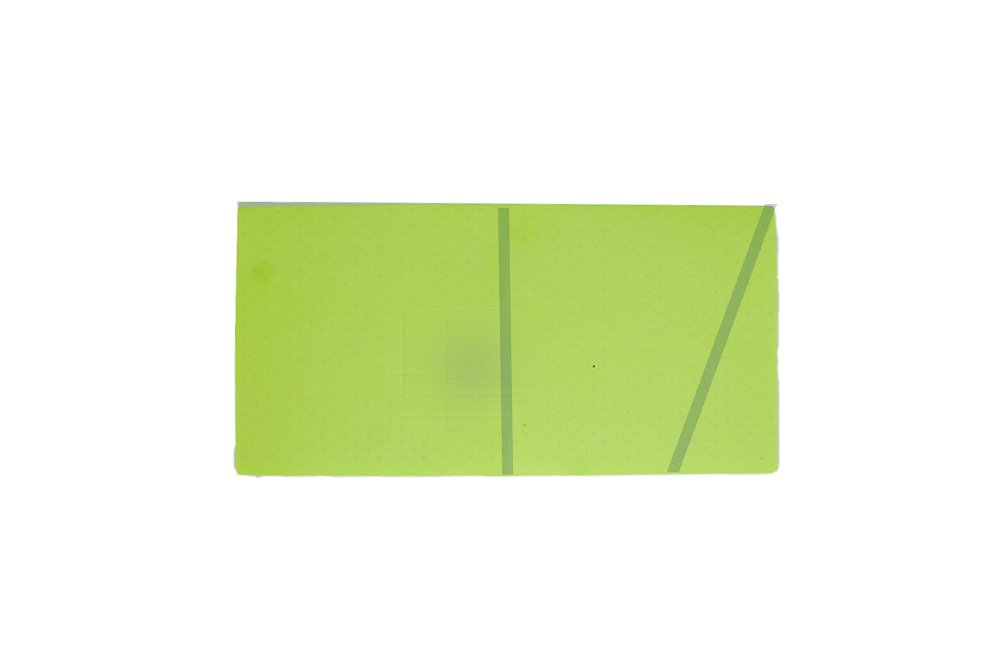
Crease the origami paper well and unfold. This is what your origami should look like now. Now that the crease marks are made, we can proceed to the next steps.
Build the square base of the origami sailboat
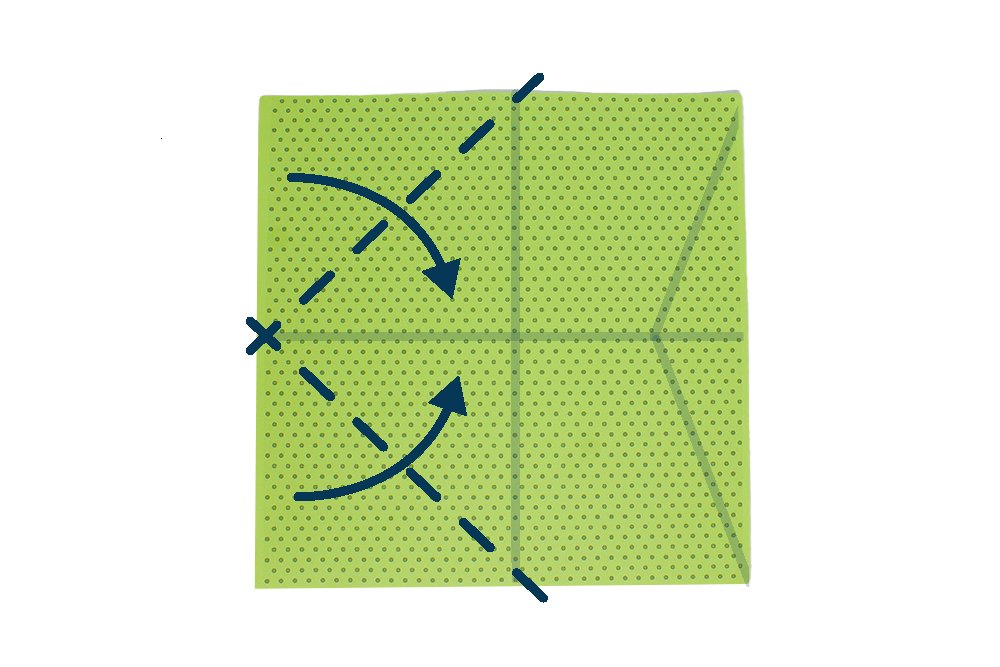
Unfold the origami paper completely. Do not smooth the paper out and make sure the crease marks made in the previous steps are still there.
Once unfolded, fold the top and bottom left corners to the center of the paper. Follow the dashed lines for guidance.
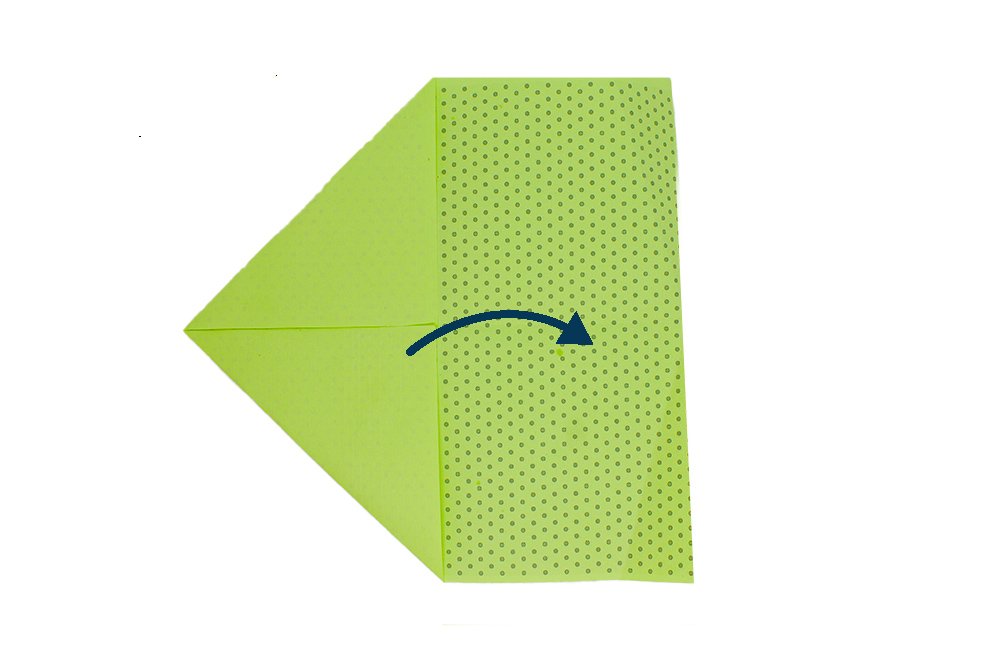
Fold the left half part of the origami paper to the other side. It should look like an envelope once folded.
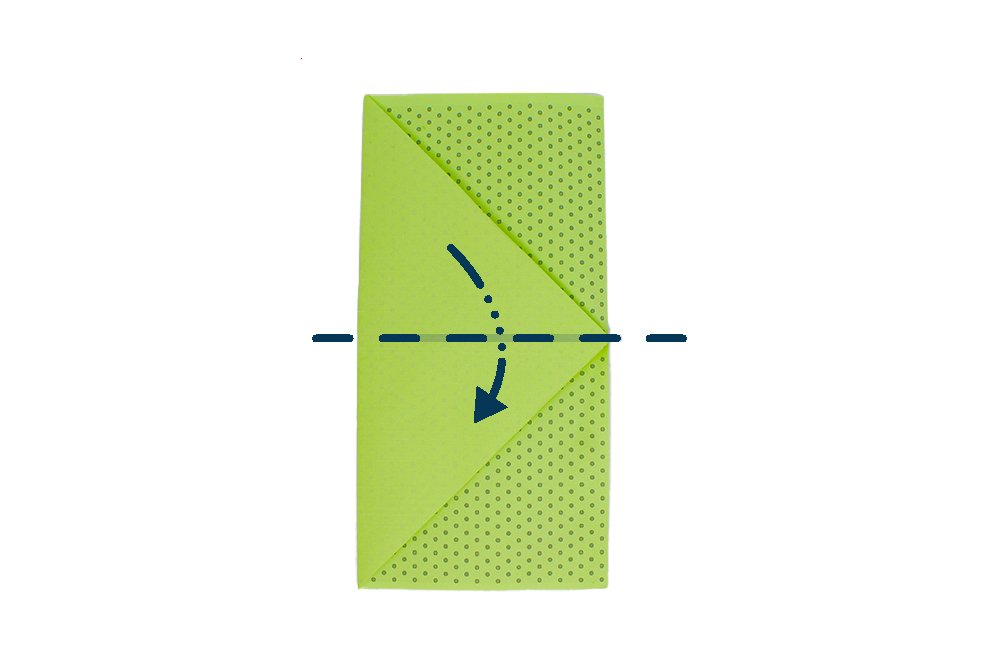
Bring the bottom half part to the back. Mountain fold it along the dashed line. Time for the next set of steps.
Shape the sail and hull of the origami paper boat

To shape the sail of the paper boat, diagonally fold the second layer along the crease line made in the previous step (dashed line). Make sure to fold the second layer inside ONLY

To shape the hull, mountain fold or make an inside reverse fold along the dashed line. To make an inside reverse fold, crease the paper along the dashed line, then push the corner inside.
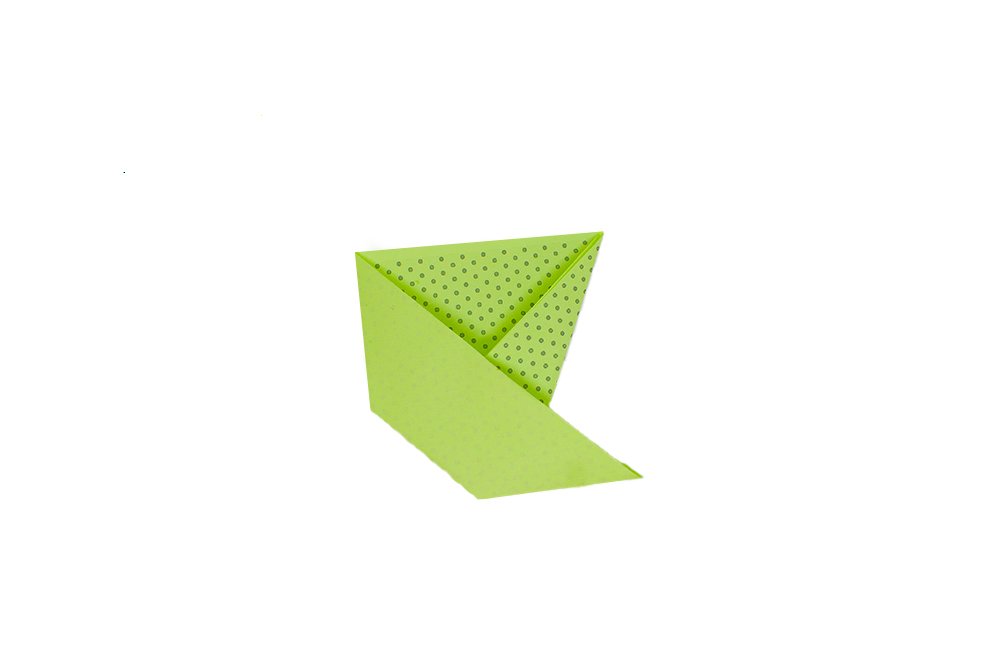
This is what your paper should look like now. It should now look like an origami ship.
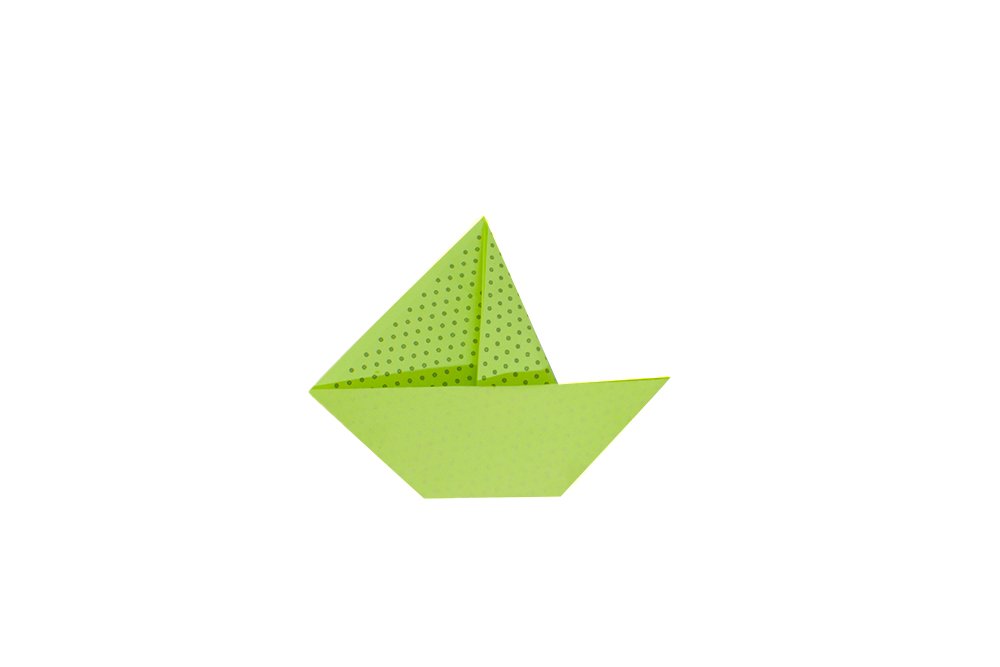
Almost done! Rotate the origami paper 45 degrees counterclockwise. Your origami easy boat is done!
Extra Tips
- What's great about this easy paper boat is that you can personalize it after you're done making it. You may draw some details like windows or an anchor to make it more realistic. Add some decorations like stickers to make it one-of-a-kind!
- This origami boat may not float but we have one that does! Learn how to make a paper sailing boat here!
- Do your kids love boats? They might enjoy coloring these cool vehicles! Check out car coloring pages where you can download for free!




wonderfully illustrated. Young kids will have no problem following the steps. Keep it up!
Love this. I remember making something similar in 95′. Man, it’s good to be a kid – now i have kids and these things come back you know
nostalgic
Adorable origami cool 😍💓💕
Thank you for making the guide!