
Introduction:
Learn how to fold an easy origami elephant with this instruction. This origami elephant may look hard to do, but it is actually easy to make. You only need to use simple folds and two pieces of origami paper to create it.
The instruction is divided into three sections and it’s a bit lengthy. But once you’ve mastered this fold you’ll be able to make the paper elephant in less than two minutes.
A great origami activity for kids and beginners, this origami is both easy and fun to do. Draw a face after to bring it to life. Enjoy!
Make other origami animals here!
Form the shape of the origami elephant's head
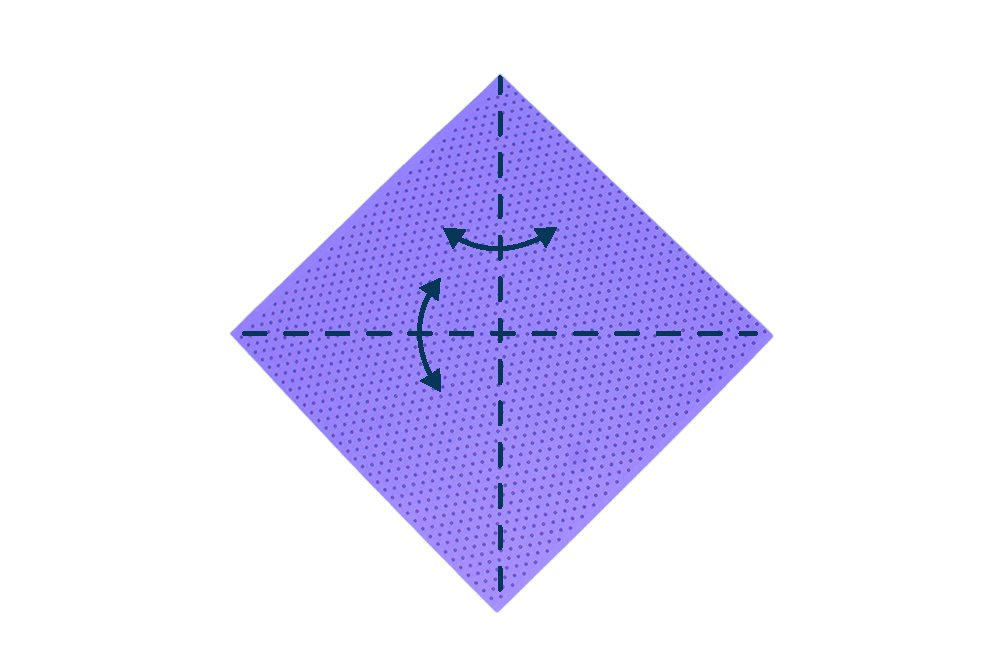
To make this head of the paper elephant, get a piece of square origami paper. Orientate it into a diamond and then fold the paper crosswise and lengthwise in half . Crease the paper well and unfold
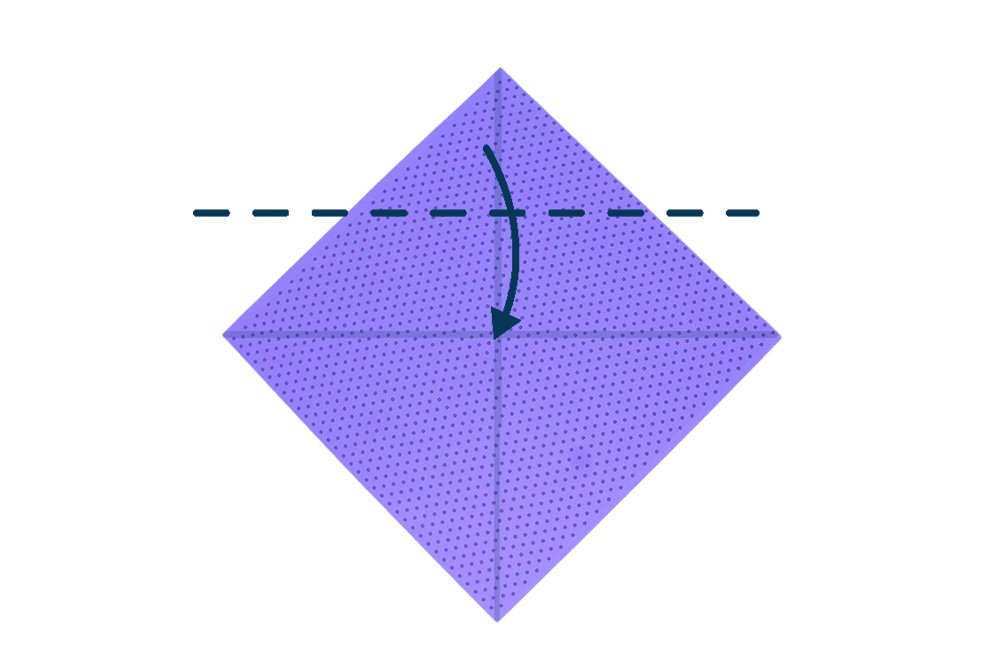
The next step is to bring the top corner to the center. The center of the paper is where the crease lines intersect.
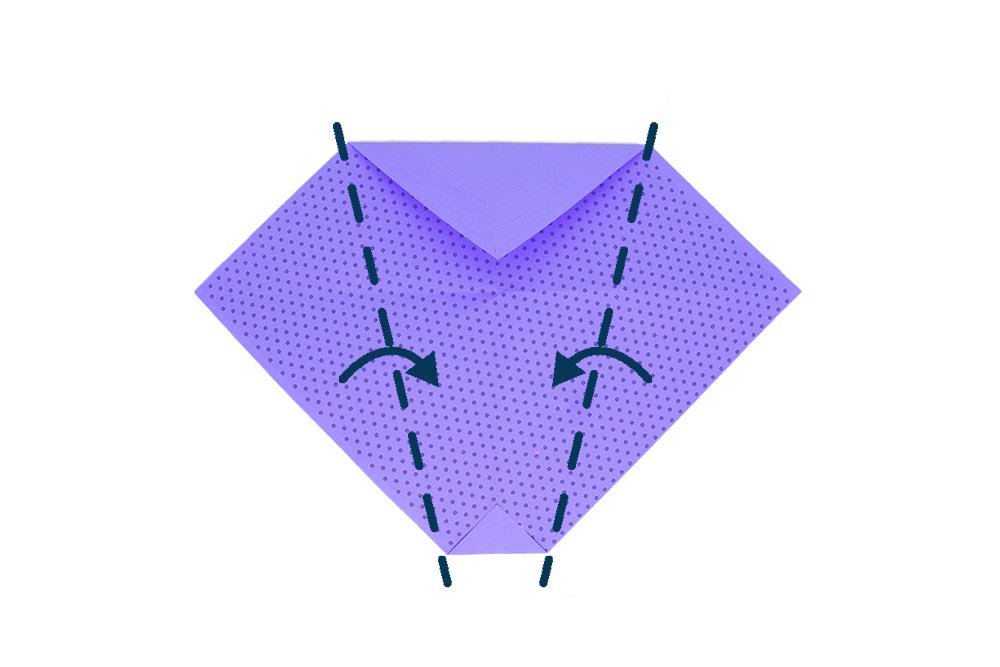
Then fold both the left and right corners diagonally to the middle.
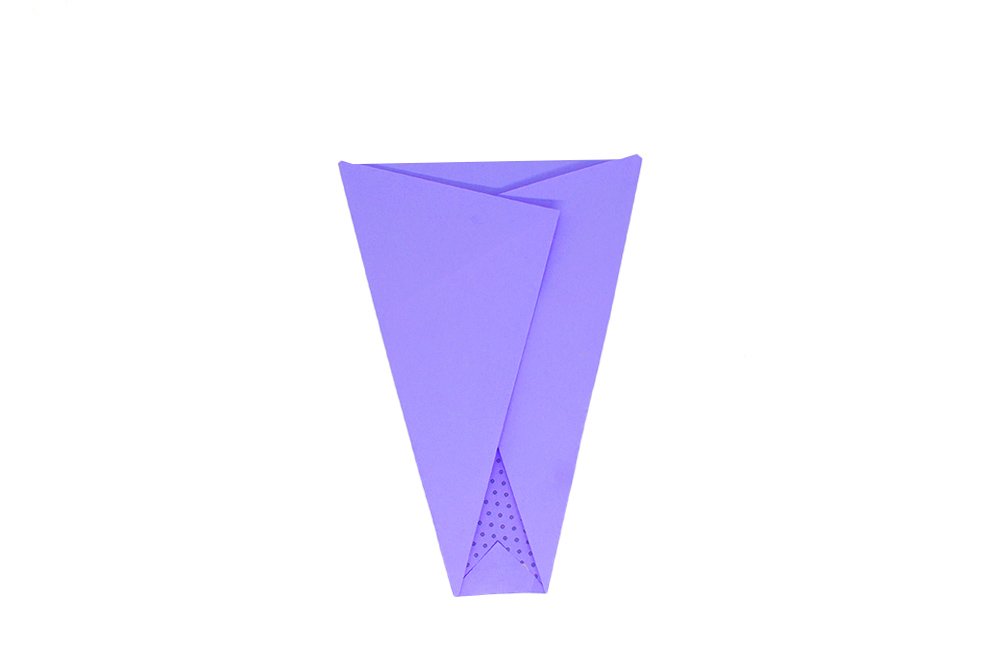
The next step is to make the ears of the origami elephant from the two topmost flaps.
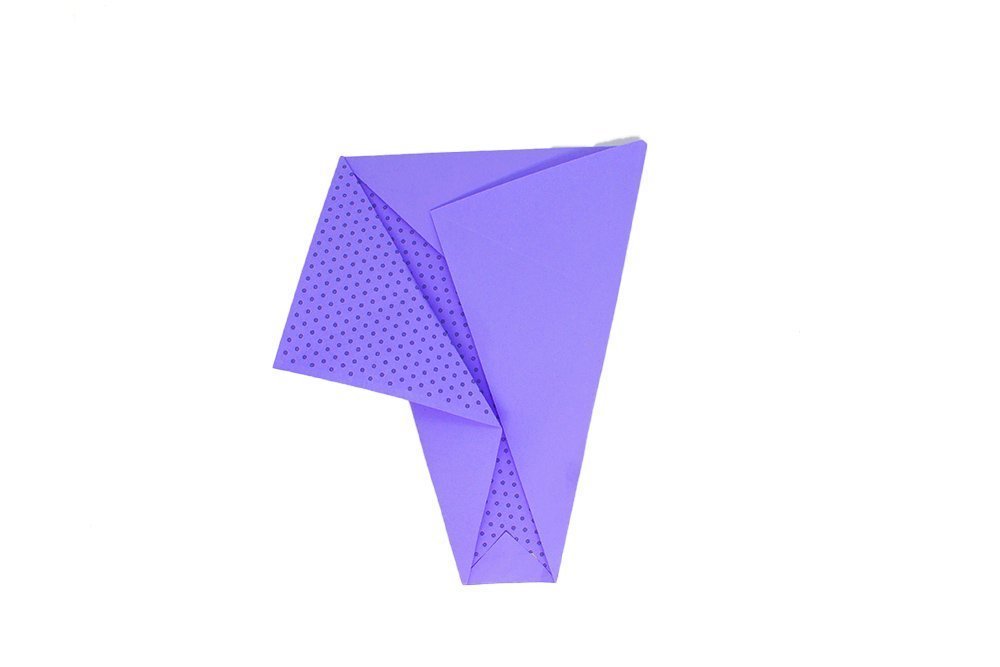
Fold the right corner of the left top flap downwards. Once you have done that, you have now made one ear of the elephant.
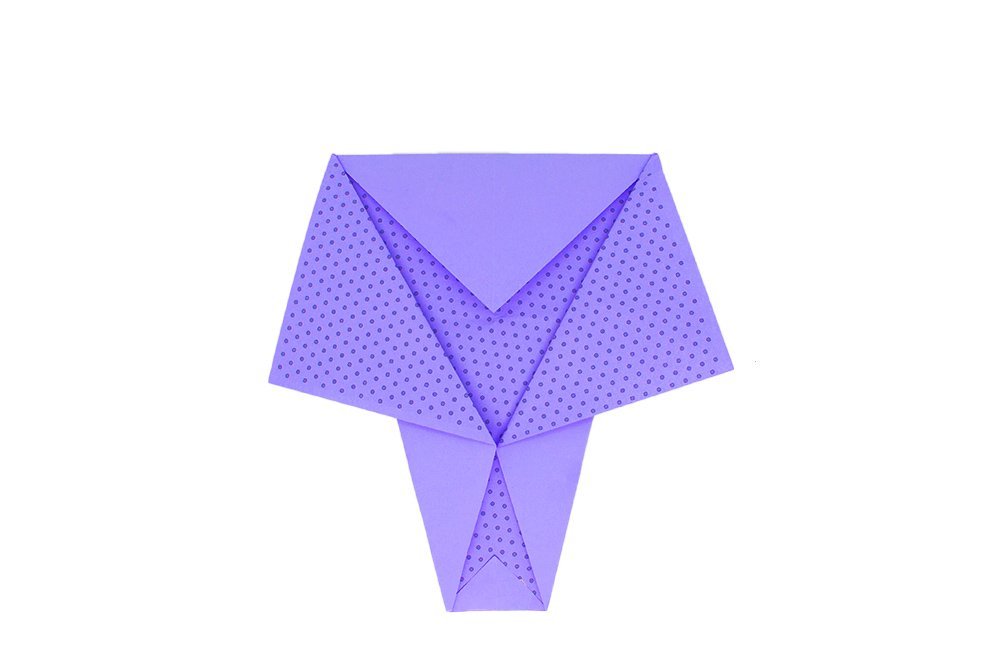
Fold the left corner downwards to the right side. Fold the top flap ONLY. This is to make the other ear.
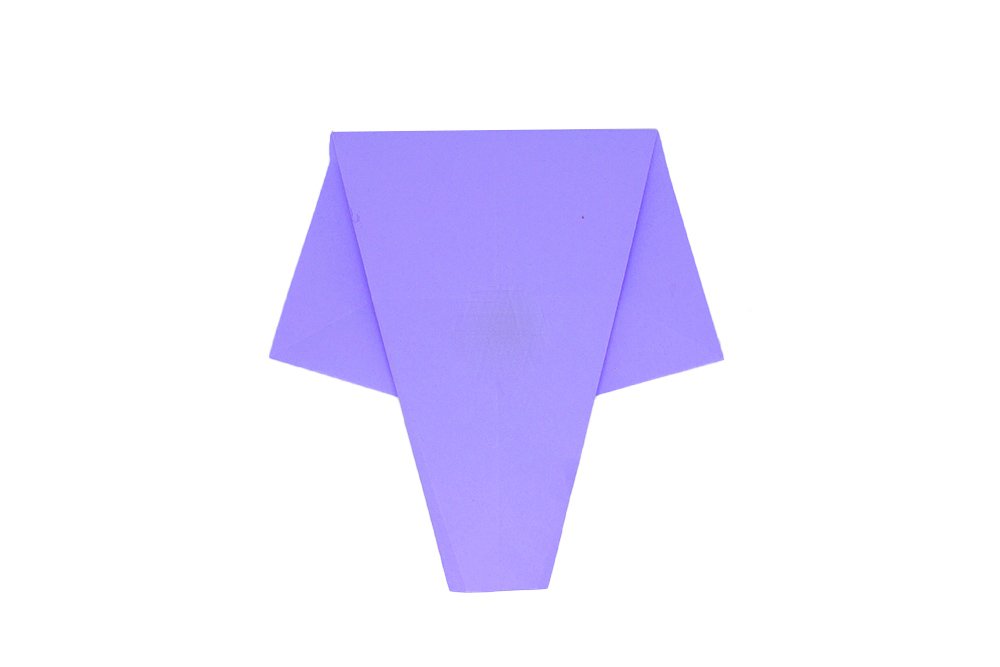
It now looks like the shape of the elephant's head. Let's proceed to the next set of steps to make the elephant's head much more defined.
Make the head and trunk of the paper elephant more detailed
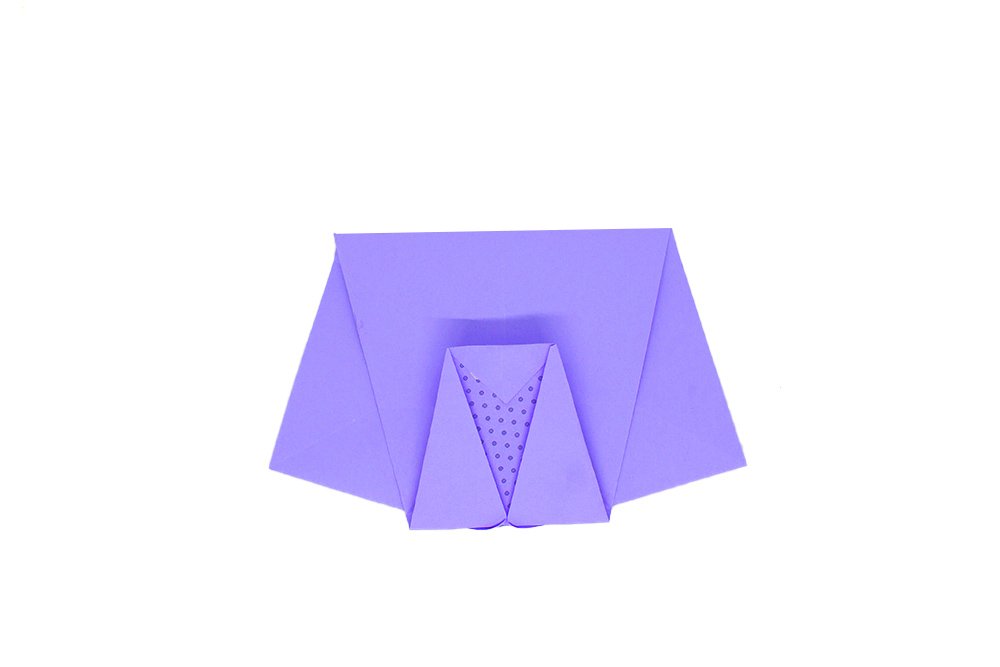
Time to make the trunk of the origami elephant! Fold the trunk towards the top.
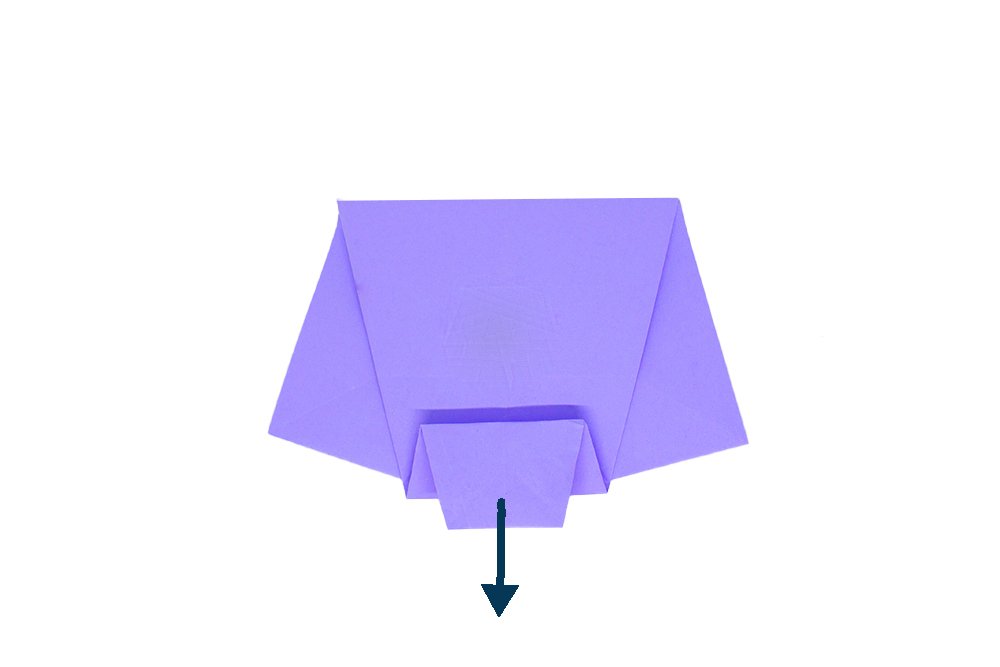
Then fold a part of it to the bottom. Lightly pull it downwards without smoothing out the creases.
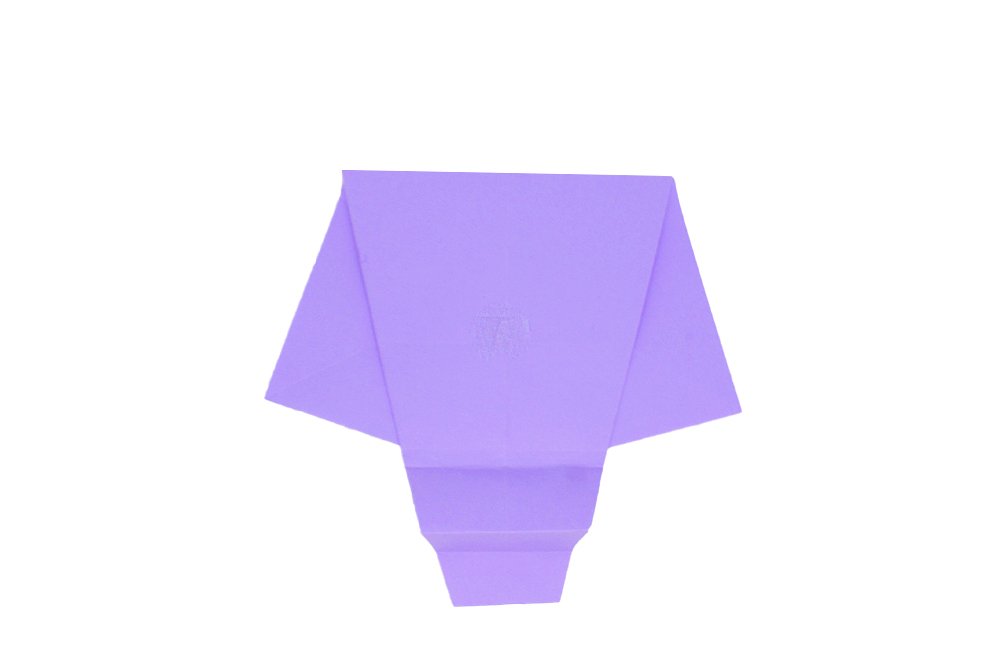
The fold made should form a zigzag pattern tot the trunk.

Flip the paper over again.

Shape the head by folding the left and right top corners downward.
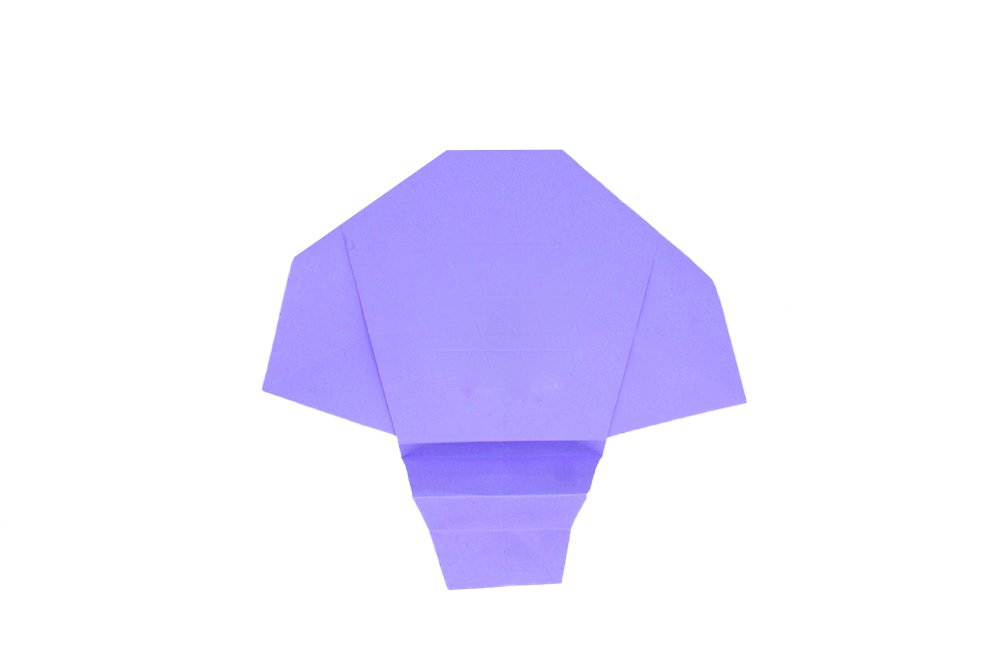
Then flip the paper again. The trunk and head are now much more defined. Good job!
Make the body of the paper elephant
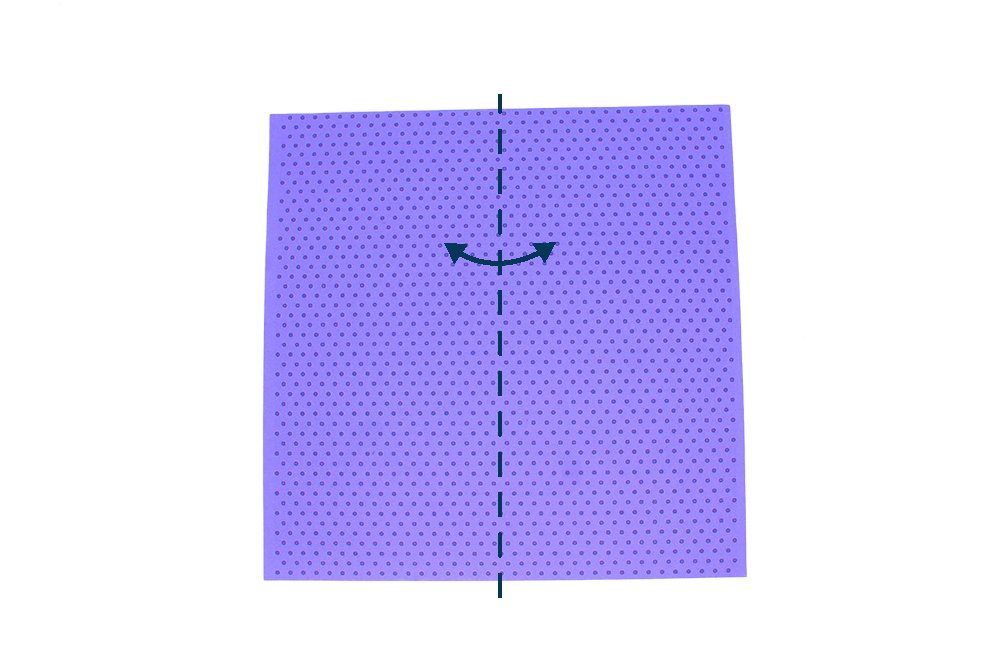
The next set of steps will focus on making the body. Get another paper. Fold the paper in half vertically. Crease well then unfold.
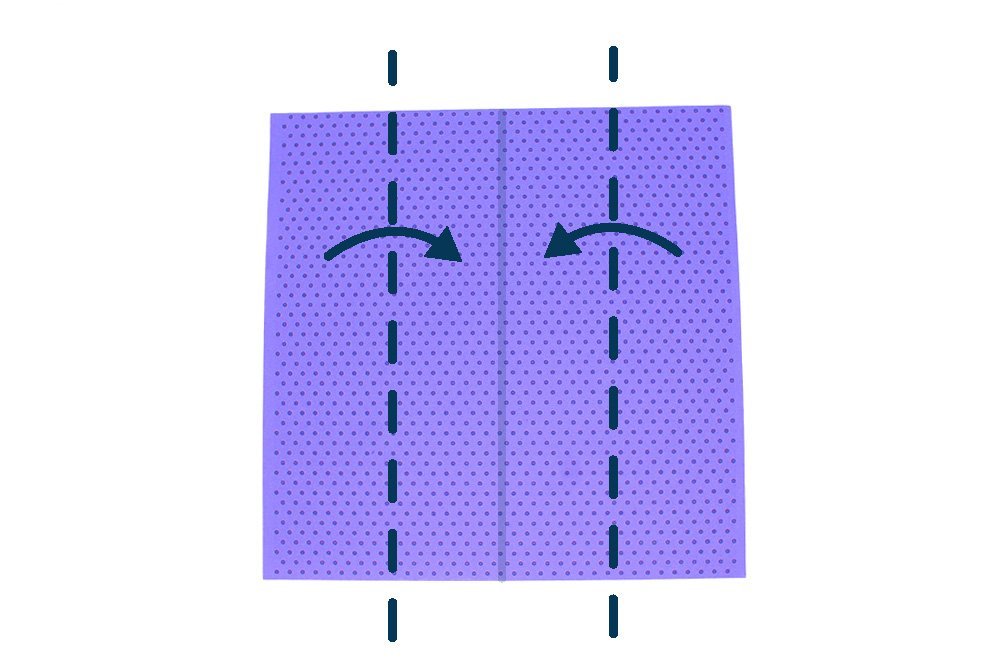
Bring the right and left edge to the middle crease line made in the previous step.
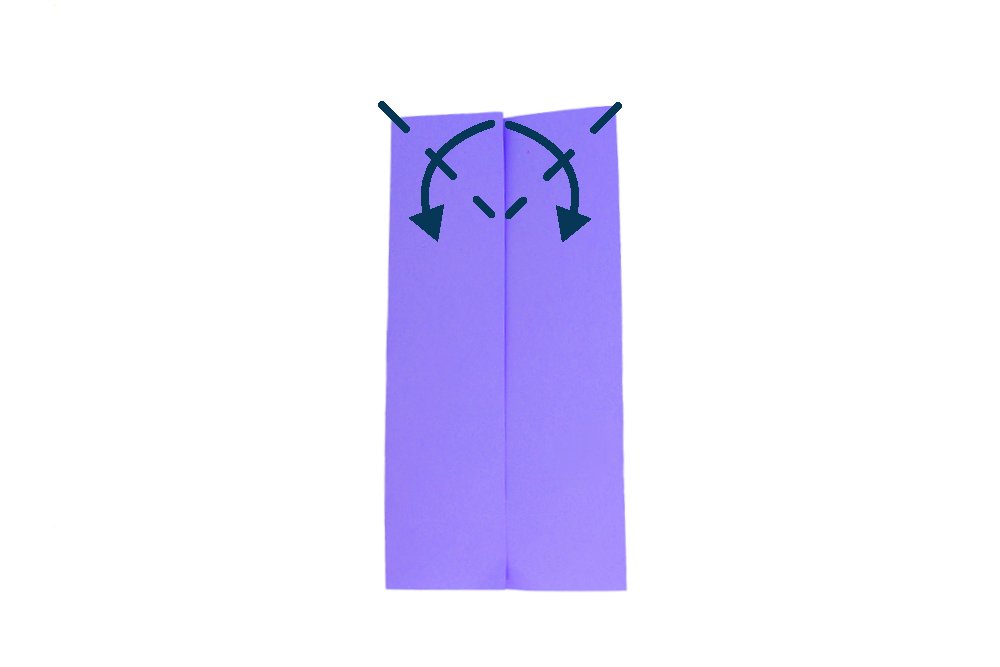
Fold the inner corners downwards of the two flaps. Make sure to fold the top layer ONLY. These flaps will be used to attach the head to the body of the origami elephant.
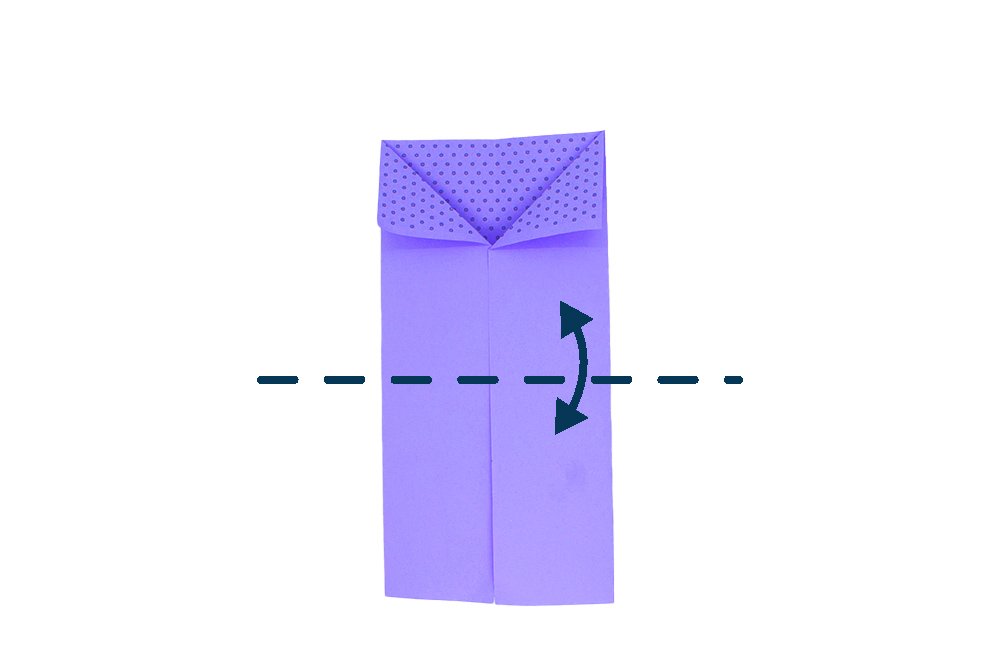
Shape the elephant's legs. Fold the paper upwards in half. Crease it well and unfold.
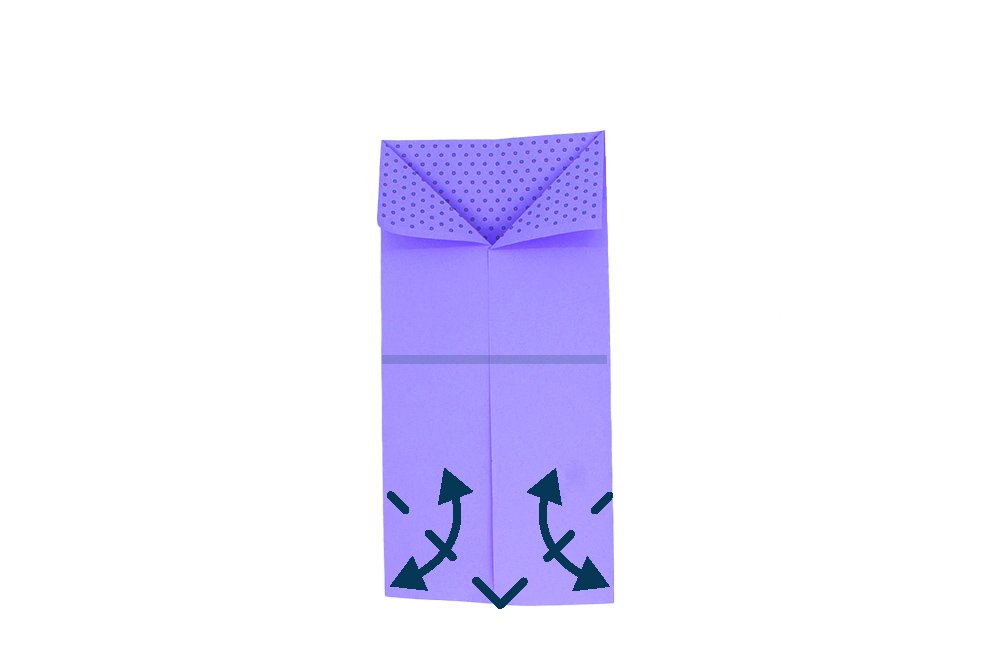
Create crease lines at the origami elephant’s foot by folding the bottom left and right corners upward.
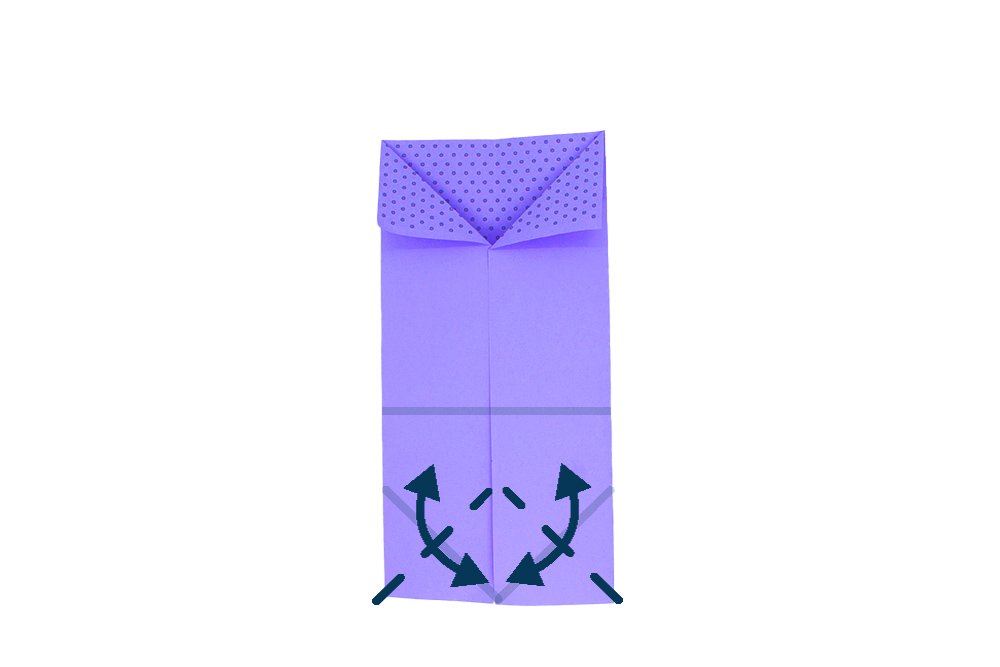
Repeat the crease marks on the inner bottoms as shown. Crease well and unfold
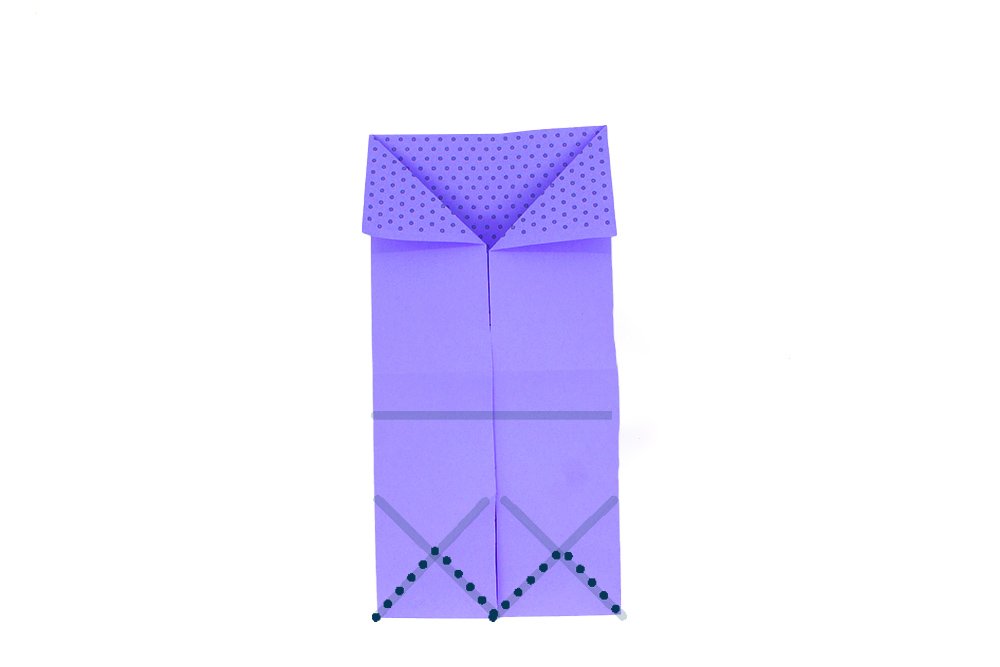
Lift the top layer of the dotted crease lines. This will be the feet of the origami elephant.
Attach the head to the body of the origami elephant
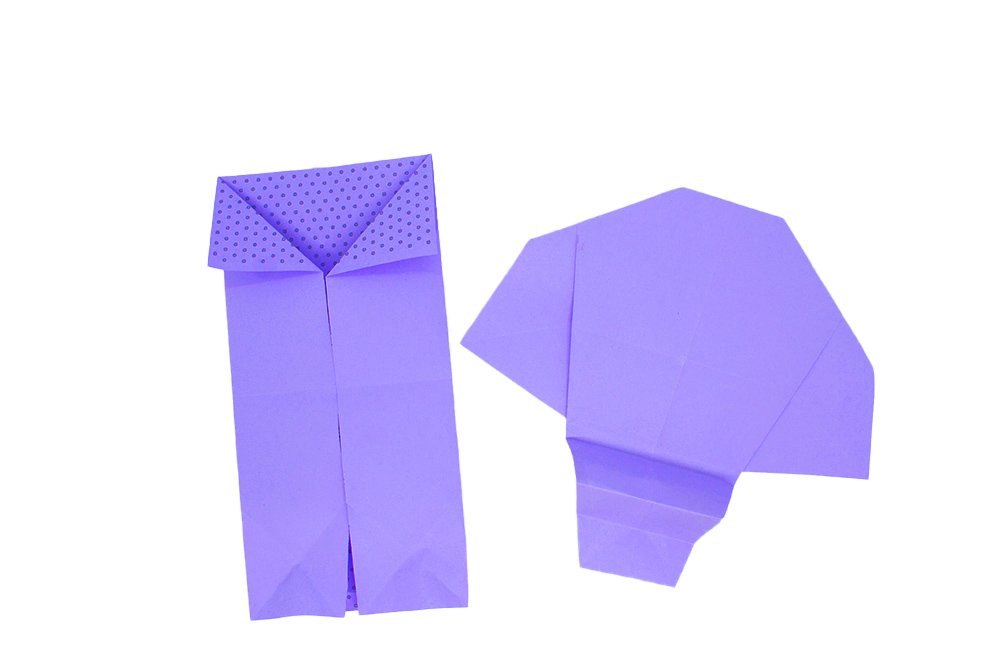
Get the head and body of the elephant. Time to connect them together.

To attach the origami elephant’s head and body, insert the flaps made from the top part of the body to the pockets of the ear.

This is what your elephant origami should look like once the head is attached to the body.
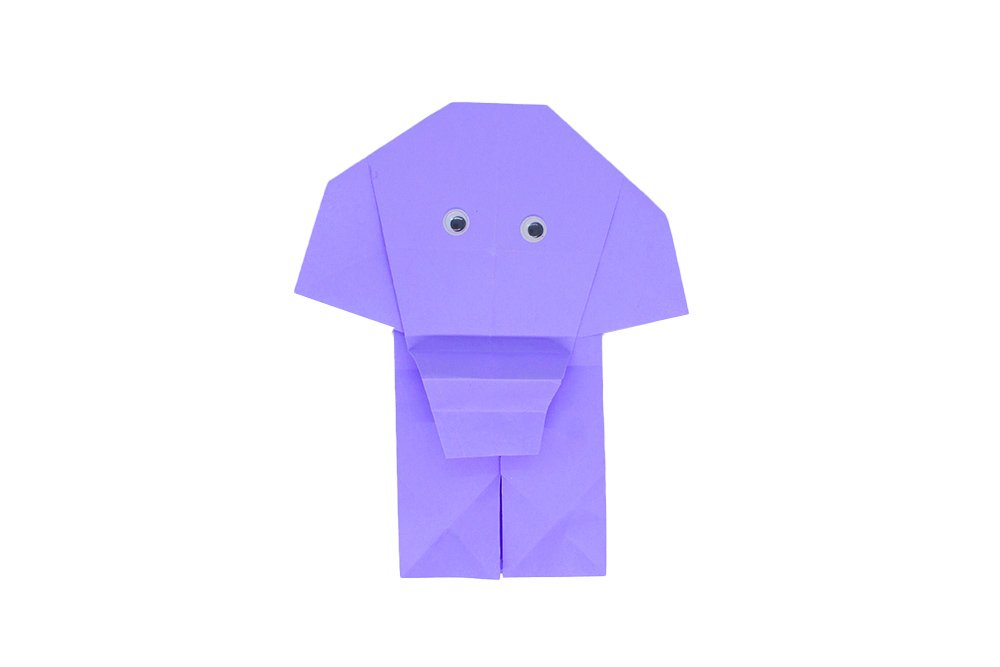
Turn the origami to the other side once you have attached the elephant’s body and head.
Ta-dah! Your origami elephant is done.
Extra Tips
- You can add some details to the elephant like sticking a pair of googly eyes.
- Don't worry if you don't memorize the entire steps. With practice and time, you can master it.


