Introduction:
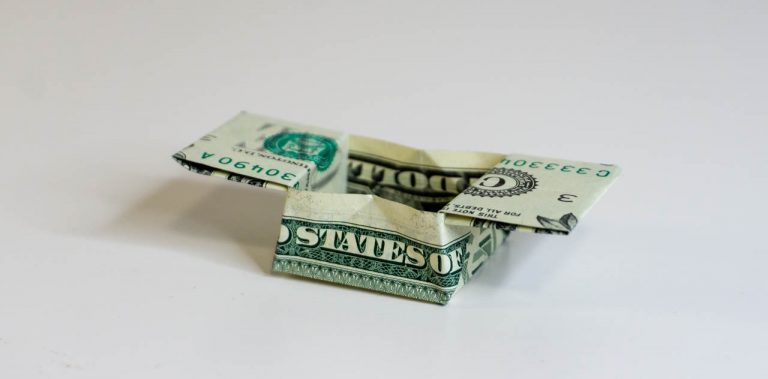
Try making a money origami box! What’s great about this box is that you can store small trinkets such as candies, paper clips, and jewelry. You may even use it as packaging for a gift if you’re planning to give some small to a special someone.
You can also use a different type of paper for this step so long as the ratio of the side lengths is the same as the dollar bill. There are a lot of steps but the good news is that this guide is clear and concise.
Have fun!
Create the base of the dollar bill box
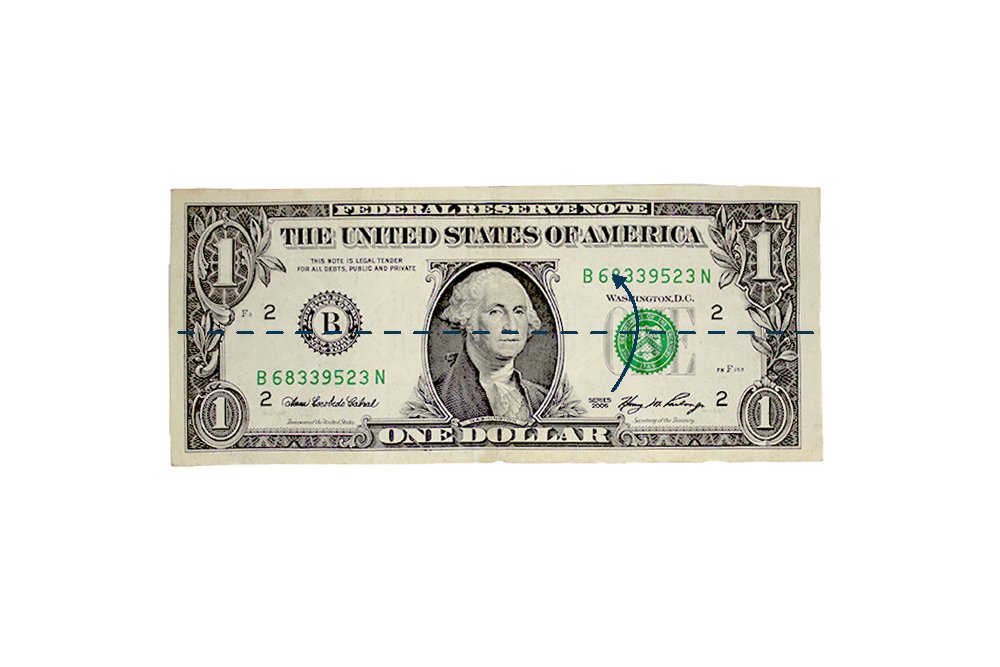
Fold the dollar bill horizontally in half. Crease it well.
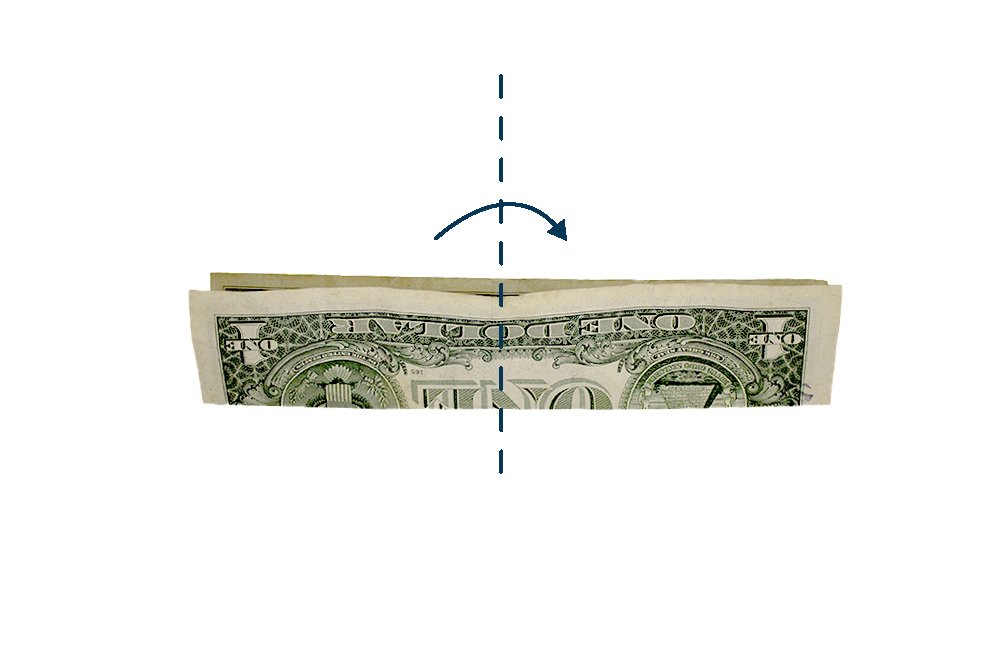
Again, fold it in half but this time in a vertical direction.
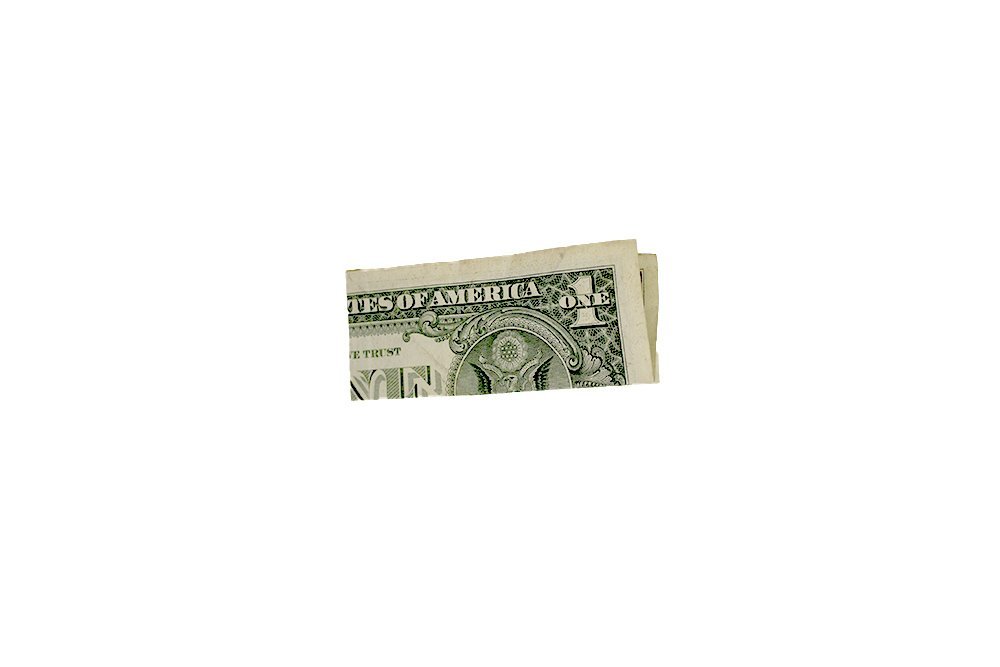
Crease the dollar bill well and then unfold. We need the middle crease line for the next step.
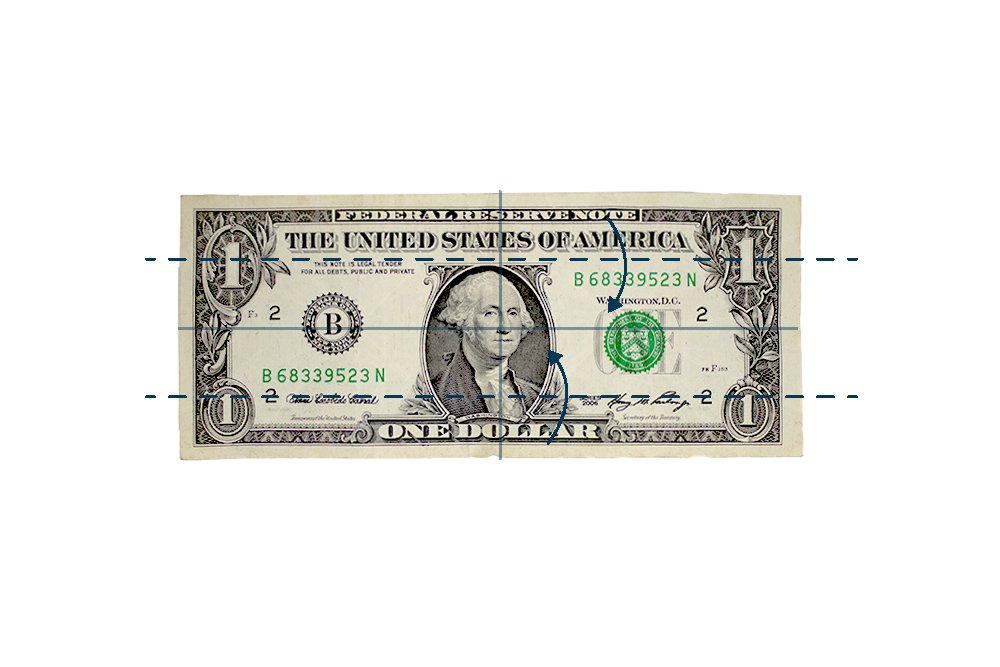
Fold the top and bottom edge to the middle of the dollar bill. The middle is the horizontal crease line made in the previous step.
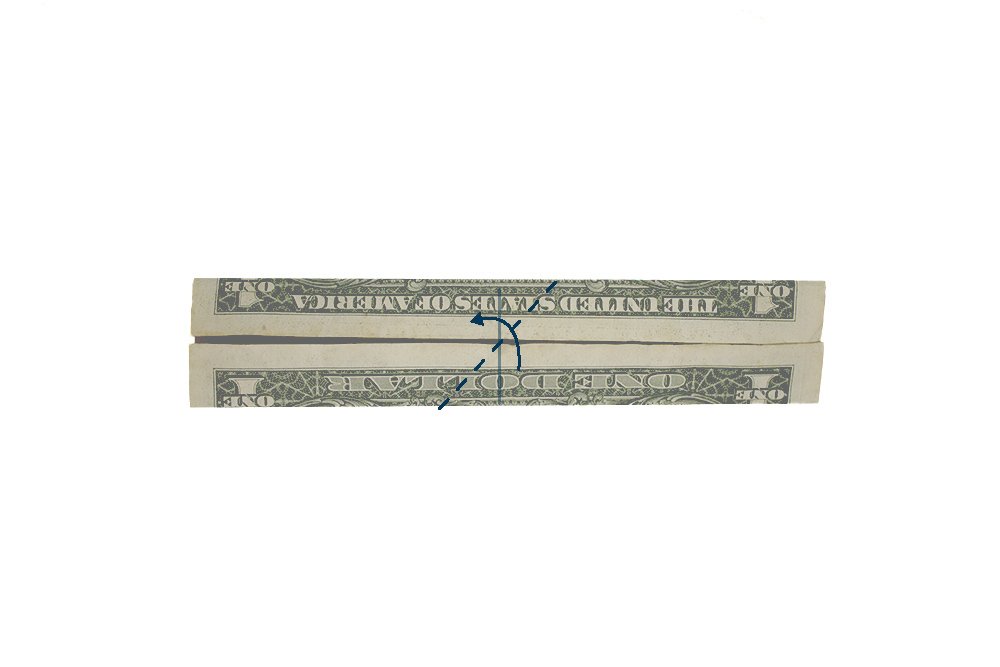
Once you have formed the base strip of the money box, diagonally fold the right part of the dollar bill upwards at a 45-degree angle.
Make an X crease mark on the base

Crease the dollar bill well and unfold.
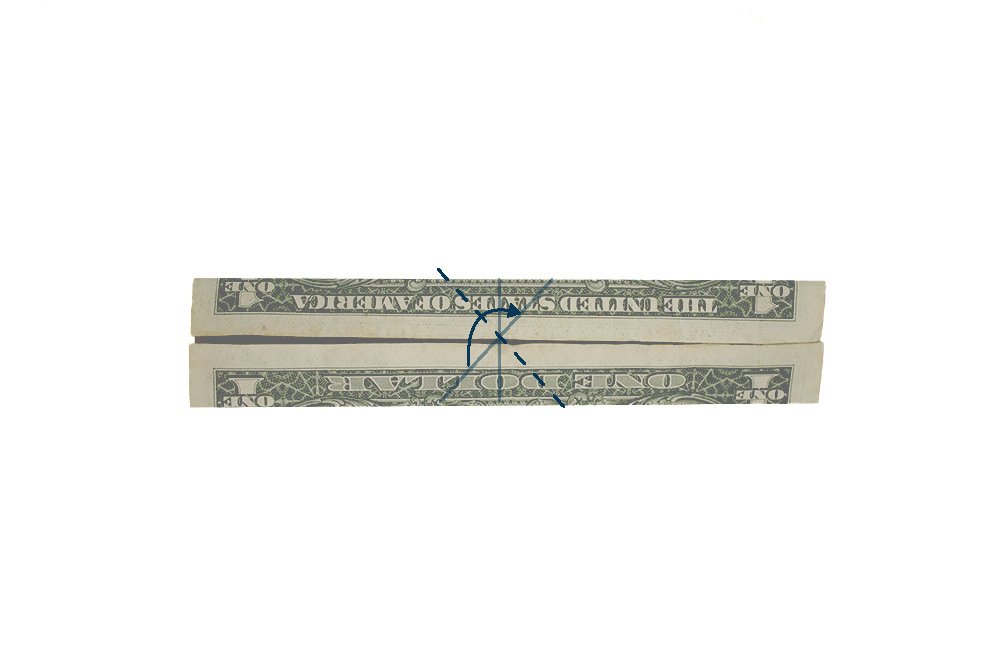
Once creased, repeat the action on the other side of the dollar bill.
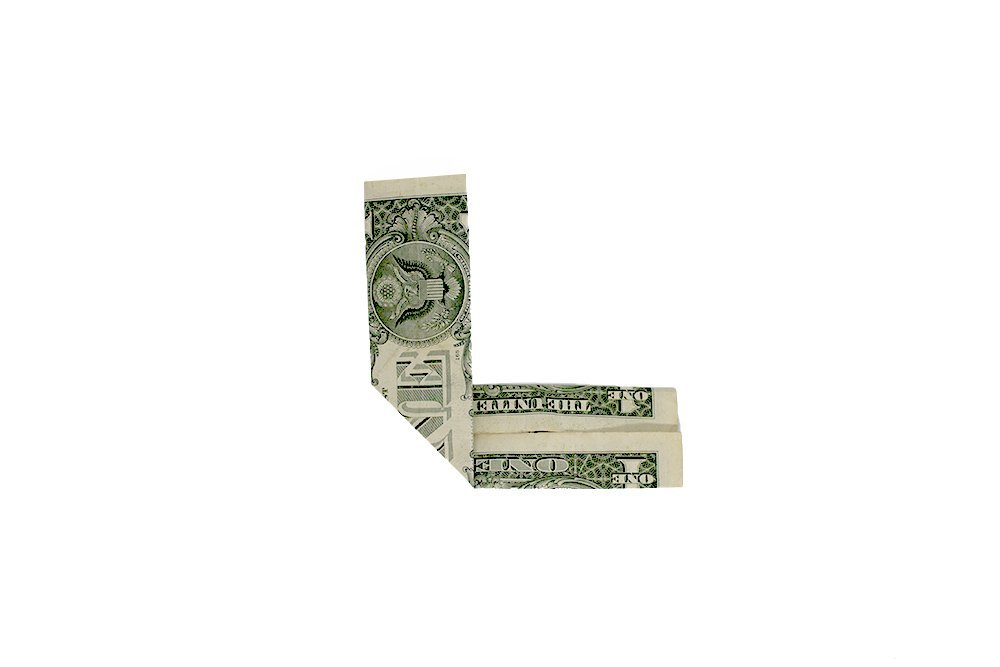
Repeat the diagonal crease fold on the left side. Remember to unfold it to make a crease mark. Once done, the diagonal crease marks made on both sides should form an X.
Create the right flap of the money origami box.
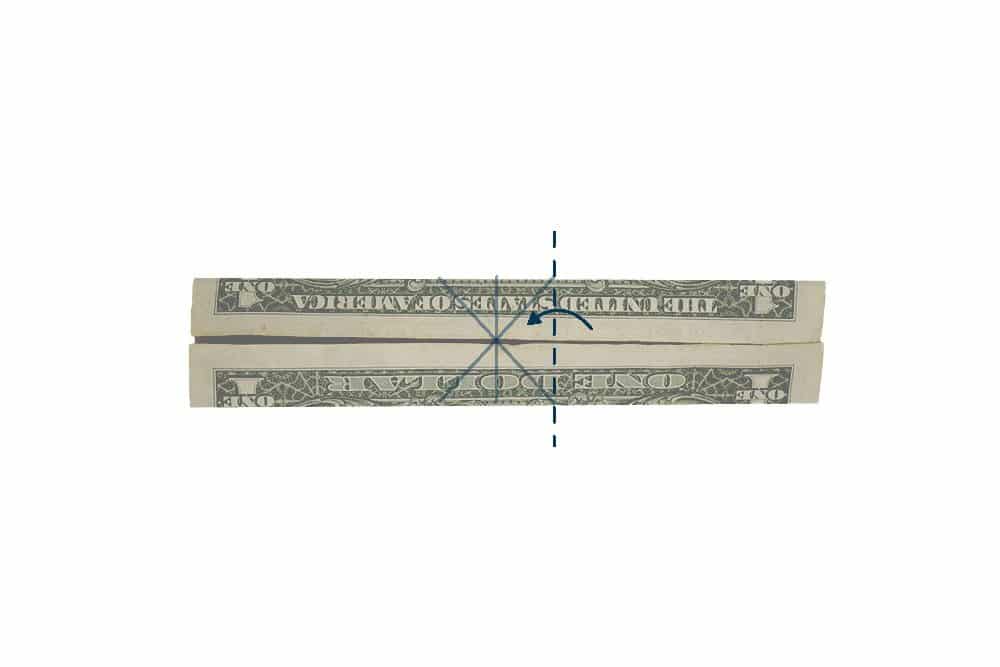
Bring the right side to the left side. Fold it along the right ends of the X crease mark made in the previous steps.
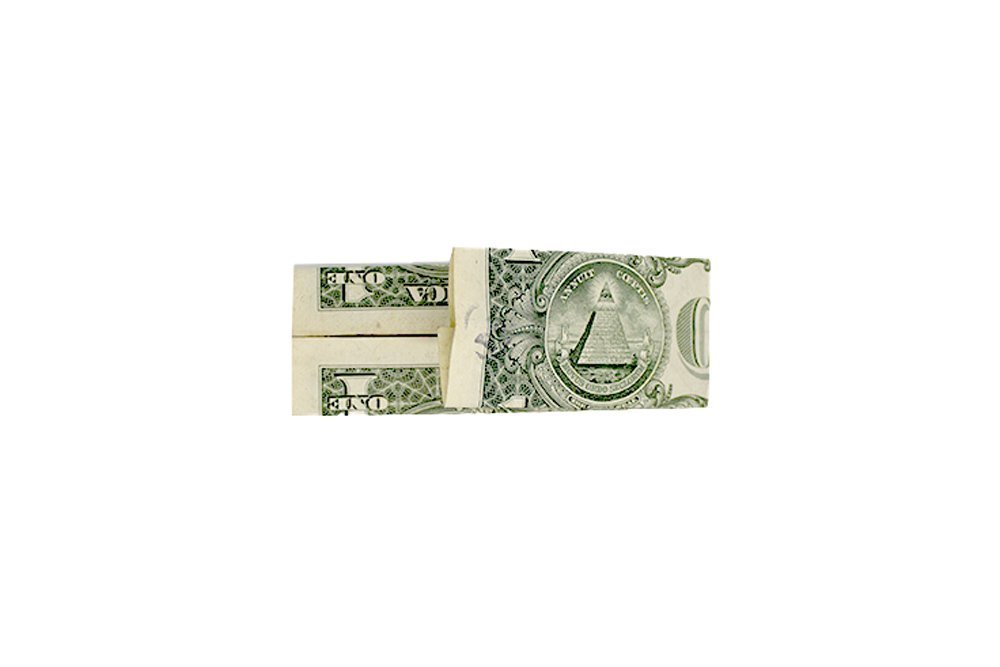
Crease it well and then unfold.
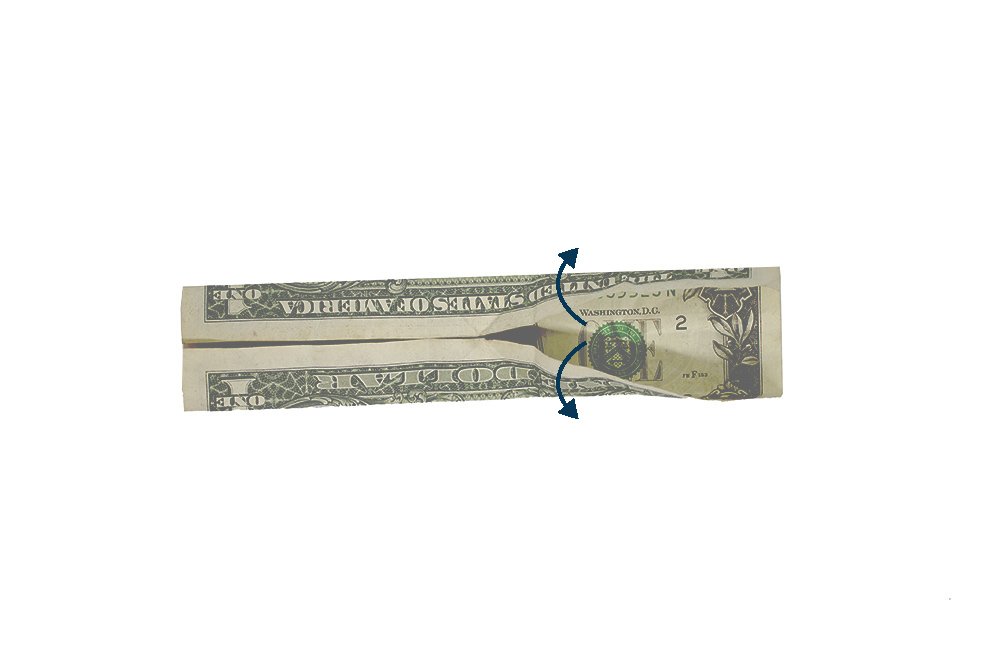
Begin to pry open the top and bottom flap on the right side.
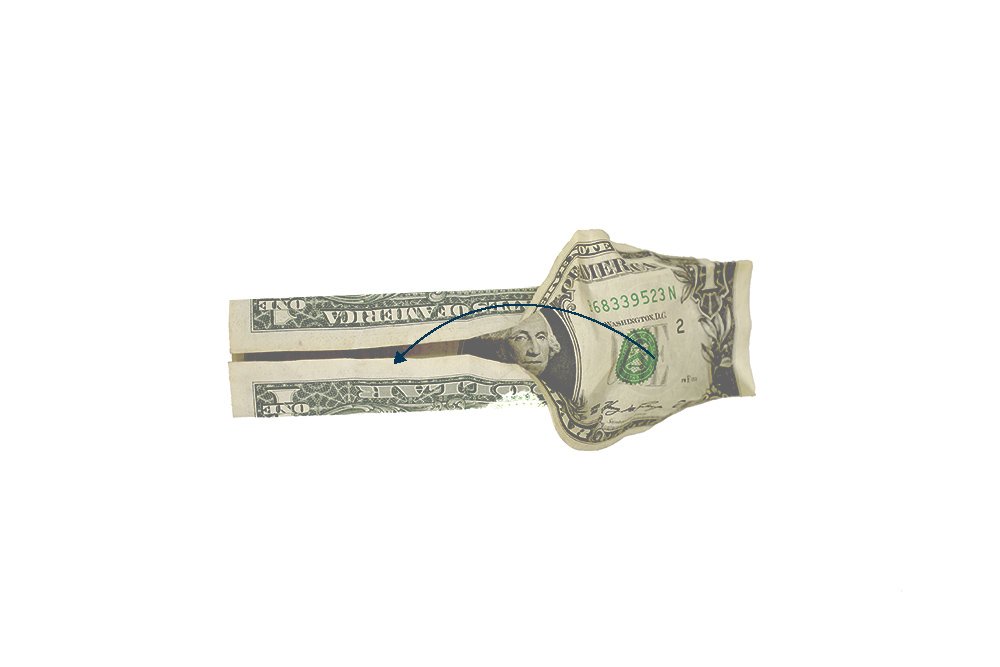
Bring the right part of the dollar bill to the left side as you pry the flap open.
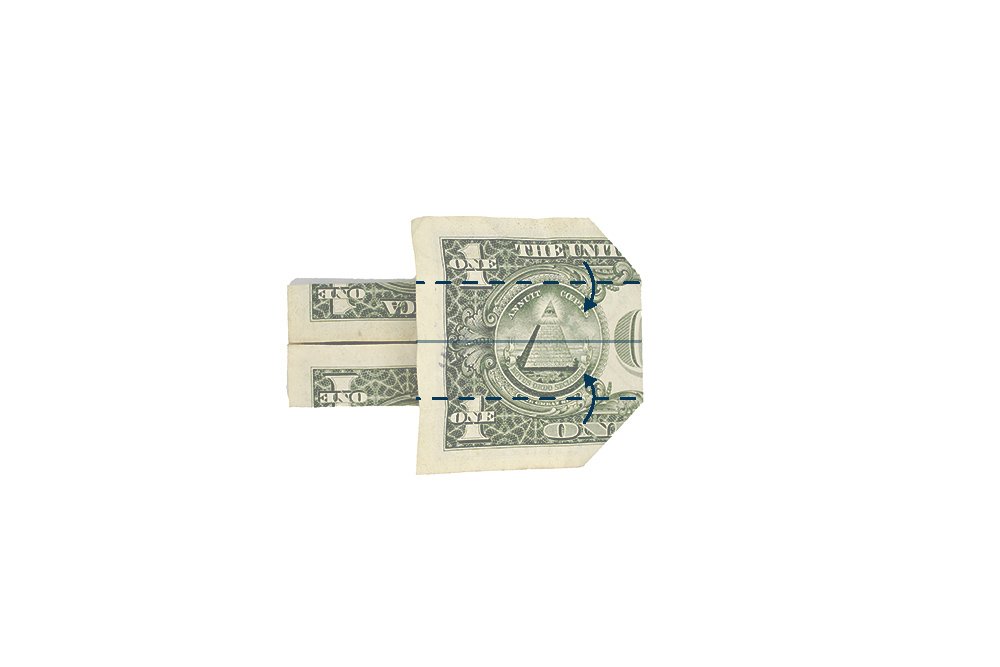
Once you have brought the right part to the left side, flatten it. It should now look like this. Fold the top and bottom edges of the right part inwards.
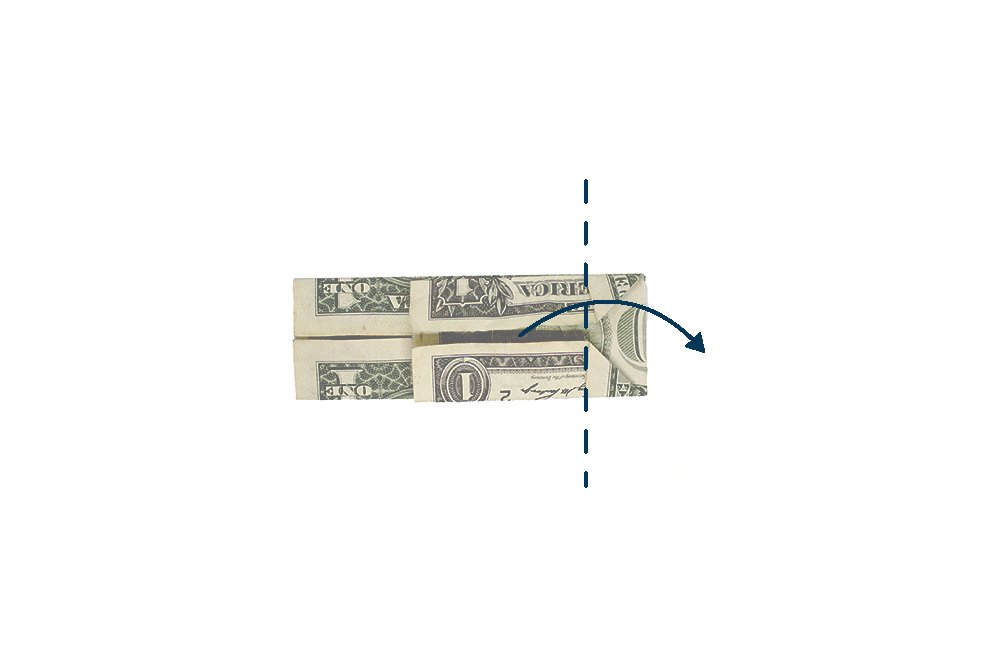
Bring a part of the top flap to the right side. It's up to you how long you want the flap will be. This will be the handle of the origami money box.
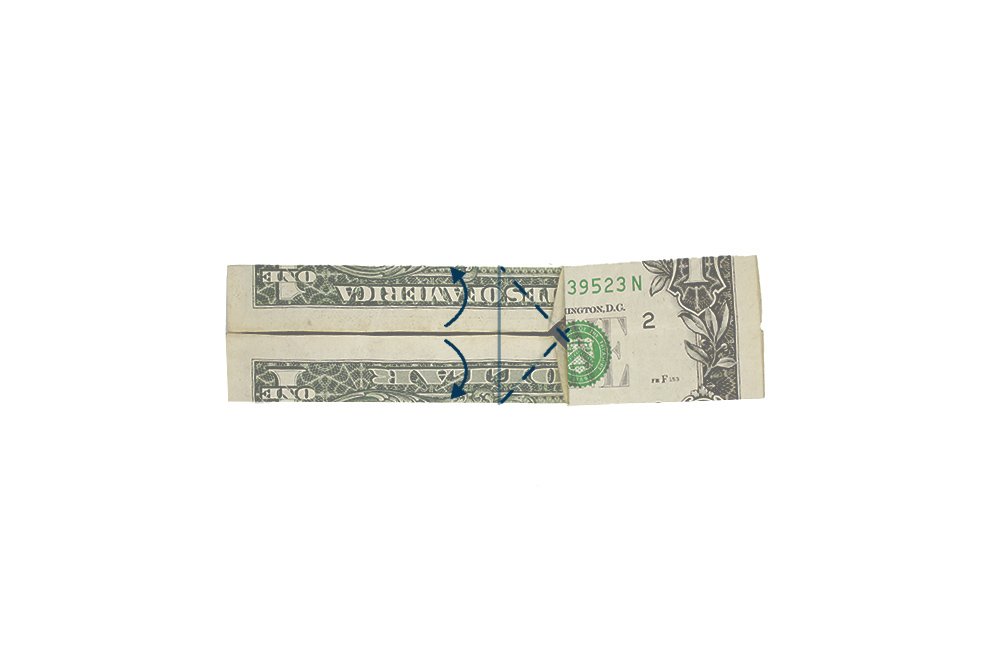
Same as what we did on the right side, pry the flaps open while directing it to the opposite side.
Create the handle on the the left side of the dollar bill box as well
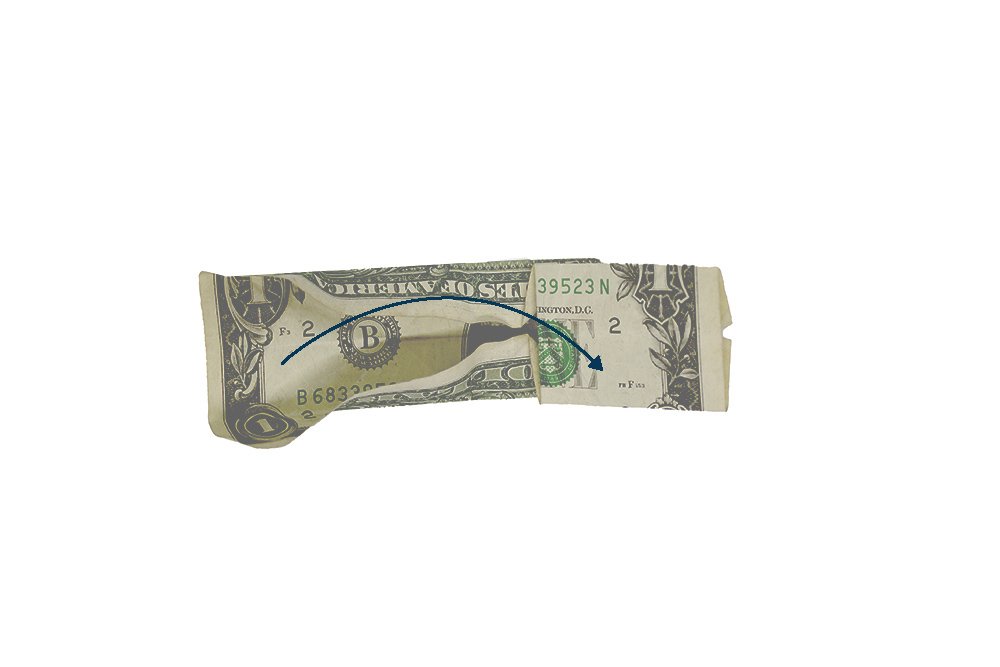
As you pry it open, swing the left part to the right. Then flatten it.
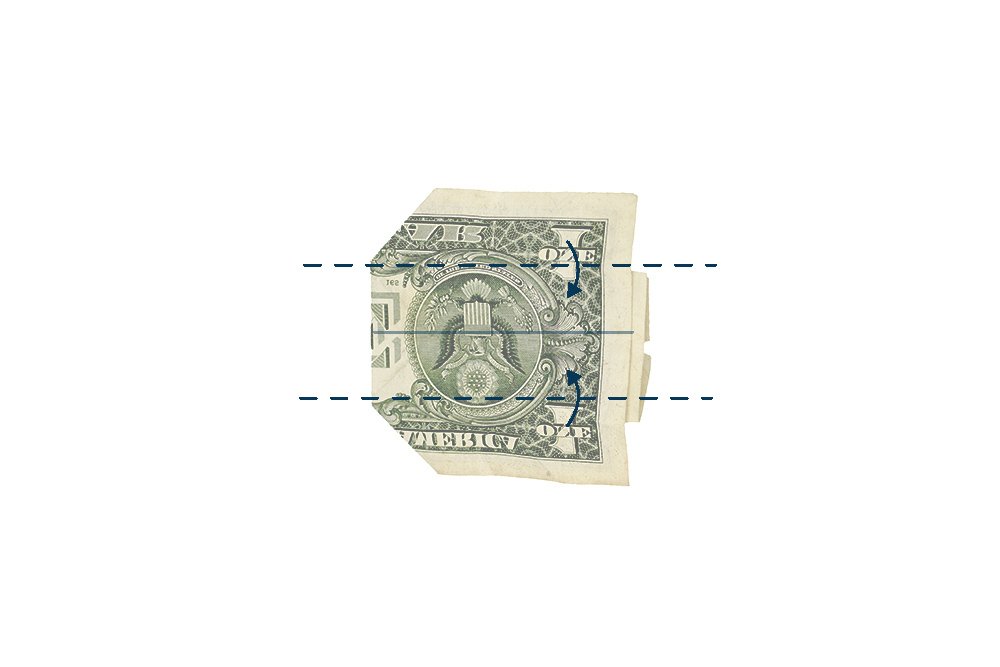
Fold the top and bottom edge inwards to the middle.
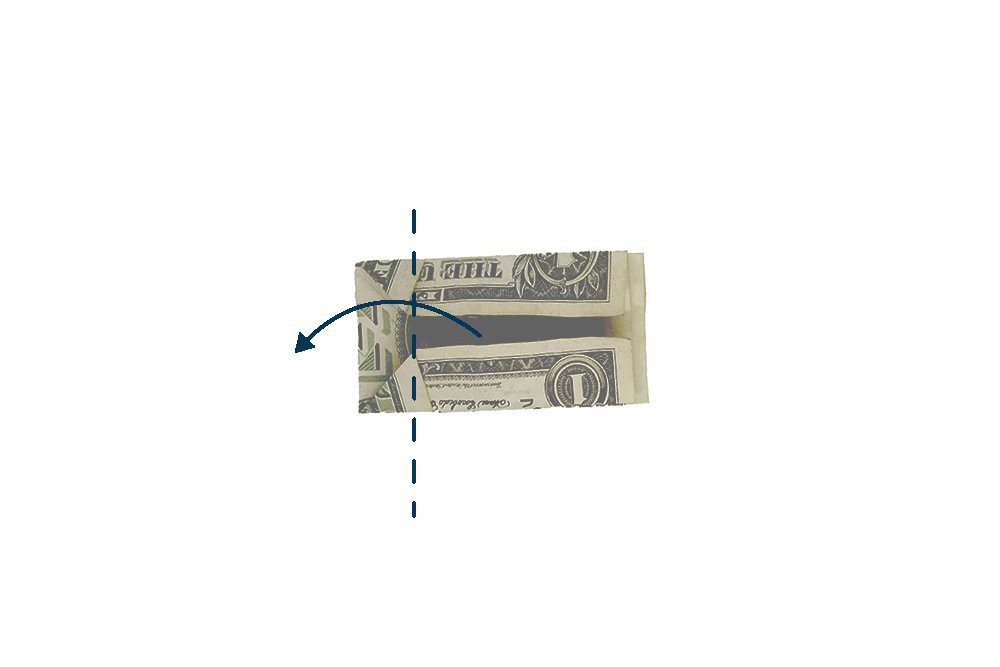
Fold a part of the topmost flap to the left. This will be the left handle of the money box is done!
Pull apart the handle to form the money origami box
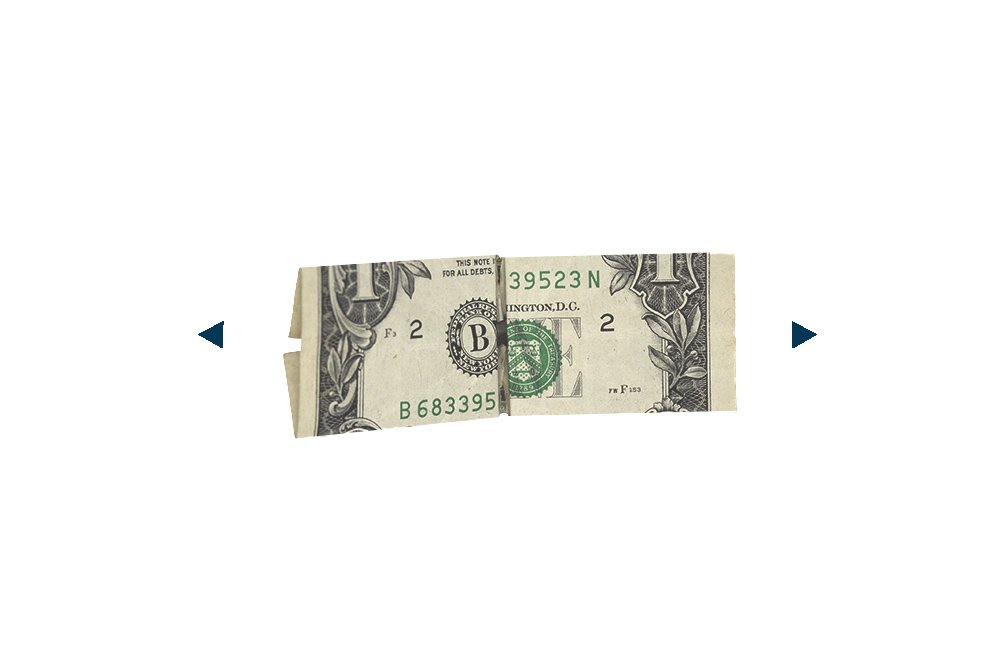
As you can see, there are 2 handles (flaps). We need to pull this two flaps on opposite directions so that the box will form.

Keep pulling and we have now have now formed a money origami box!
Optional step: We can shorten the flap handles more by folding each flap inwards.
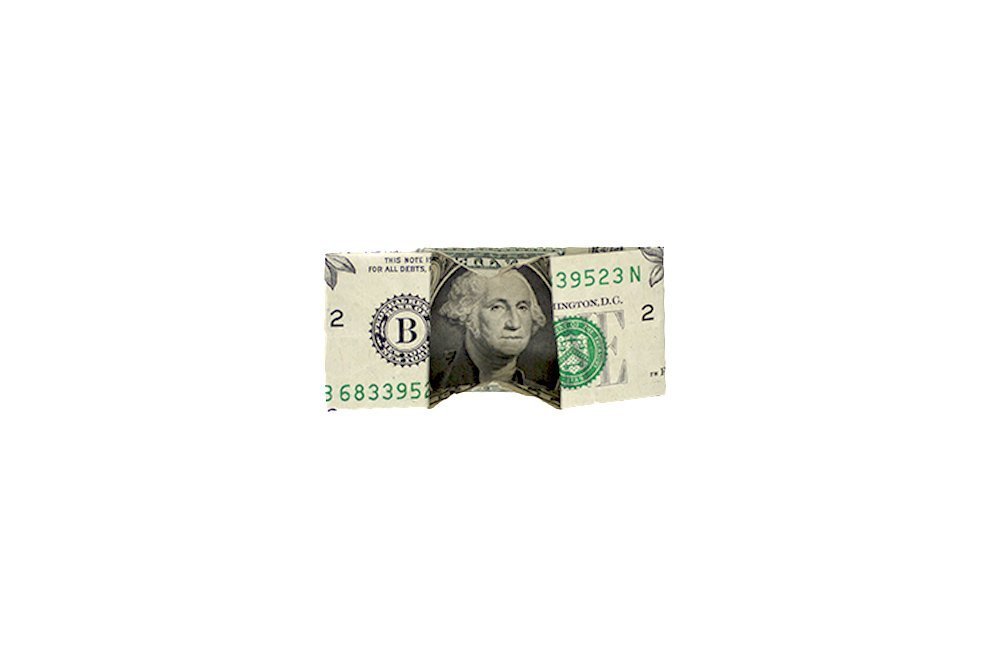
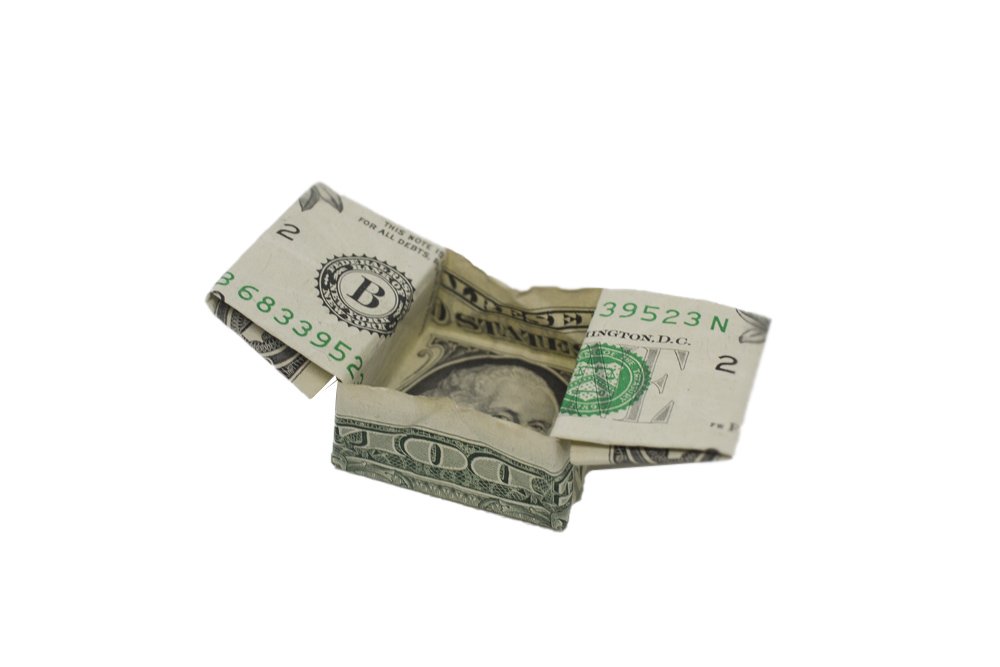
Your money origami box is done.
Extra Tips
- If you don’t want to use a dollar bill then you may use any piece of rectangular paper.
- Make sure to apply enough pressure when making creases and folds. A dollar bill is quite thick.
- Money does not tear easily but it is prone to get crumpled. Practice with fake money or a rectangular piece of paper first if you're planning to give the bill/s as a gift.
- Remember, it is highly advisable that you should not cut, burn, staple, and/or iron banknotes. Handle it with care
- For more origami dollar bill folds, check out the articles below.

