How to Make a Money Origami Graduation Cap and Diploma
Introduction:
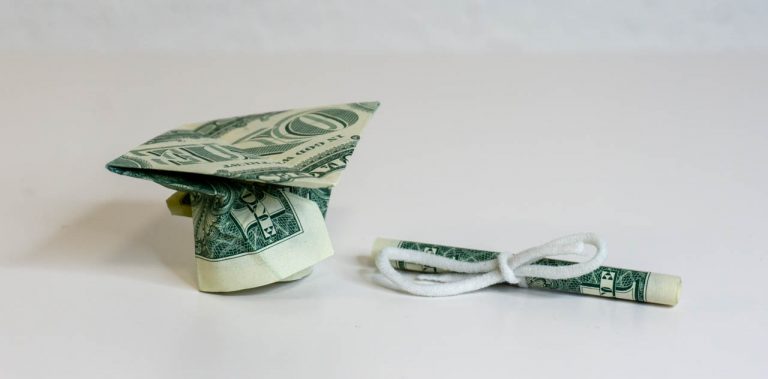
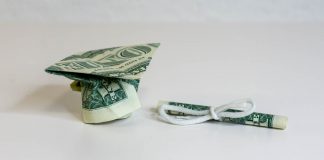
An awesome gift you can give to someone on their graduation is this money graduation cap and diploma. Using two pieces of a dollar bill, you can give your special someone a thoughtful congratulatory present. You will also be needing a ribbon or any piece of string to make the matching diploma for the cap.
A paper with the same ratio and proportion of the side lengths as that of the dollar bill can also be used. This is a bit of a lengthy guide and this fold is geared towards those who have experience in origamis.
Don’t worry though because even beginners can still learn how to do the fold with this guide. Enjoy!
Make the necessary crease marks to form the dollar bill mortarboard
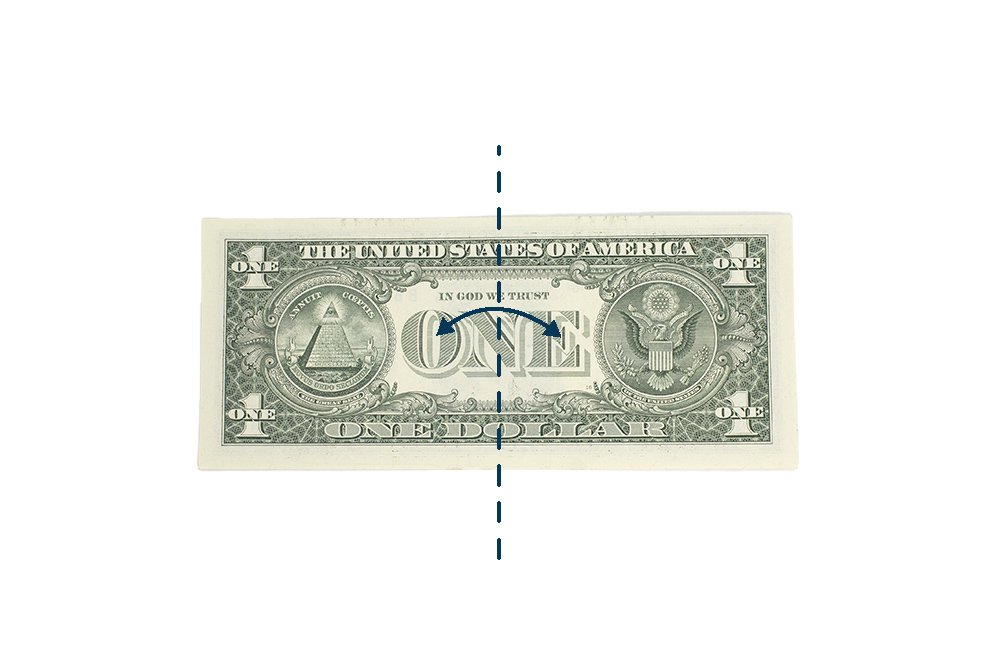
Lay a crisp dollar bill in front of you. Orient it just like the dollar bill is placed on the picture above.
Make a crease line by folding and unfolding lengthwise in half.
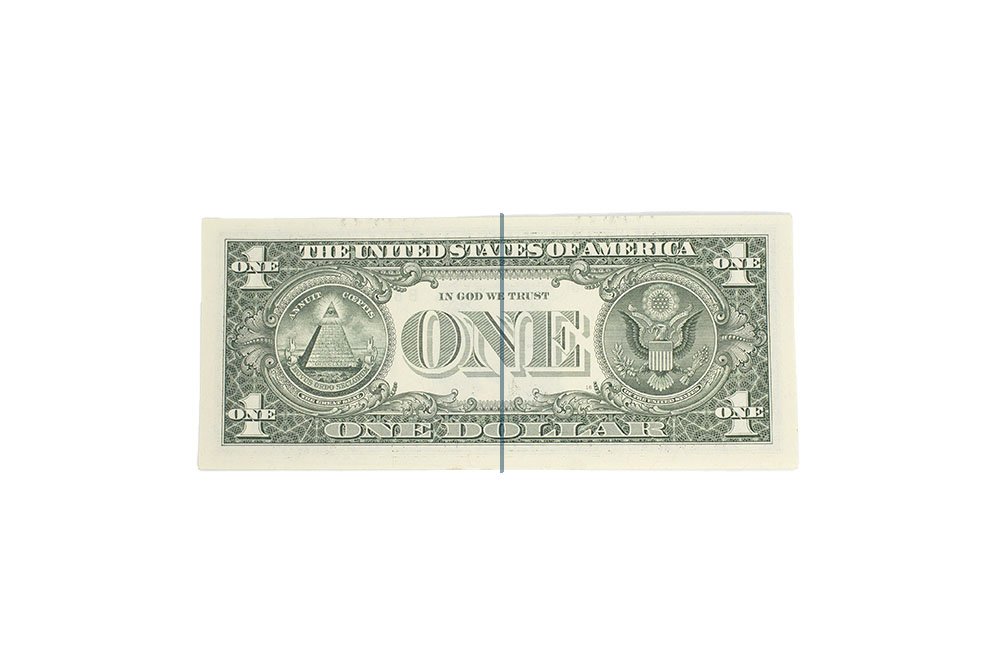
Flip the dollar bill to the other side.
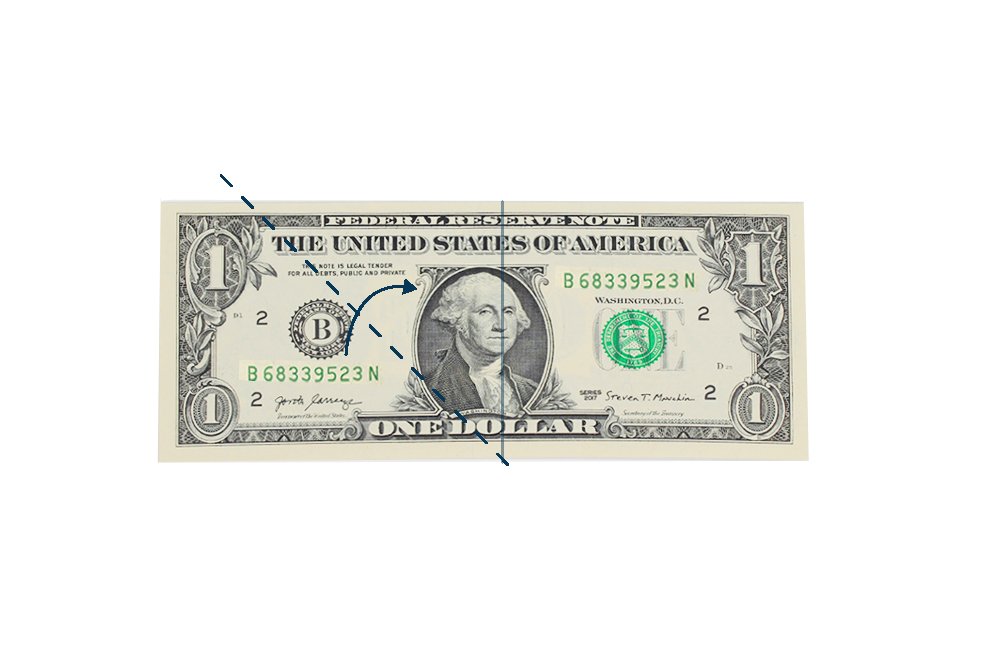
Diagonally fold the right edge. The right edge should be slightly higher than the top edge. Also, the diagonal line should start/end at the bottom point of the middle crease line.
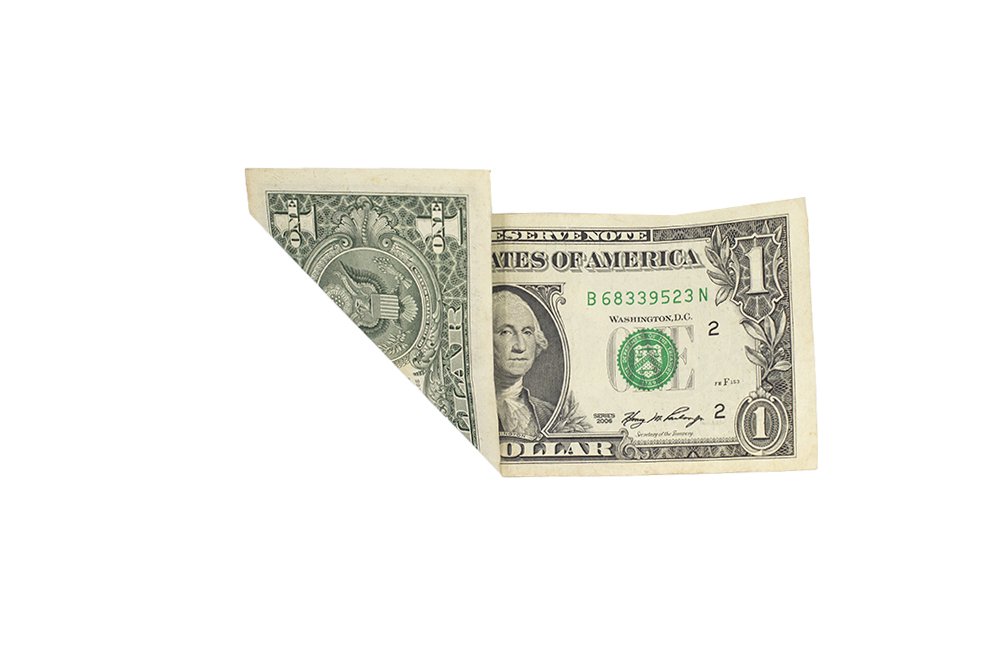
Unfold and you'll then have a nice crease line.
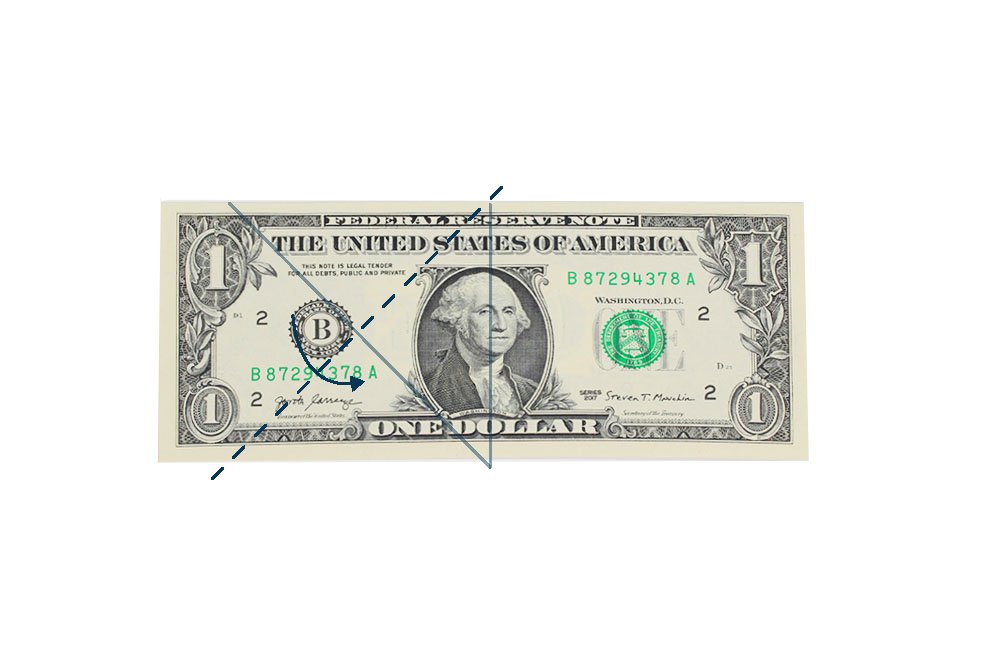
This time fold it towards the bottom.
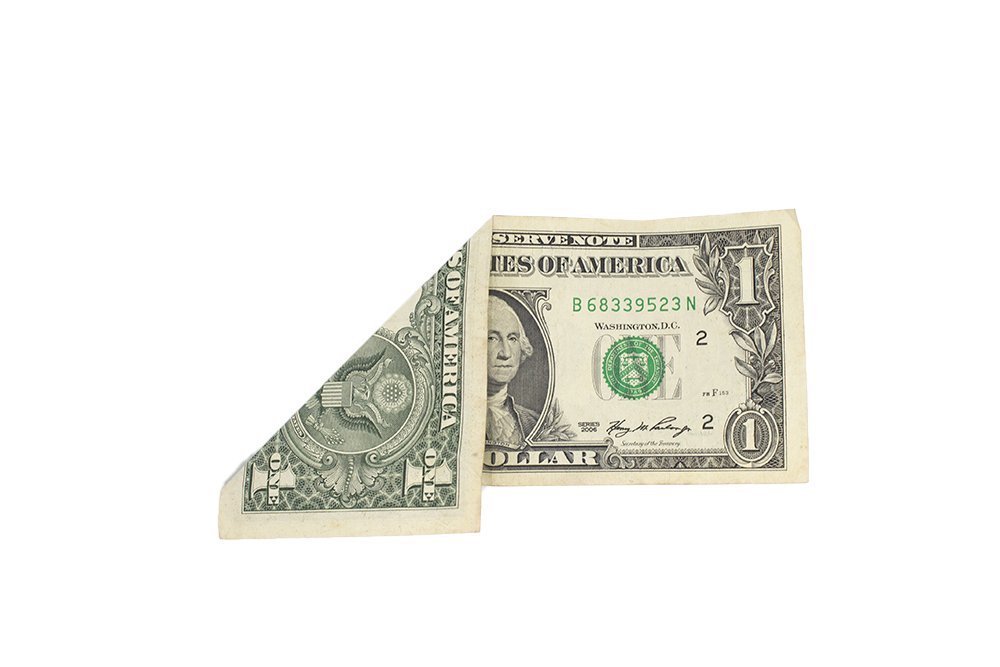
And then unfold.
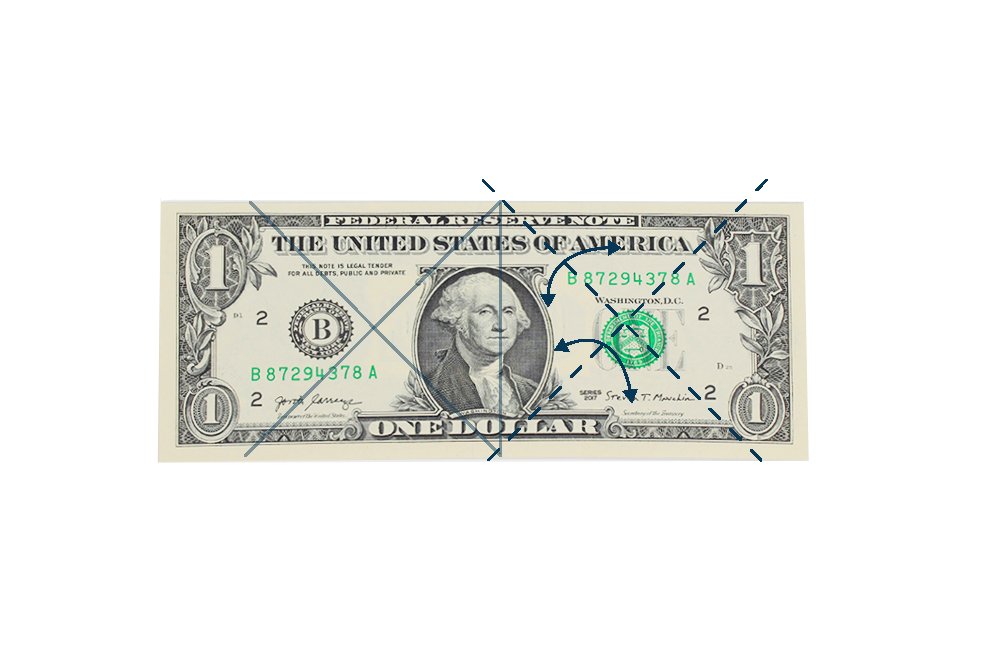
Do the same on the right side of the dollar bill as well. Fold and unfold diagonally along the dashed lines.
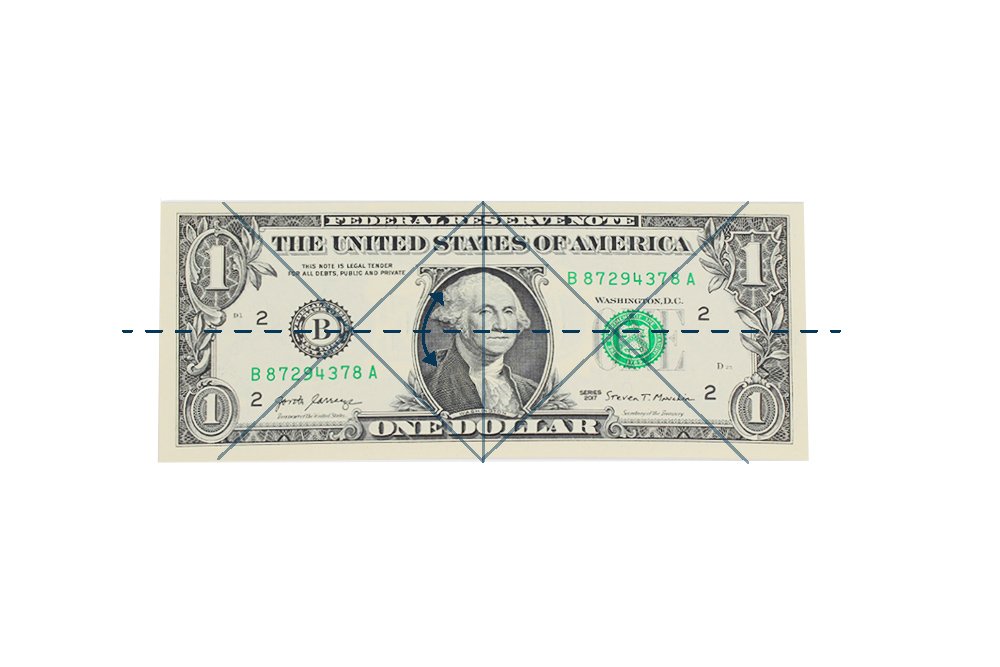
Fold the dollar bill crosswise in half. Crease the paper well then unfold.
Great job, now it's time to move on to the next set of steps.
Flatten the left and right edges
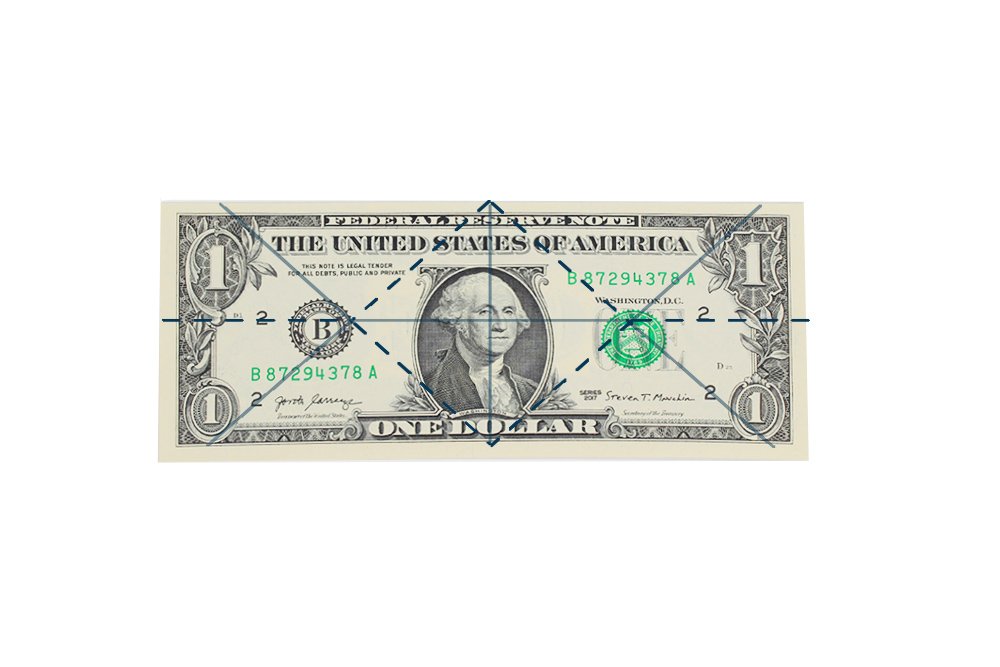
Fold the dollar bill inwards along the diagonal crease lines. Use the crease lines as guide to fold the dollar bill easily.
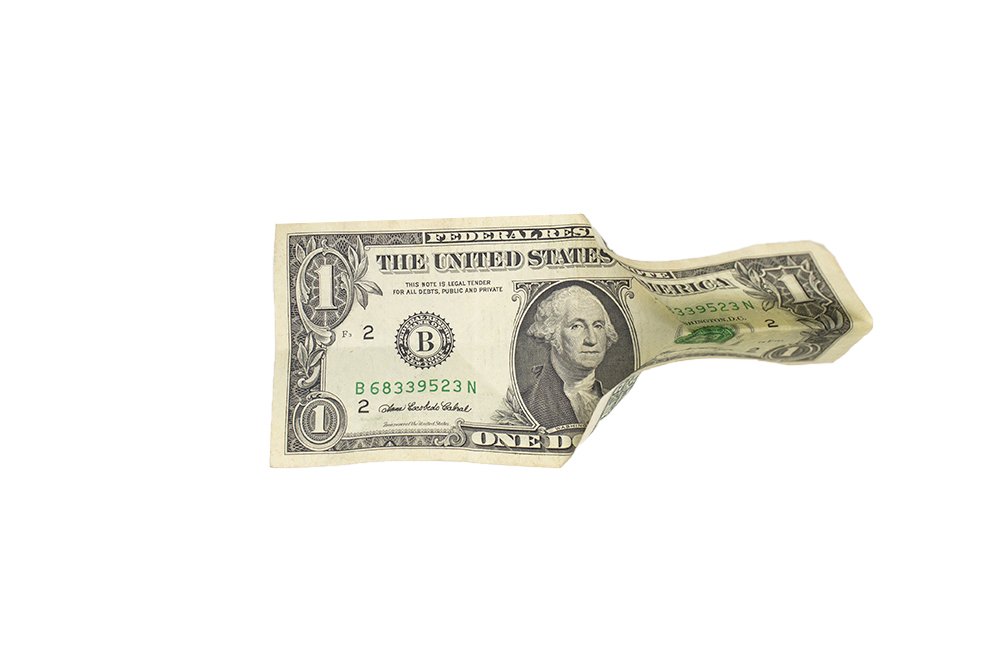
Start with the right side.
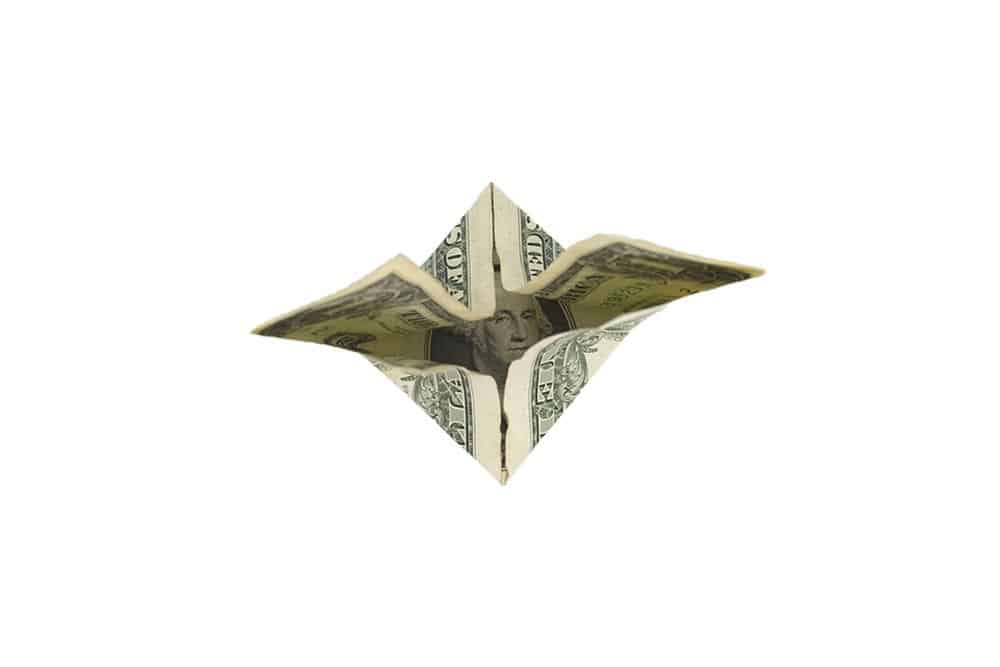
Then do the same for the left side. This is how it looks like when you collapse the dollar bill to the center. It should fold along the creases made.
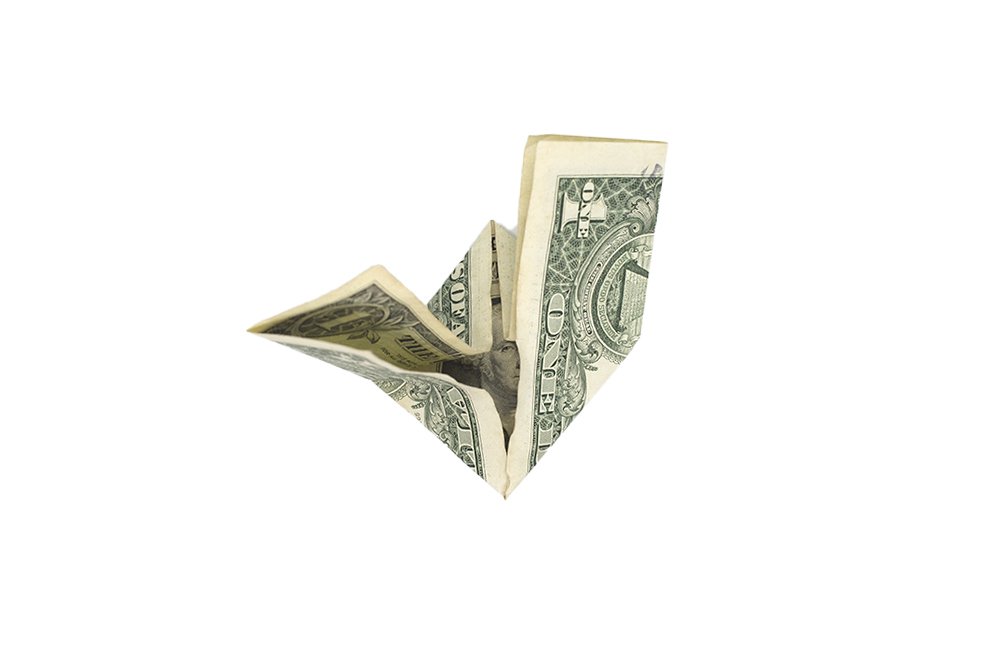
Flatten the right side of the dollar bill as shown in the image above.
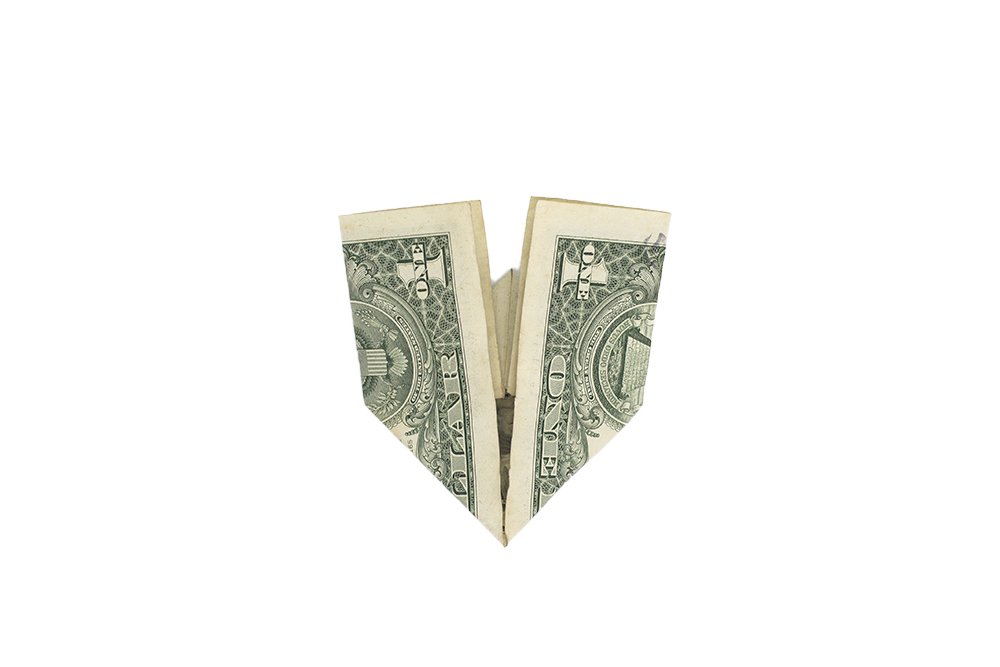
Do the same on the left side like the right part of the dollar bill as well.
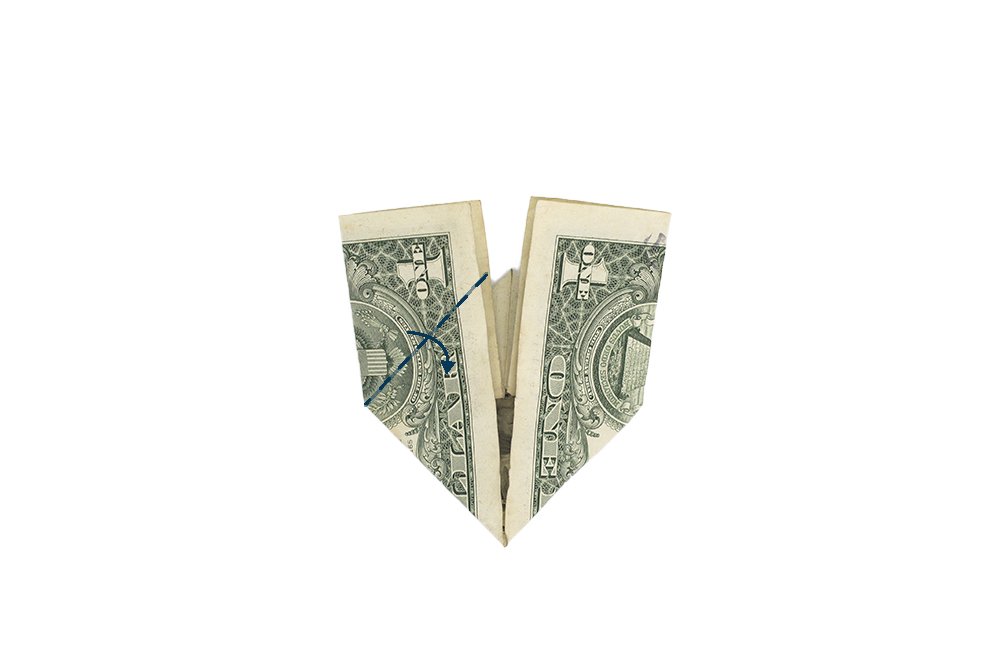
Diagonally fold the left flap downwards. Crease it well then unfold.
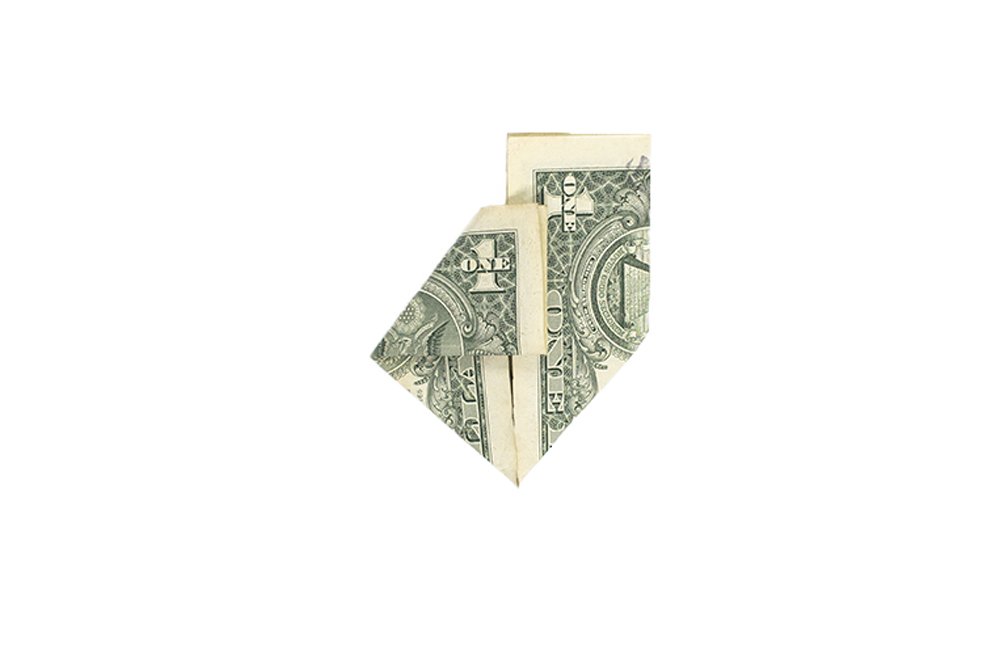
Unfold the previous fold made.
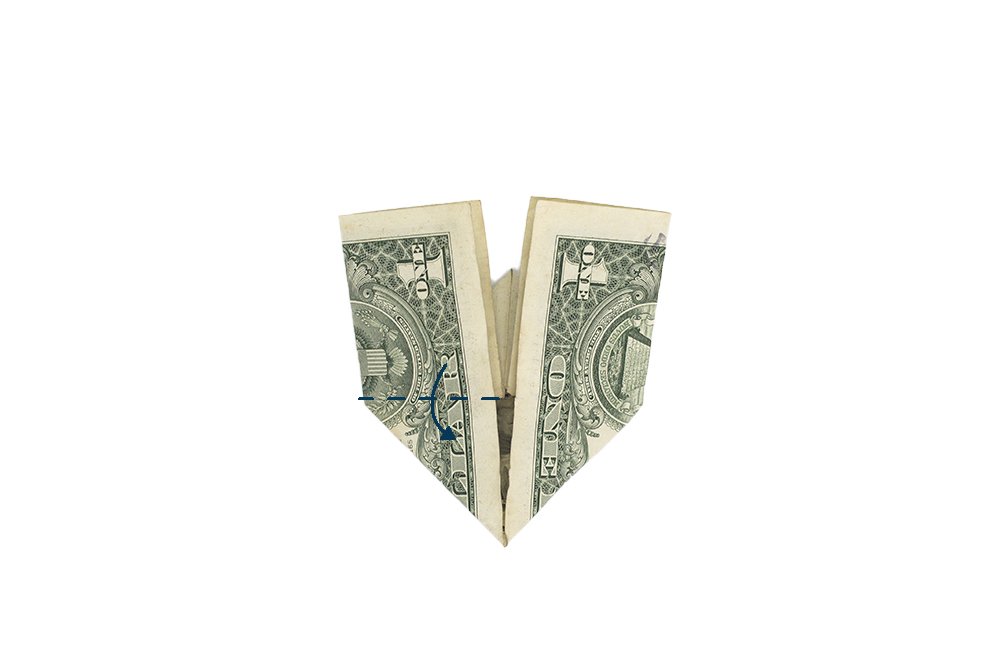
Bring the left top flap downwards along the dashed line.
Shape the left side of the dollar bill graduation cap
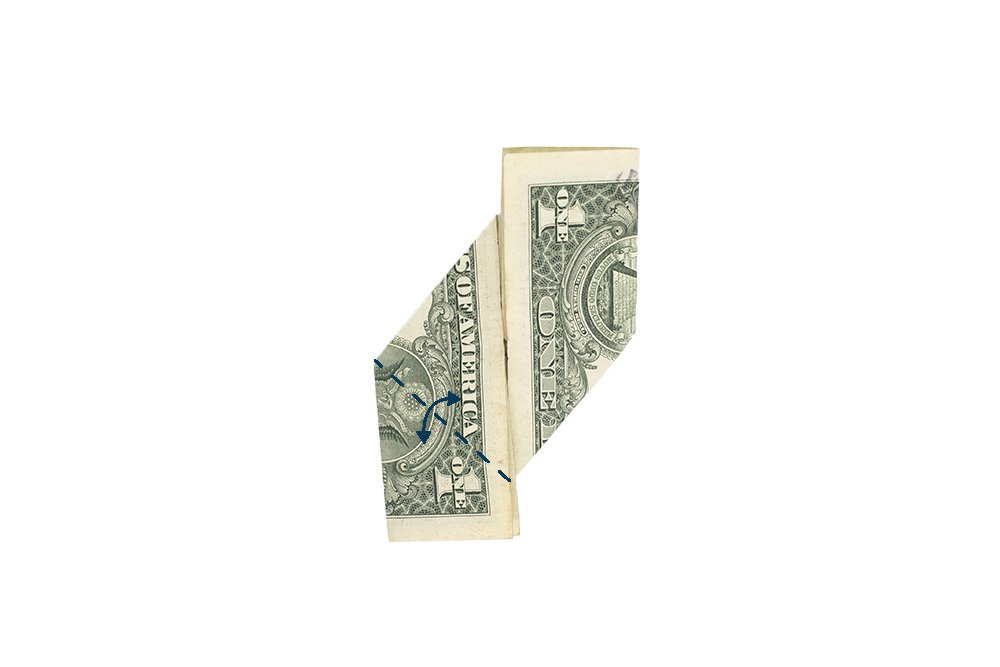
Diagonally fold and unfold the bottom left flap upwards. Crease it well then unfold.
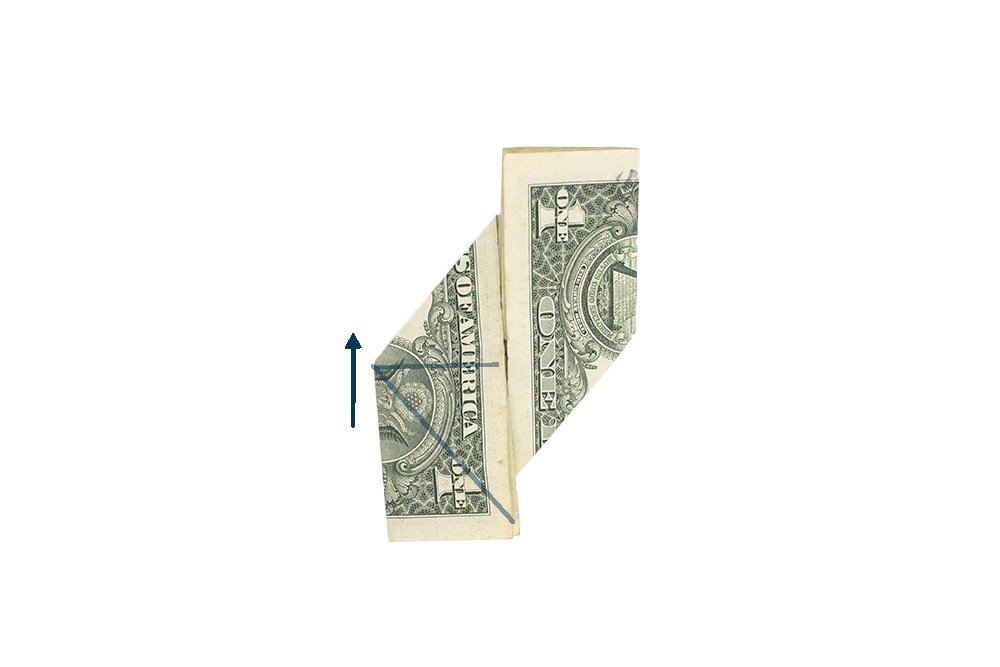
Lift the top flap so that it is pointing towards the sky.
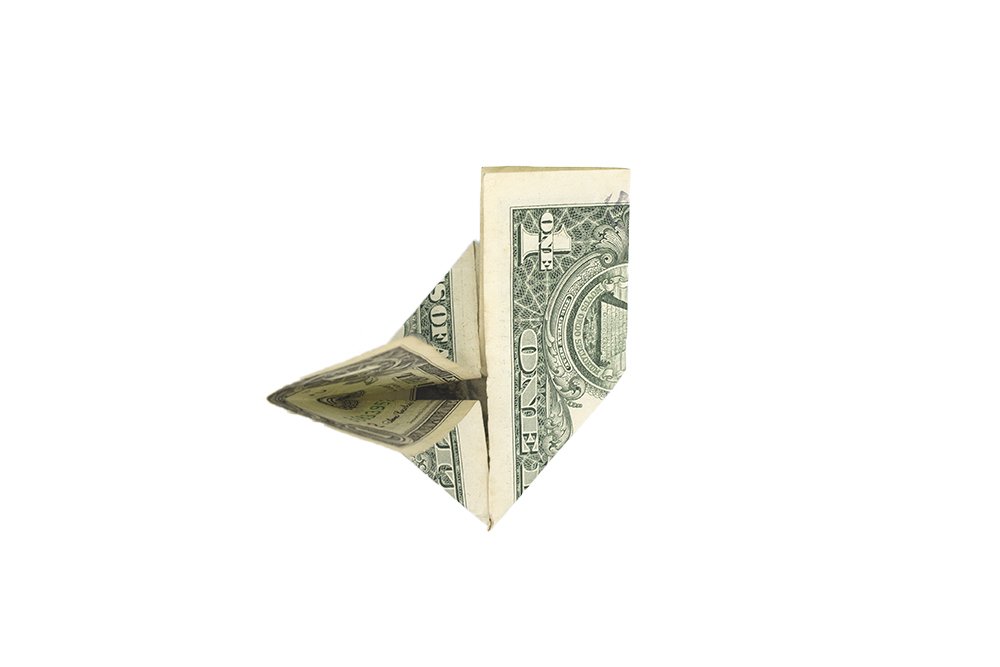
Bring the flap to the middle like what is shown in the image above.
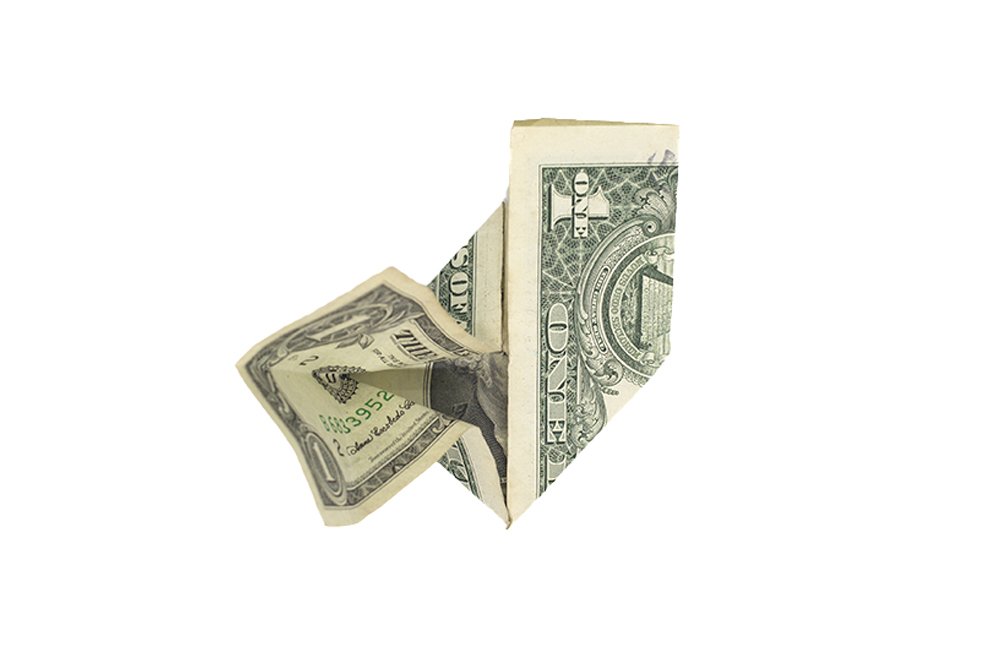
As you pry it open, squash it down.
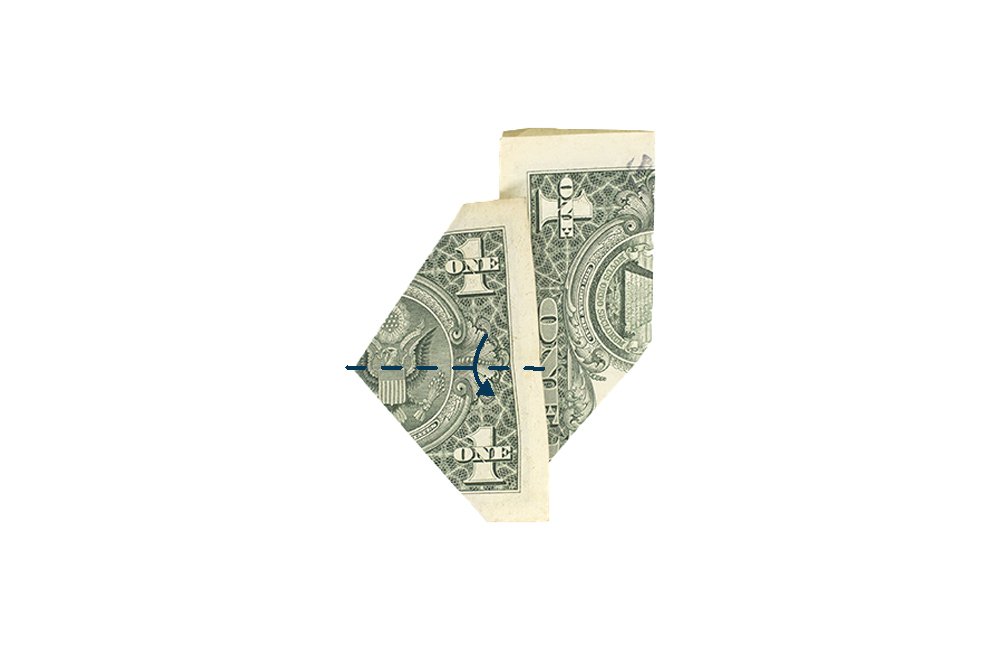
Once squashed, it should now look like the illustration above. Flip the top part of the left side to the bottom part along the dashed line.
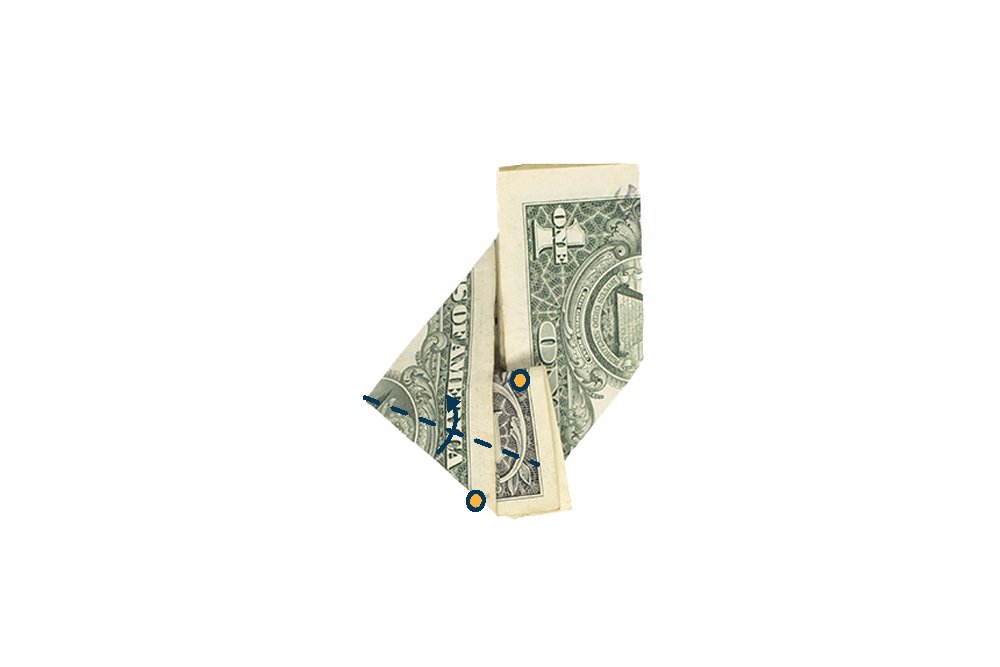
Fold along the dashed line as illustrated in the image above. Make sure to fold the top flap only and use the yellow dots as a guide on where you should fold the bottom flap.
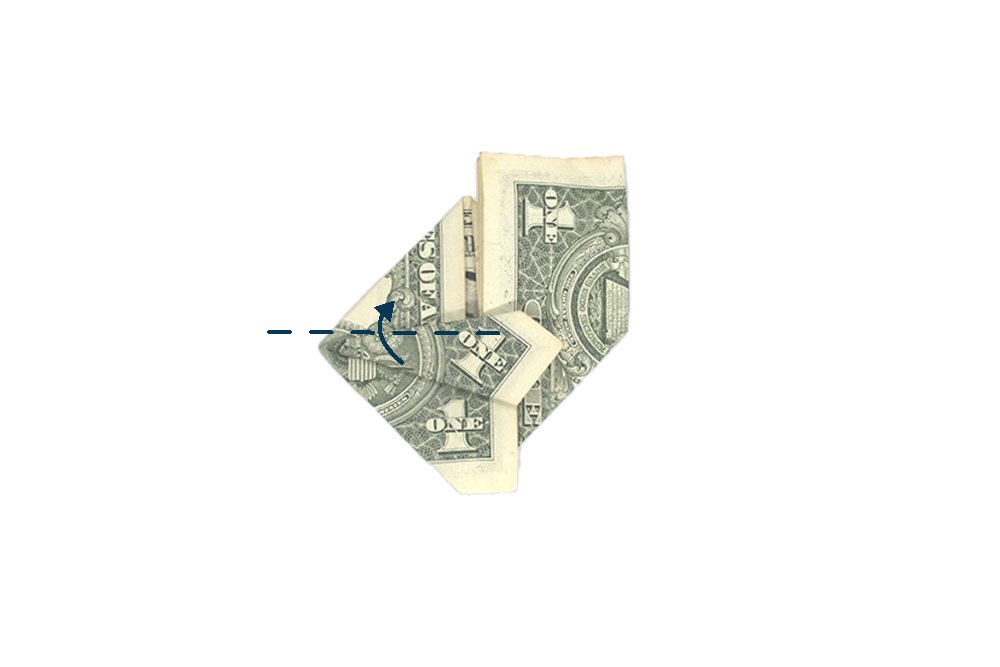
Bring this section to the top part of the dollar.
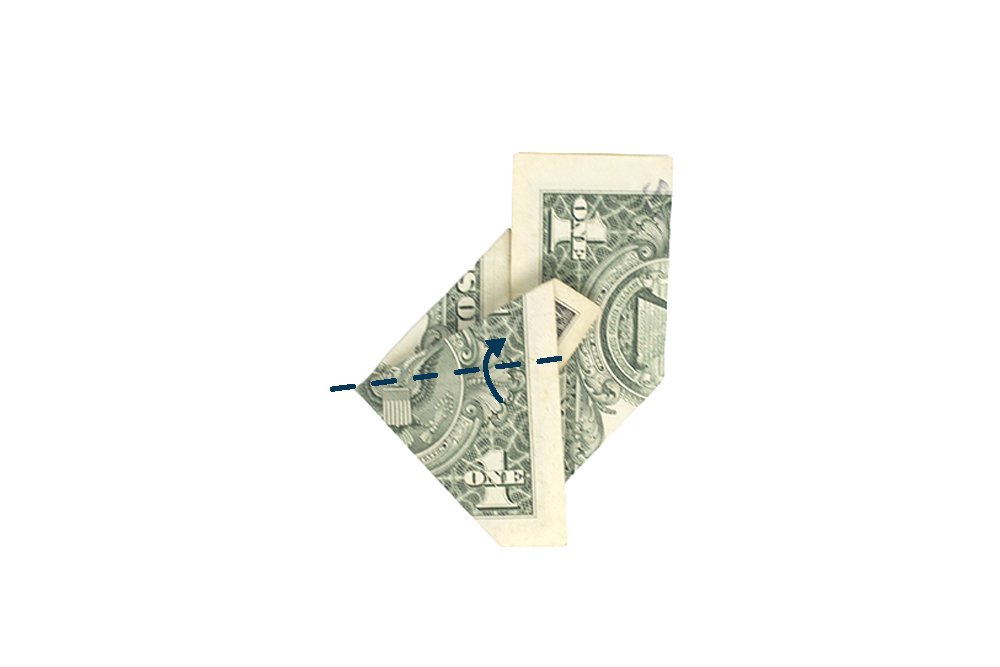
Flip the bottom part upwards on the top side of the dollar bill.
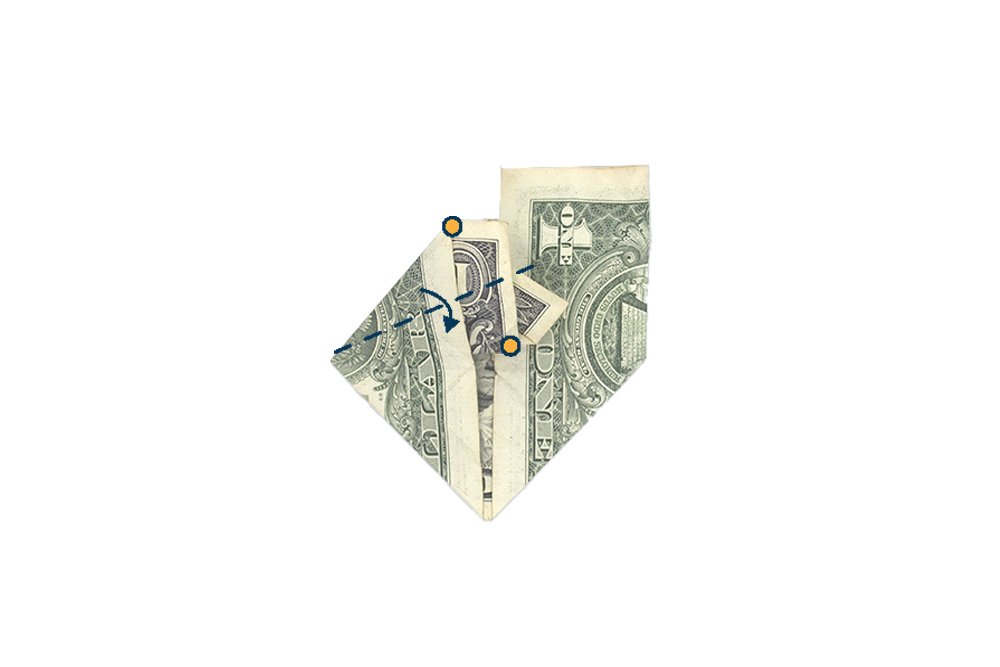
Fold along the dashed lines as shown in the image above.
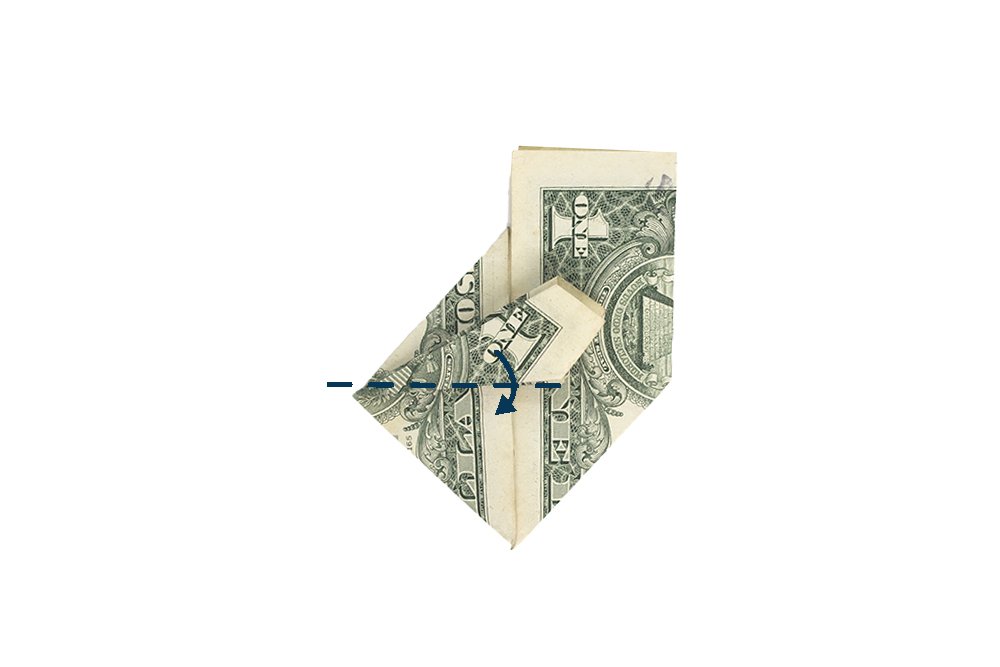
Bring the top layer part downwards.
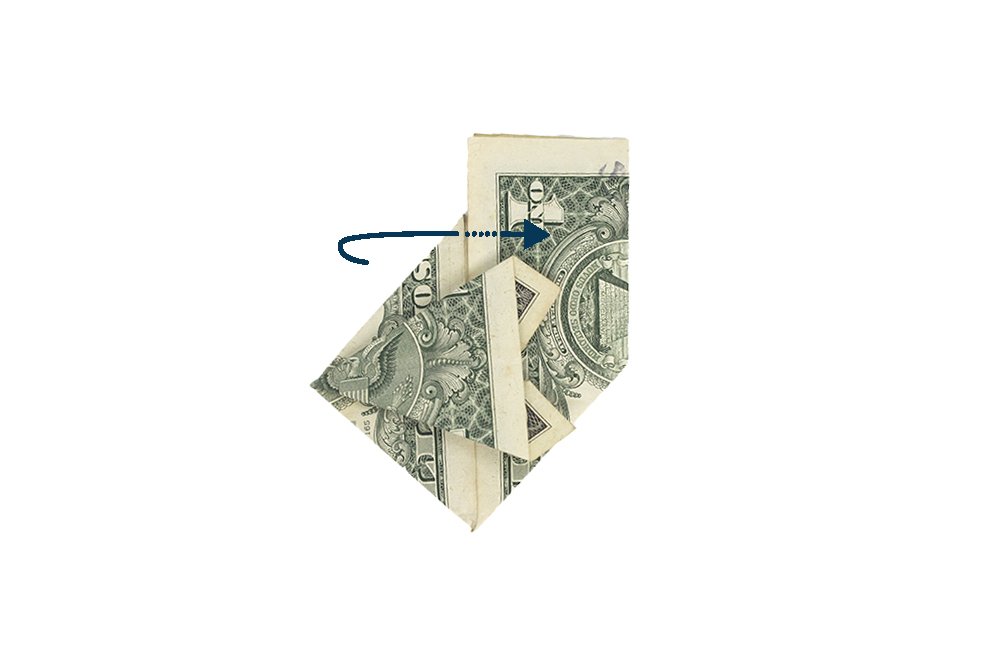
Bring the left part side to the back. It should look like the next image on the next set of steps.
Finish the Origami Graduation Cap
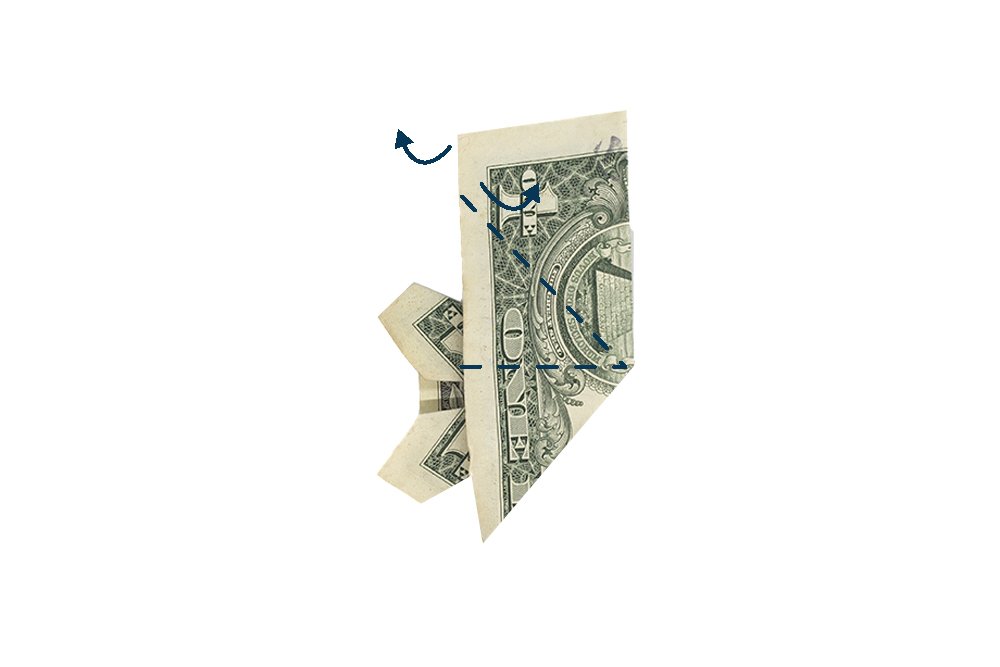
Repeat the previous set of steps (Step set 3) on the right side of the dollar bill.
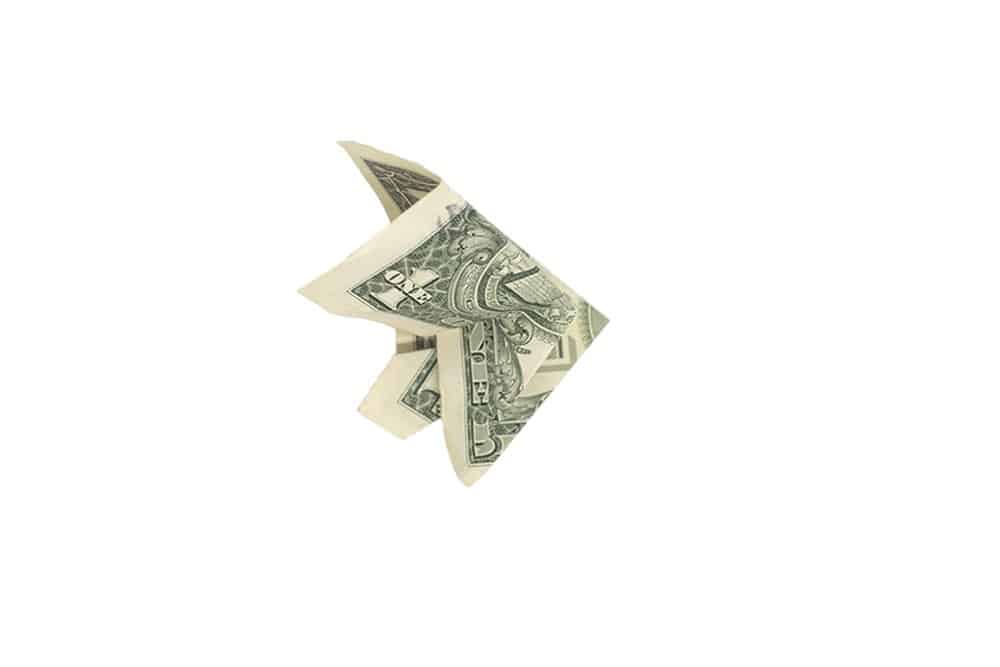
That is to make the necessary crease marks along the dashed lines. Pry the right flap open and make a squash fold.
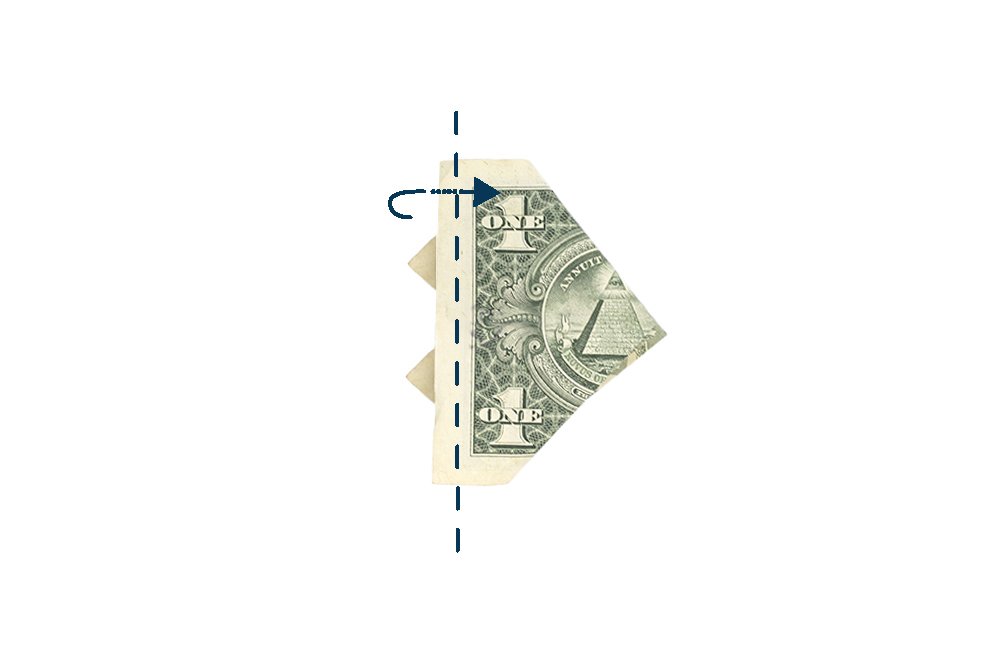
Mountain fold along the dashed line. Crease well and unfold.
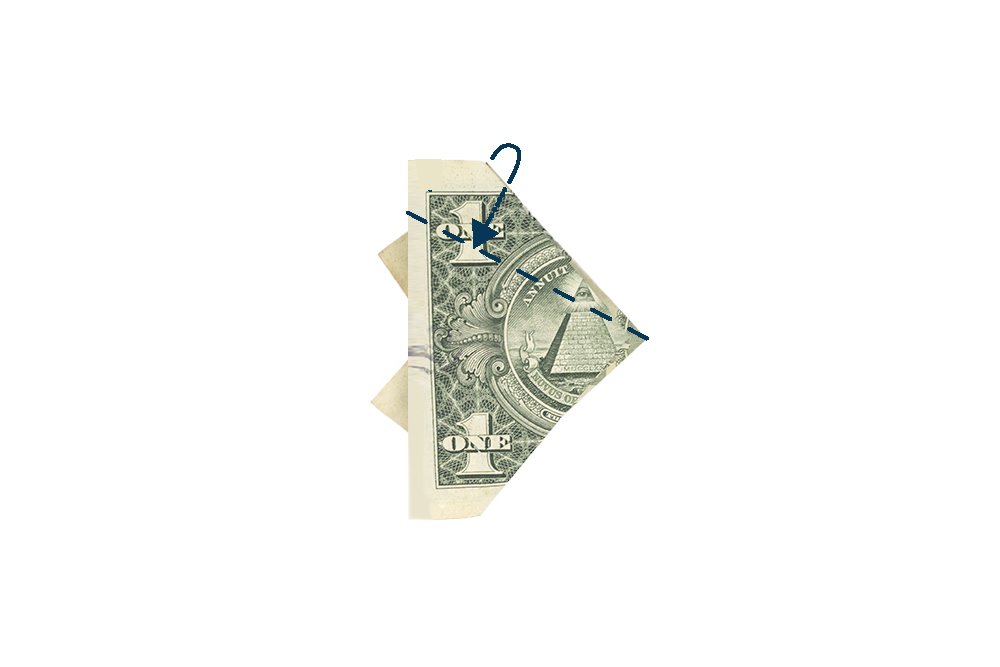
Bring the top edge of the topmost flap inwards.
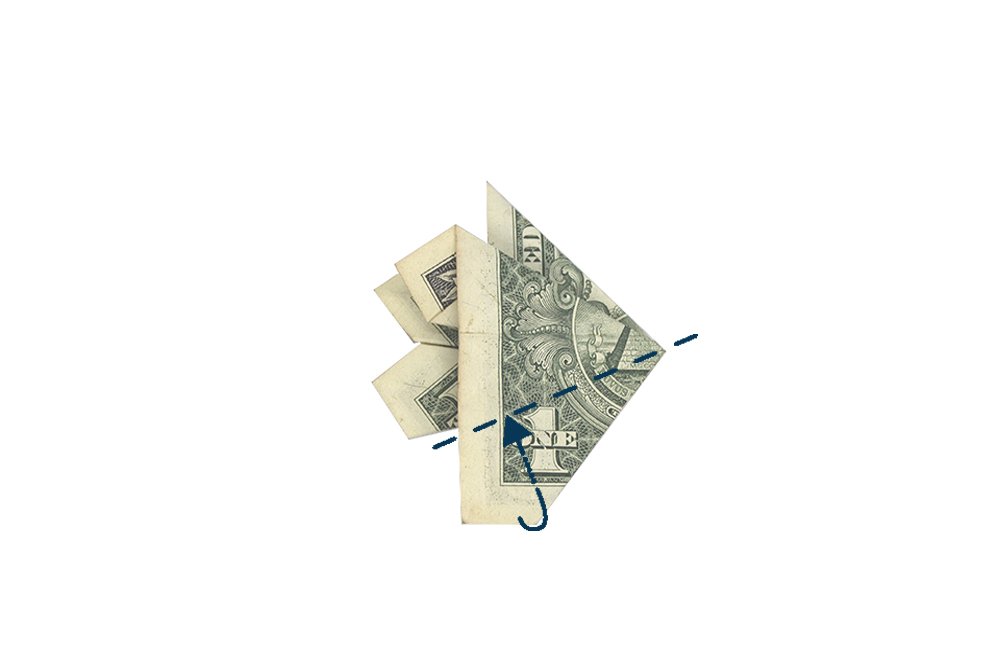
Mountain fold the bottom part as well. Follow along the dashed line.
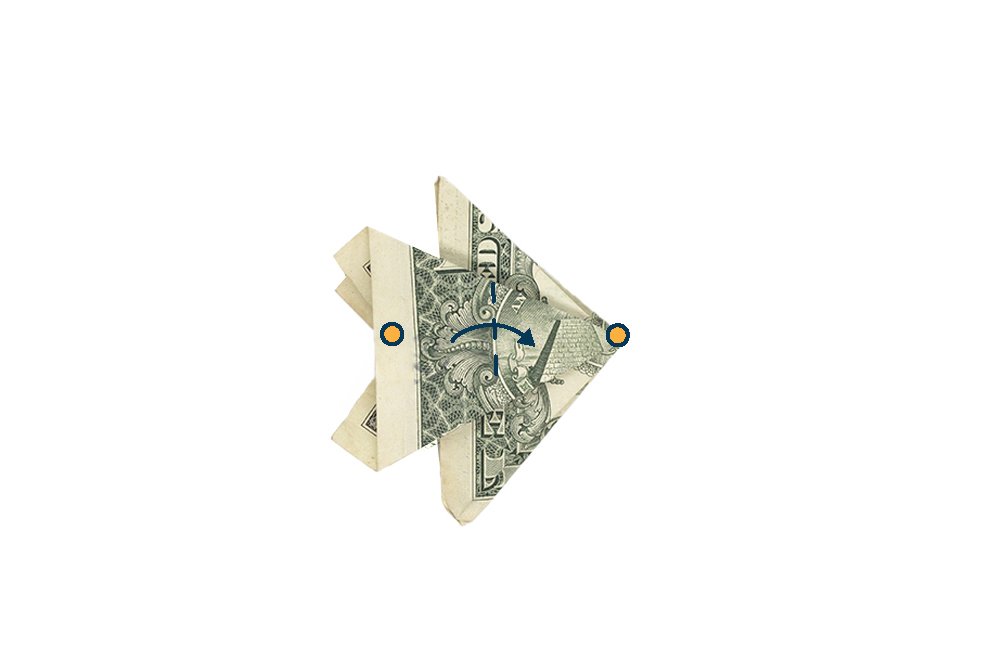
Fold the left side towards the right.
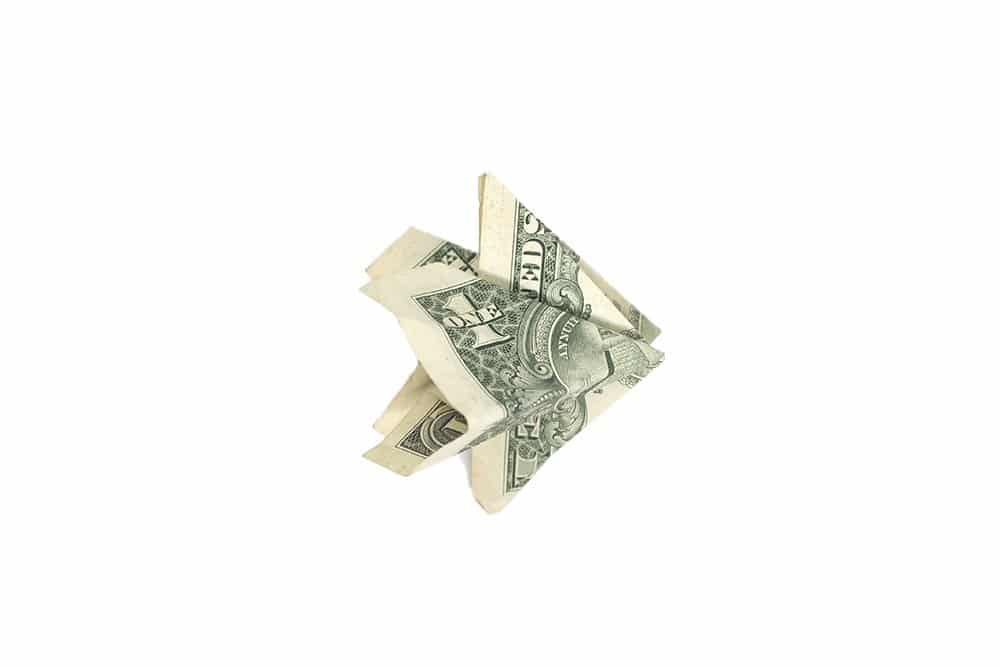
As you bring it to the right, pry it open.
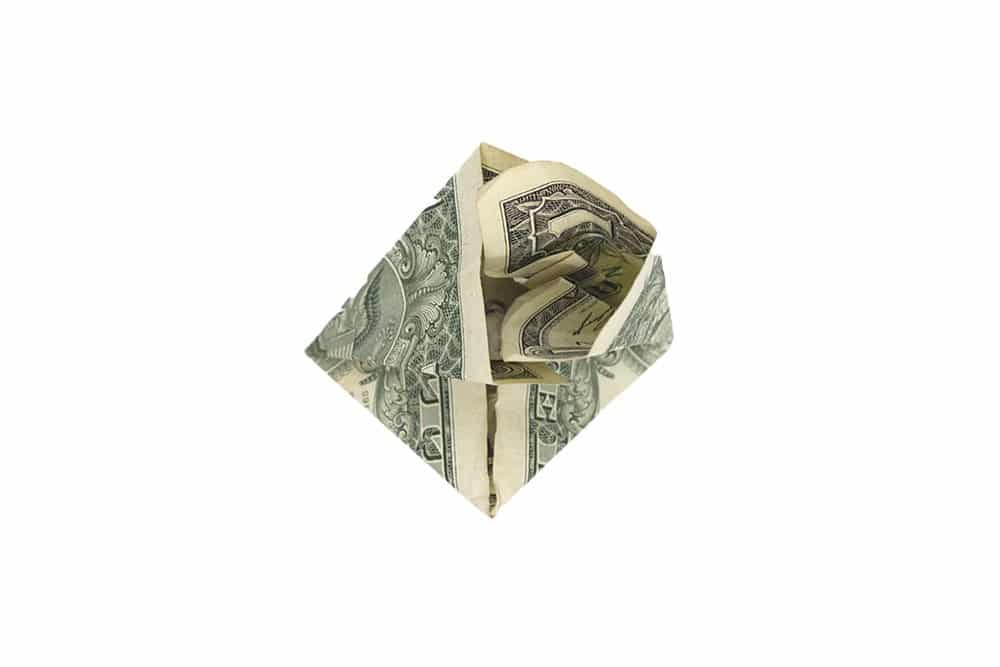
Make the right flap into a semicircle.
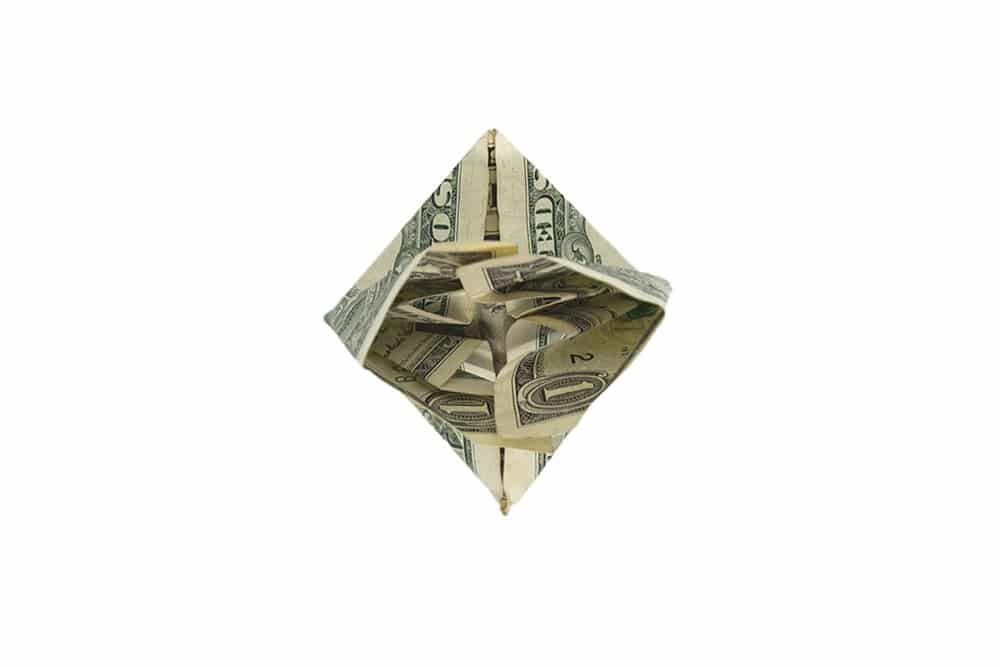
The dollar origami should now look like this.
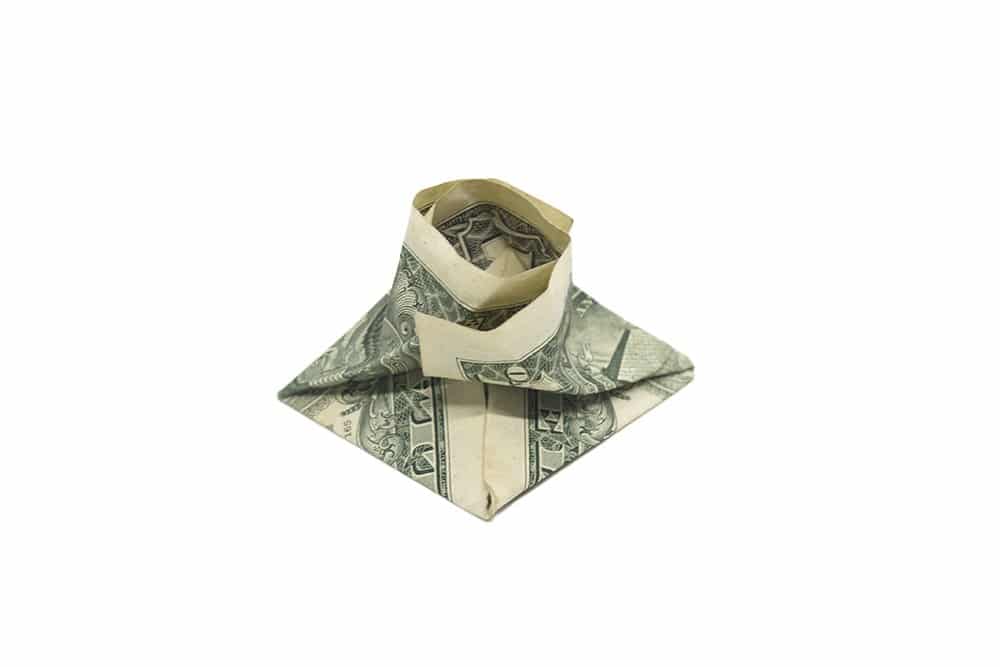
Merge the two rounds together by sliding the right side over the left side.
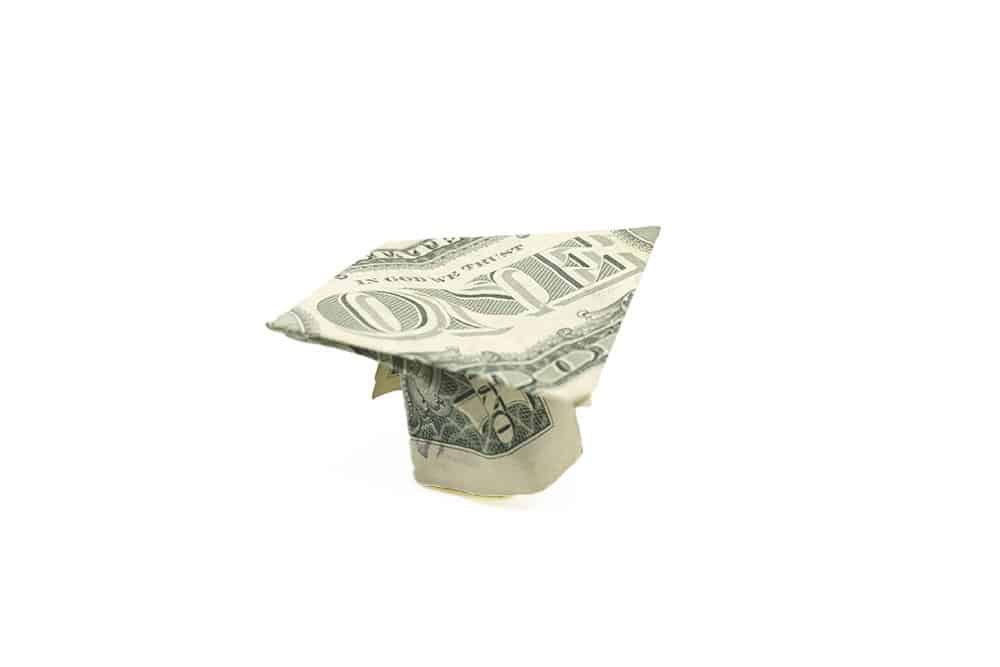
Flip it over and your origami mortarboard is done! Set aside the graduation cap for now.
Make the Diploma
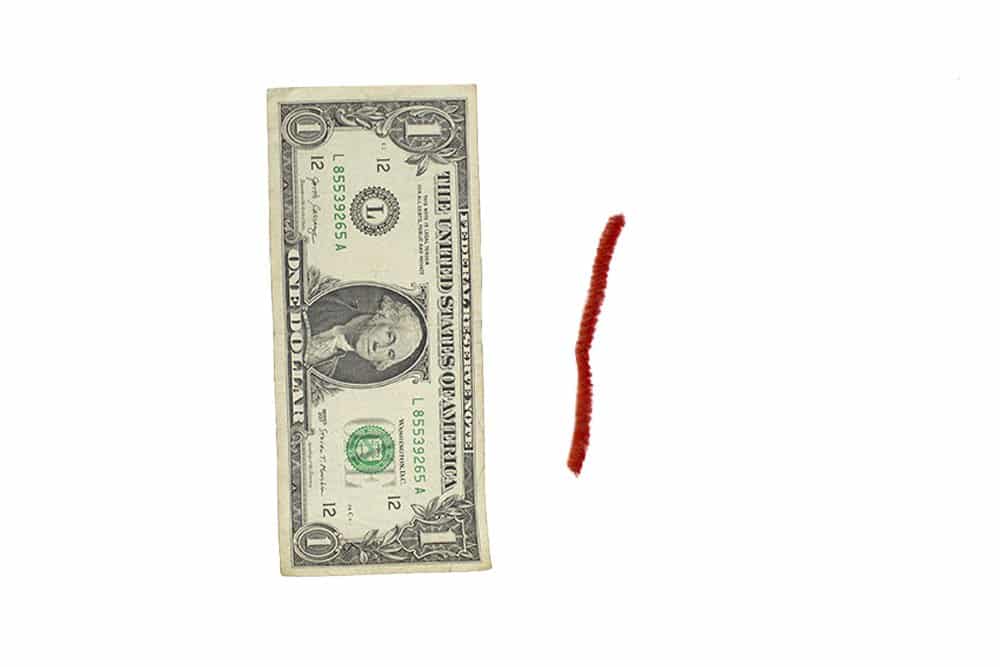
Get another dollar bill and a short length of yarn.
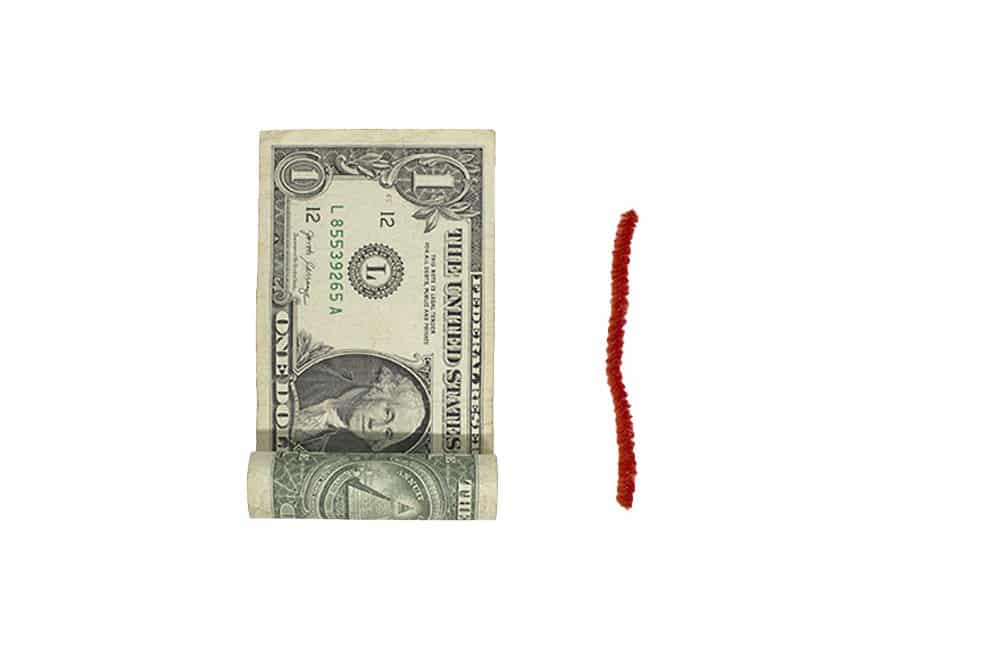
Keep rolling till you reach the top edge.
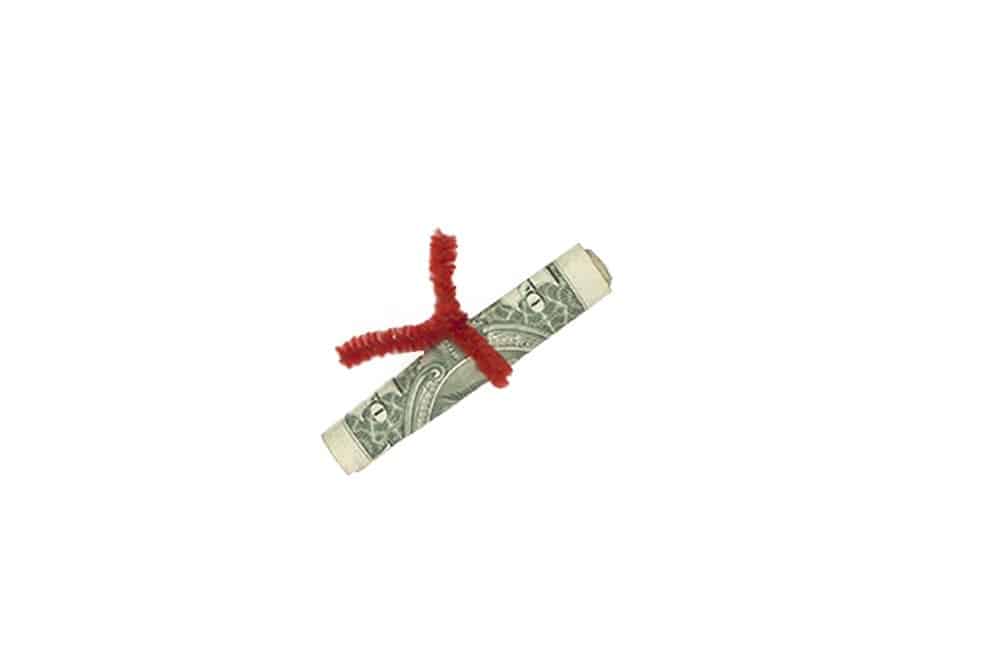
Tie it with a ribbon after.
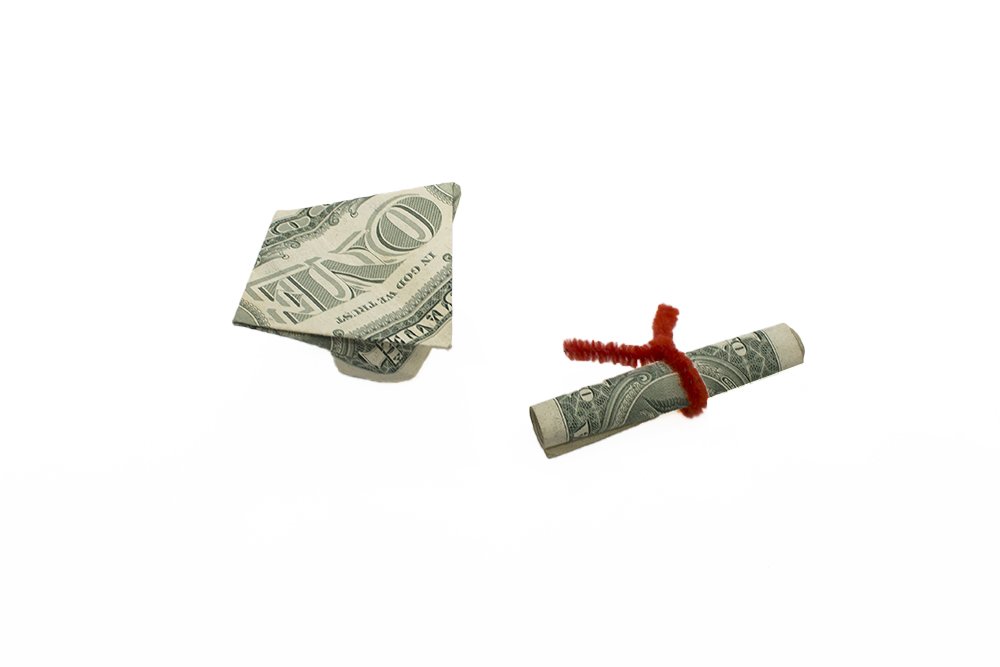
Your origami graduation cap and diploma are done! For more awesome dollar origami folds, check out the suggested articles below.
Extra Tips
- Money does not tear easily but it is prone to get crumpled. Practice with fake money or a rectangular piece of paper first if you're planning to give the bill/s as a gift.




Nice Grad Gift Idea!
super cool for graduation!
super cool for graduation!
unghh the instructions are okay, its my folding skills that aren’t (╯°□°)╯︵ ┻━┻
You can do it 😀