- Dollar Bill Origami
- Easy Dollar Bill Origami
- Folding Instructions
- Money Gifts
- Origami Money Star Tutorial
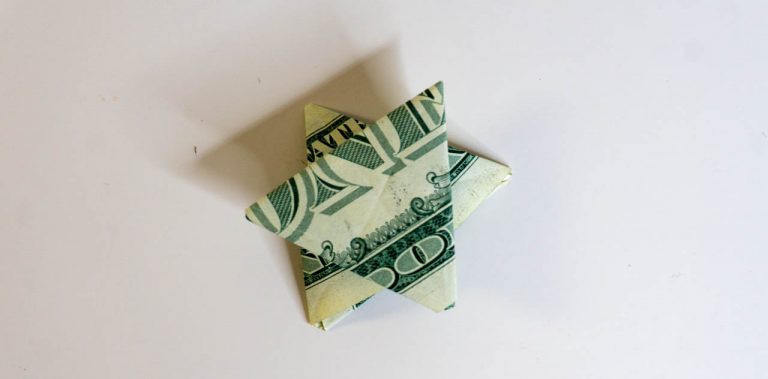
How to Fold a Dollar into a Star with 6 Points
Introduction:
There are various ways to fold a dollar bill into a star. One way is to fold it into a six-pointed origami star. This origami hexagram may look tricky to do, but it is actually quick and easy to make. You will only be needing a piece of a dollar bill for this origami star. You don’t necessarily need to use a dollar bill. Any rectangular piece of paper with a 7:3 proportion will do great for this activity!
Before you begin the folding, don’t you know that the six-point star is also known as the star of David. Its meaning is tied to the Jewish and Judaism religion. Also, its shape is a hexagram which is a compound of two equilateral triangles.
Anyways, we hope you enjoy reading this guide. Have fun!
Make the triangular base of the money origami star
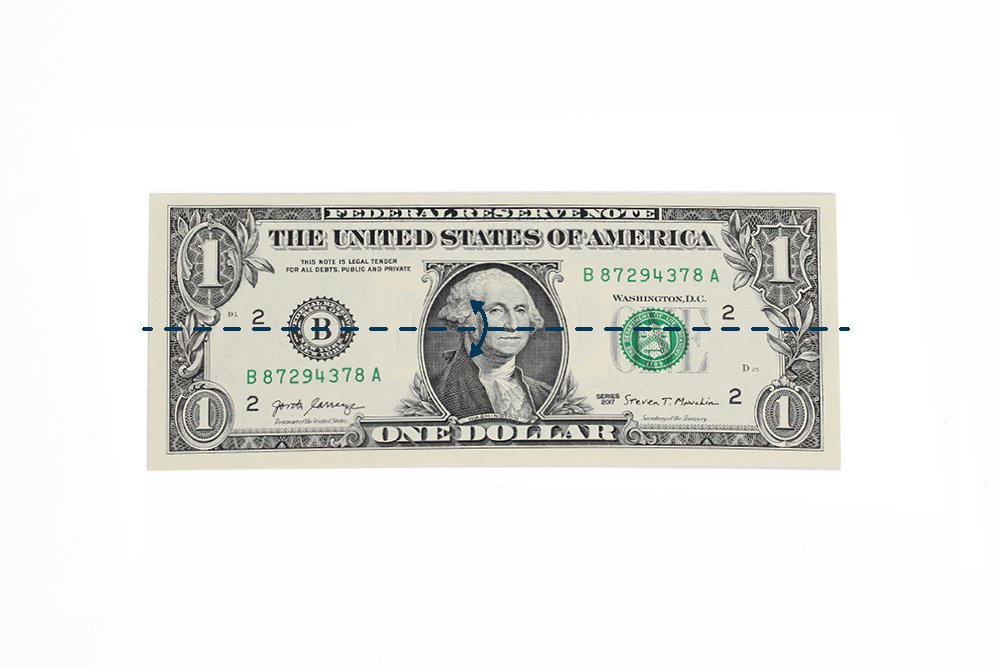
To begin this activity, you must first get a dollar bill or any paper with the same proportion. Then find a suitable place to begin folding the six point star origami.
Fold the dollar bill crosswise in half. Crease it well and then unfold.
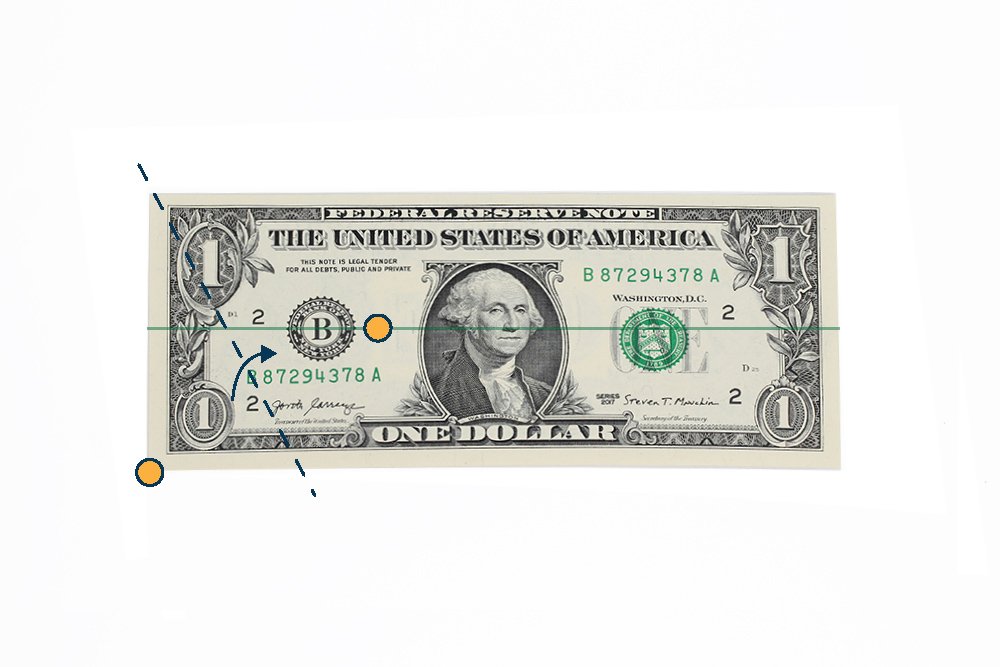
Diagonally fold the right bottom corner towards the middle horizontal line.
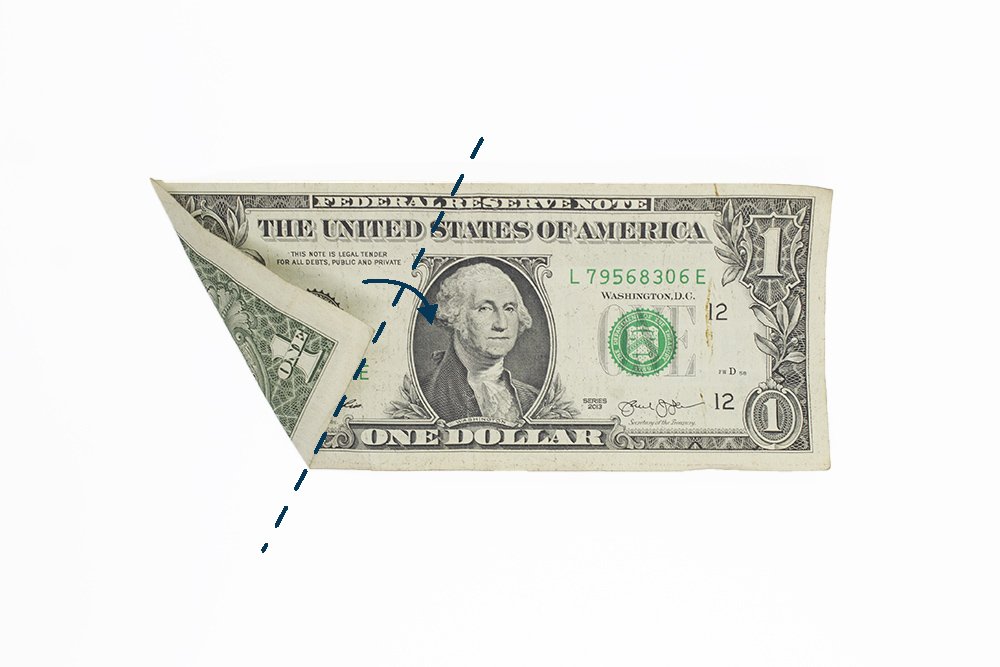
Take note of the shortest side of the triangle you see before you now from the fold you made. Diagonally fold the right upper corner of the triangle towards the bottom edge of the bill to create an isosceles triangle. Fold along the the shortest side of the triangle.
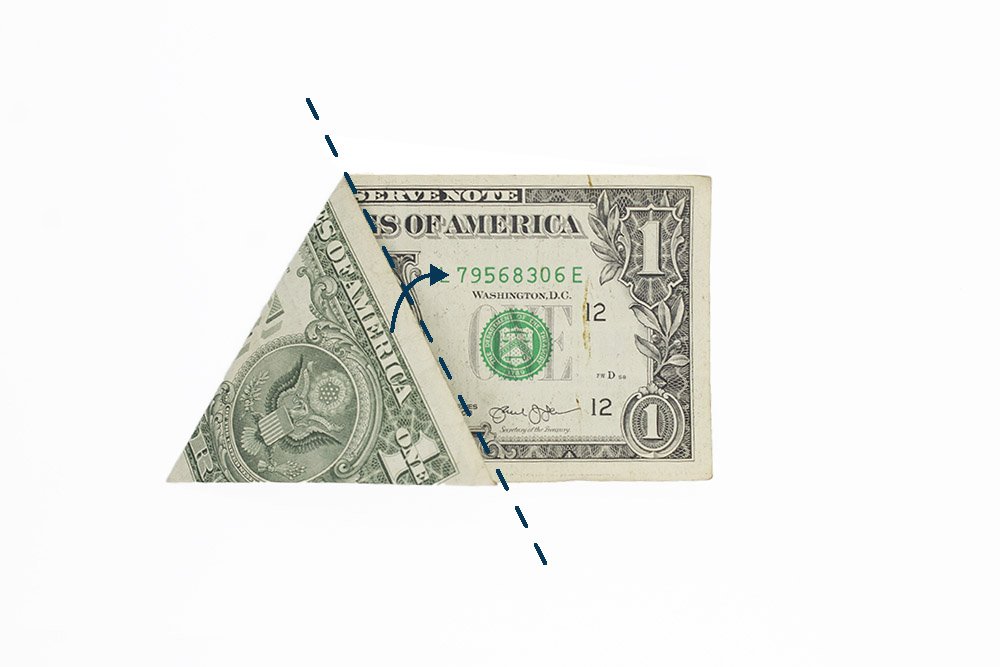
Diagonally fold the left triangle upwards.
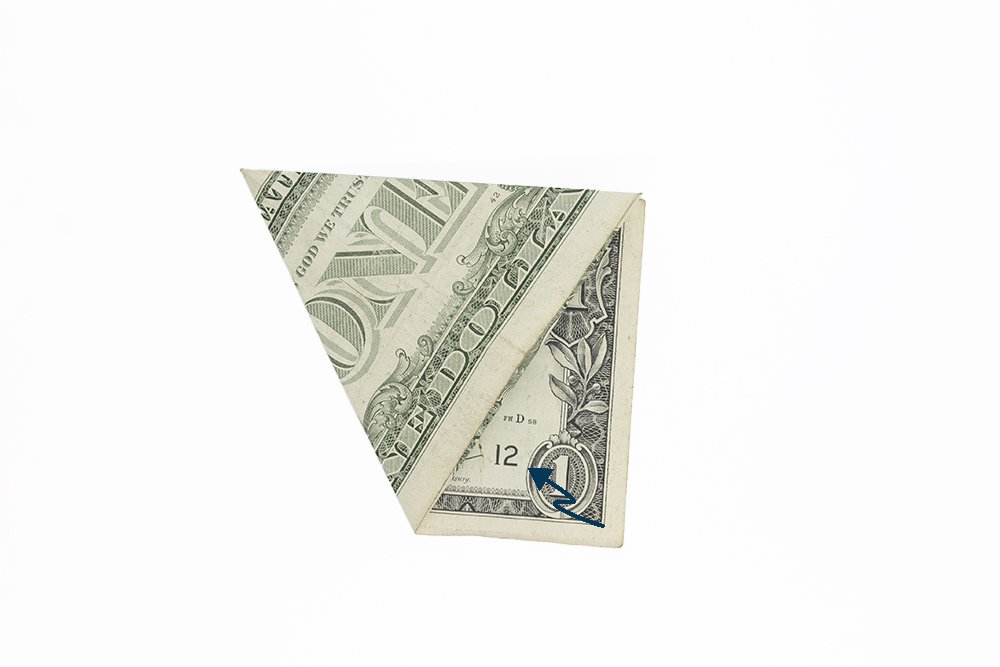
Then you'd have something similar from the photo above. Insert the bottom right corner to the pocket of the triangle.

Keep inserting the extra flap until you have formed a triangle.
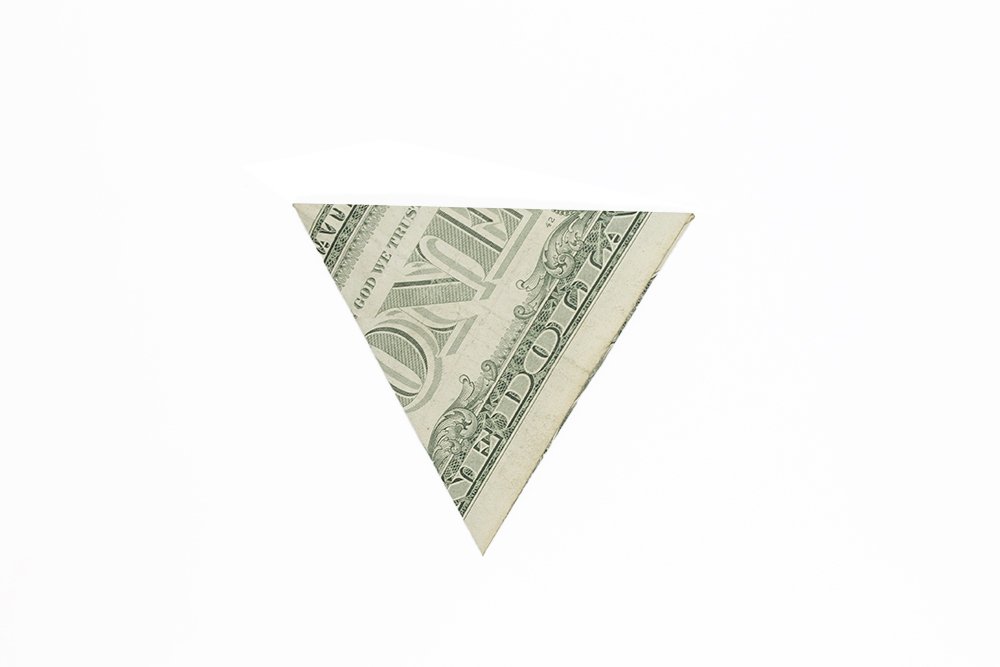
This is what the triangle should look like once the bottom corner is fully inserted.
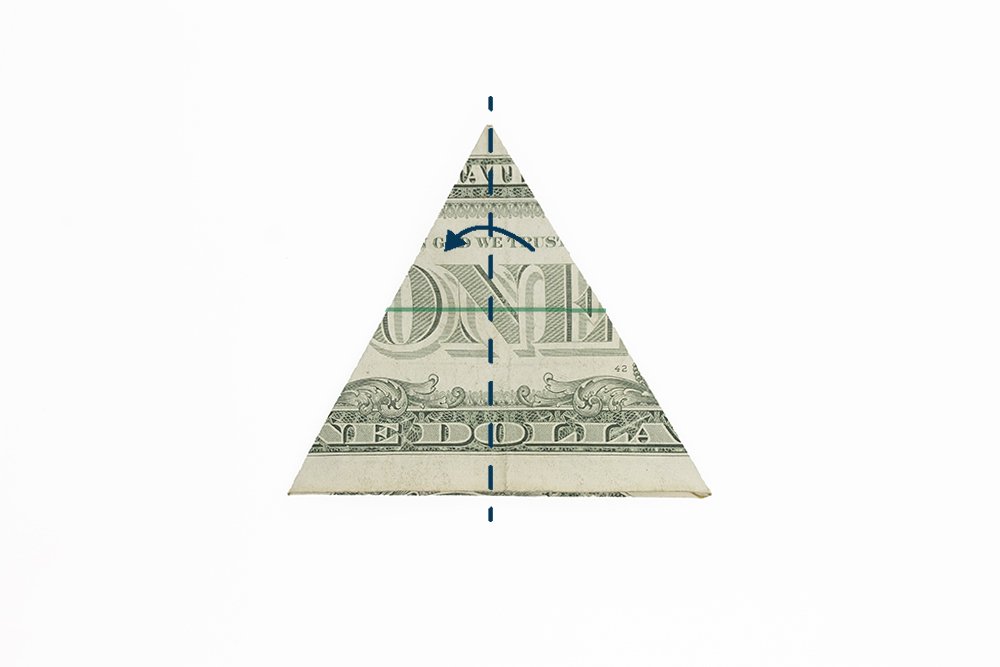
Rotate the dollar bill clockwise until the top left corner is in the top middle.
But first, make a vertical crease line by folding the triangle in half. Hooray! Good job, now it's time to proceed to the next step.
Create the necessary crease marks to form the money star
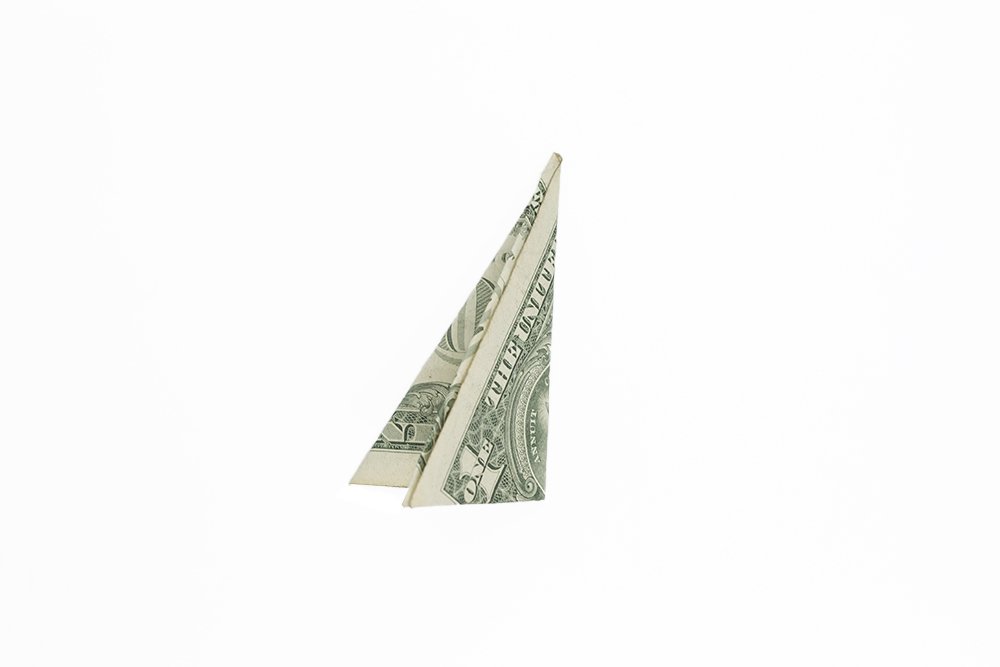
Unfold the previous fold made to make a vertical crease mark on the dollar bill.
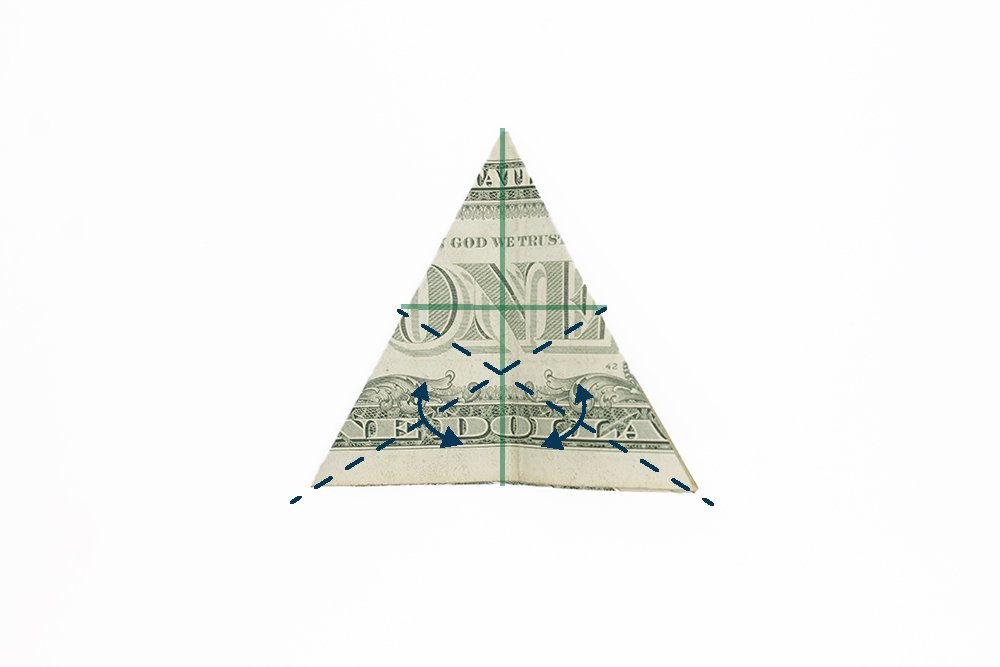
Diagonally fold and unfold the dollar bill along the dashed lines.
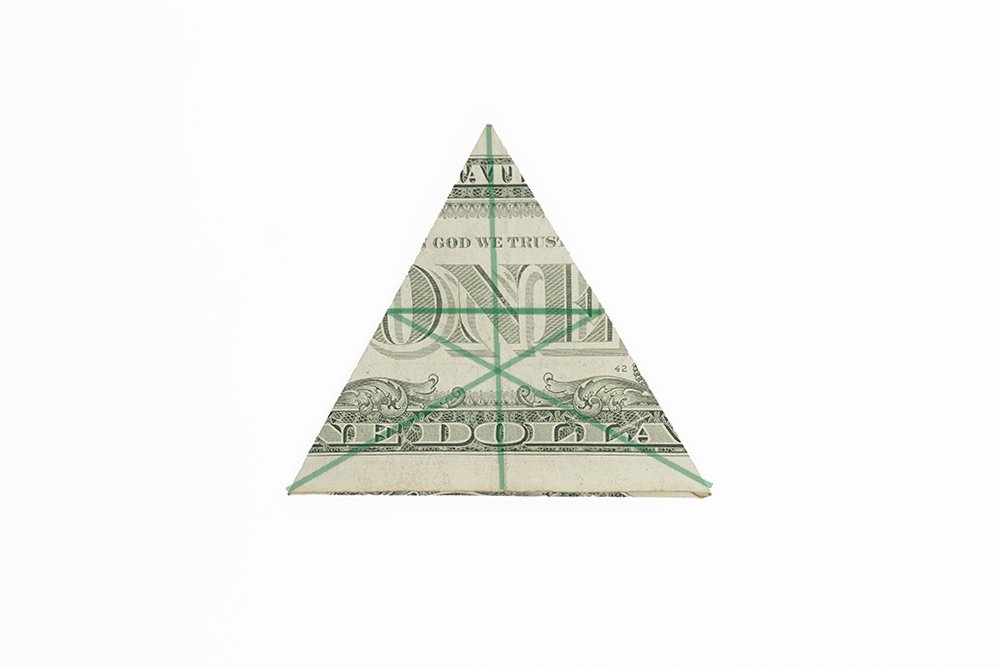
The crease marks made should now look like this.
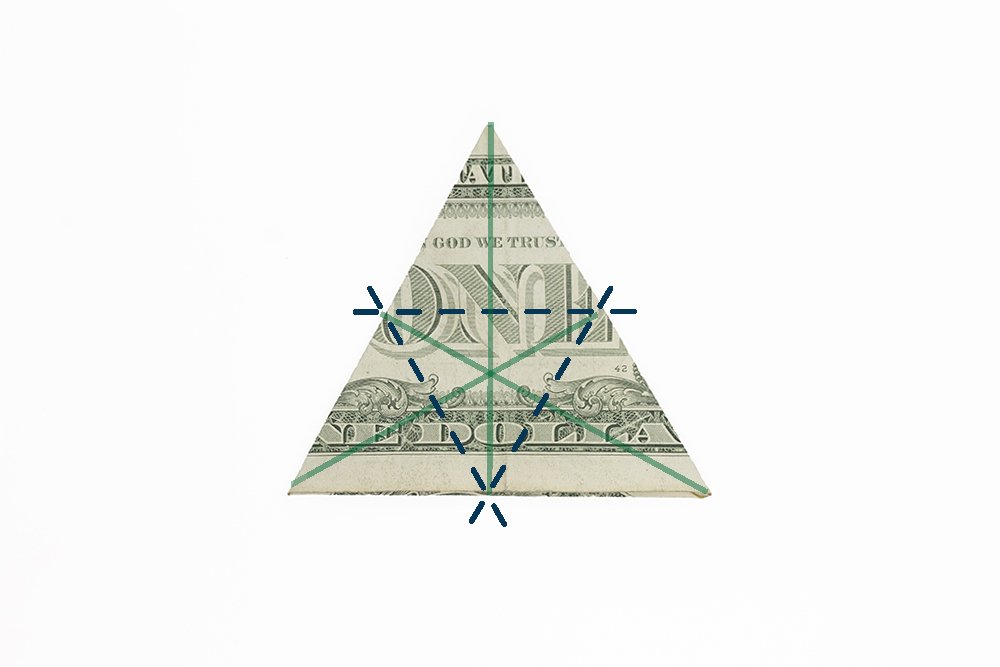
Make a triangular-shaped crease mark by folding the corners along the dashed lines. See next steps for guide.
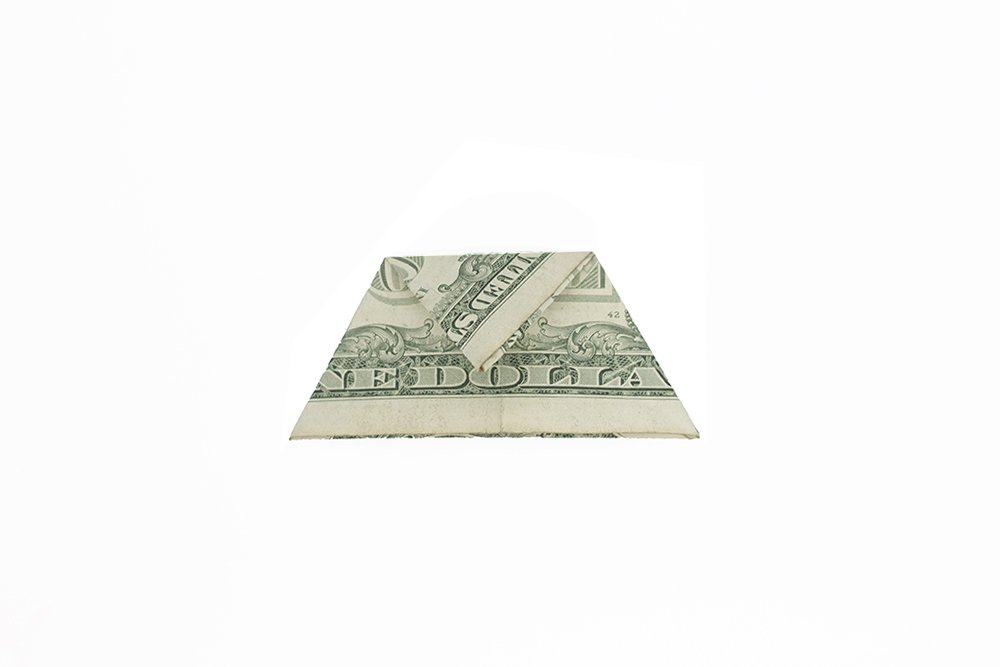
Fold the top corner downwards then unfold.
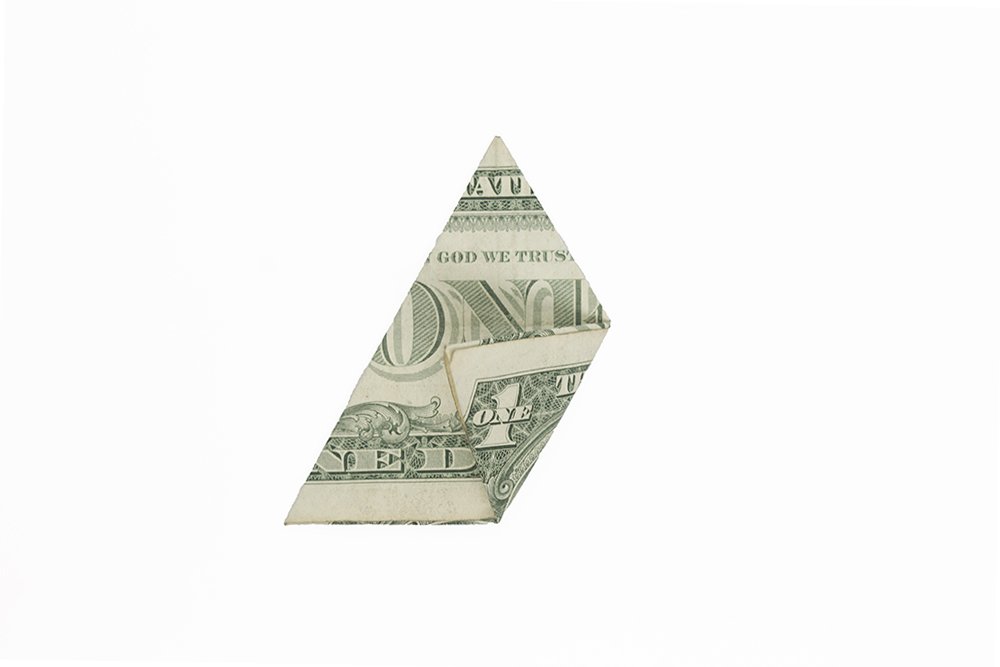
Next, do the same on the bottom right corner but fold it diagonally upwards this time. Don't forget to crease the fold well then unfold.
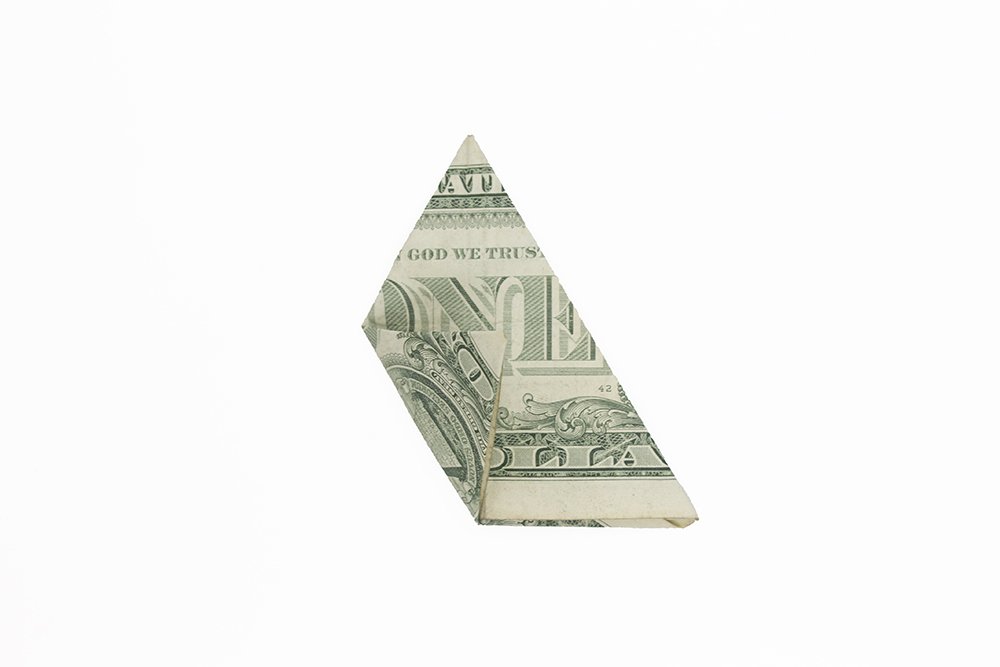
Repeat the process on the bottom corner as well. Crease it well then unfold.
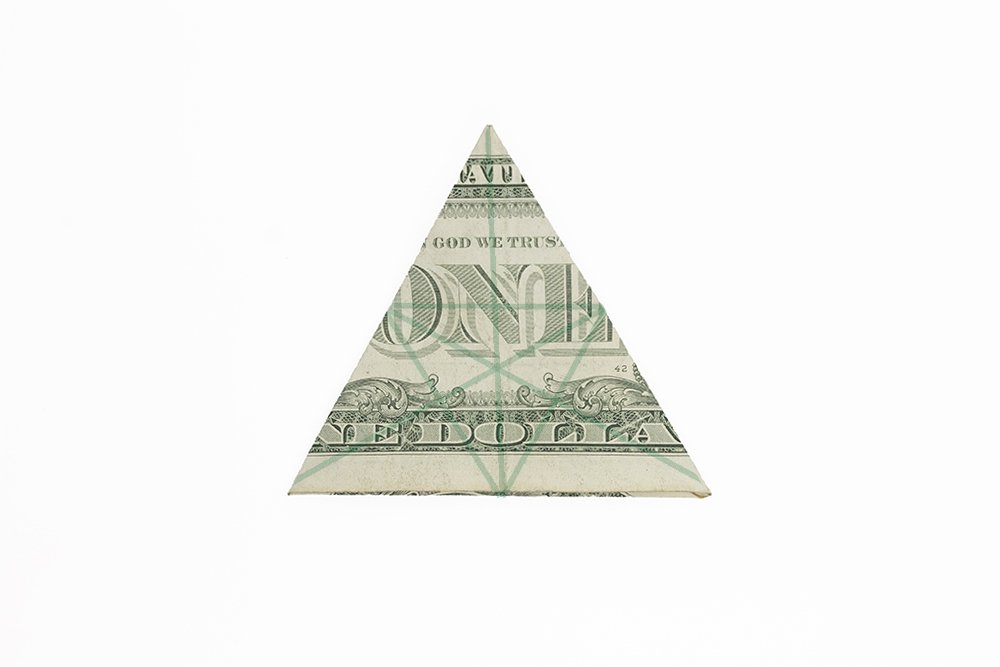
Now that the necessary crease marks are already made, flip it over to the other side.
Shape the dollar bill into the Star of David
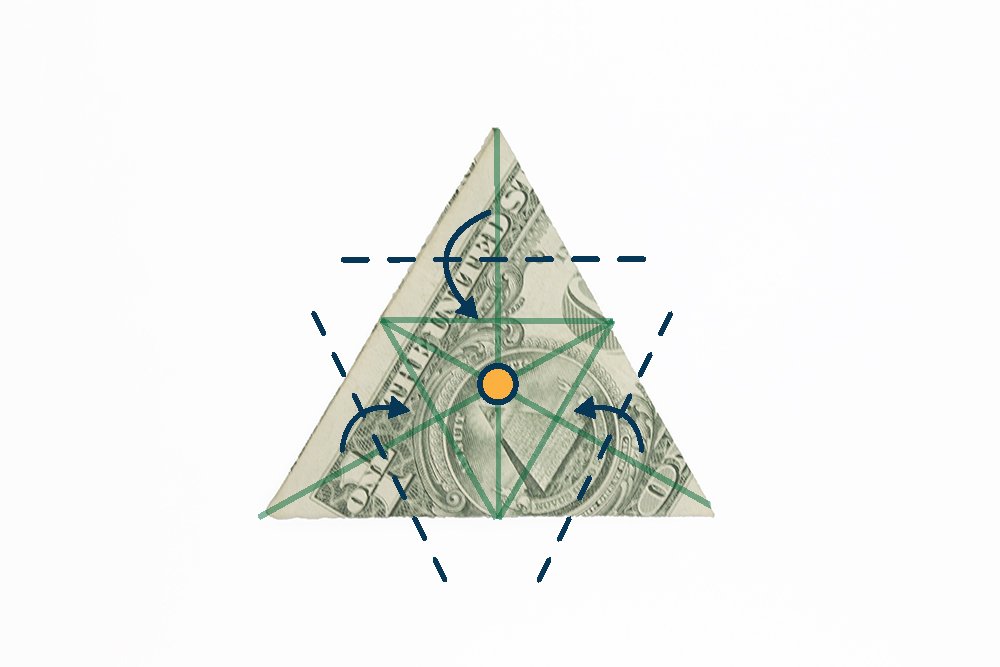
Fold all the corners to the center of the folded dollar bill.
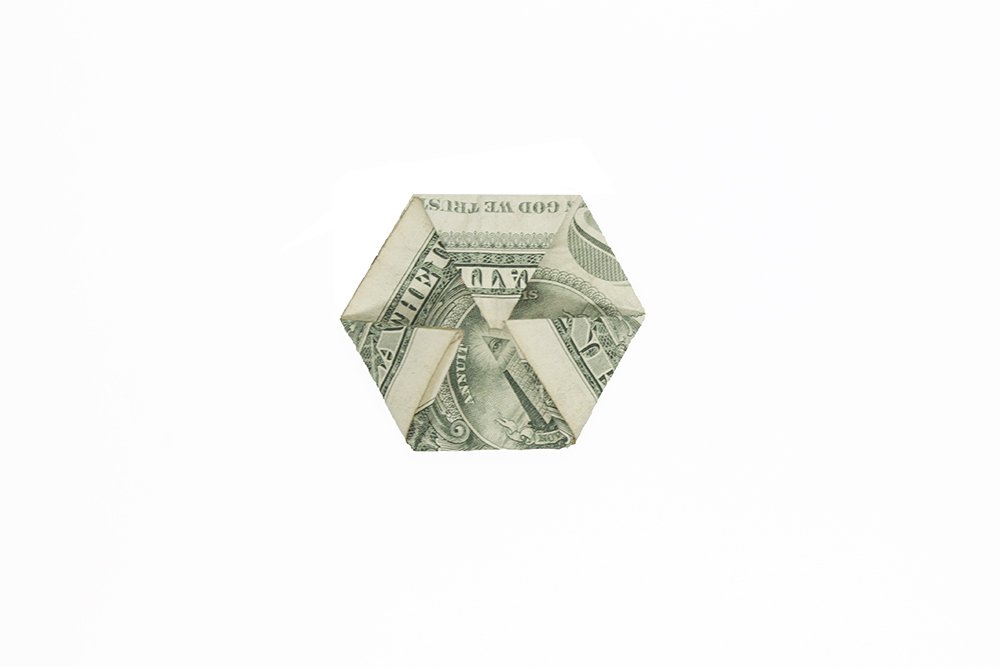
Flip the dollar bill to the other side once it's shaped into a hexagon.
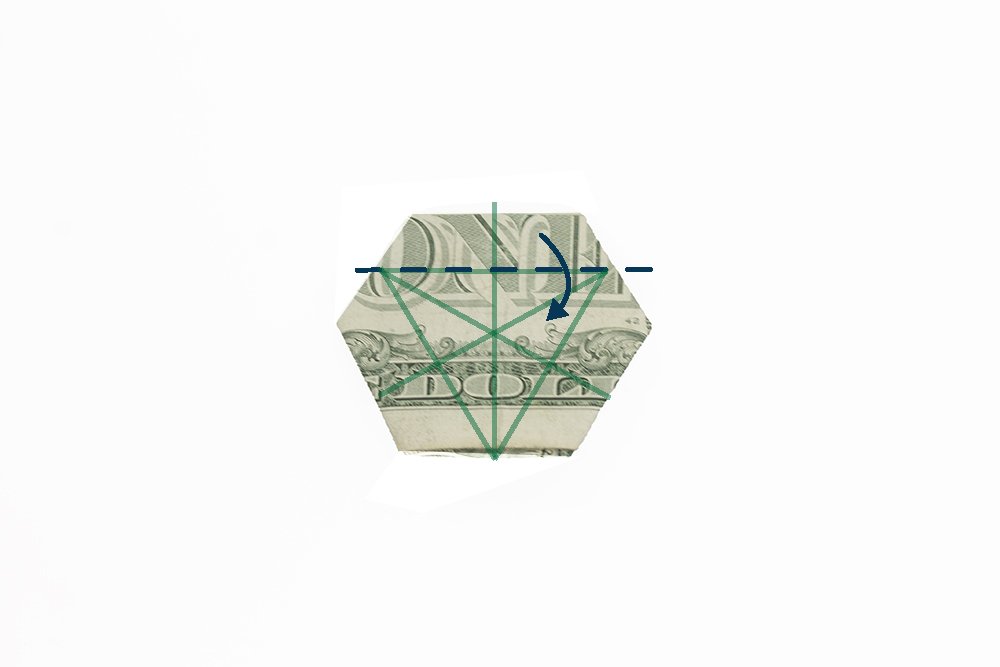
Bring the bottom right edge to the center.
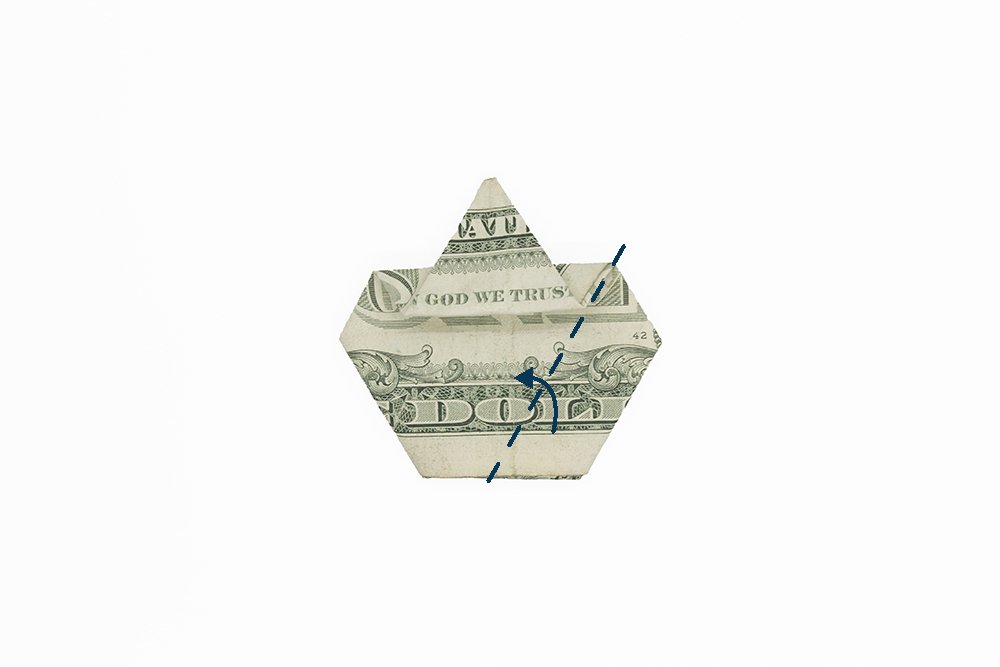
Repeat the same step on the bottom right side. Almost done!
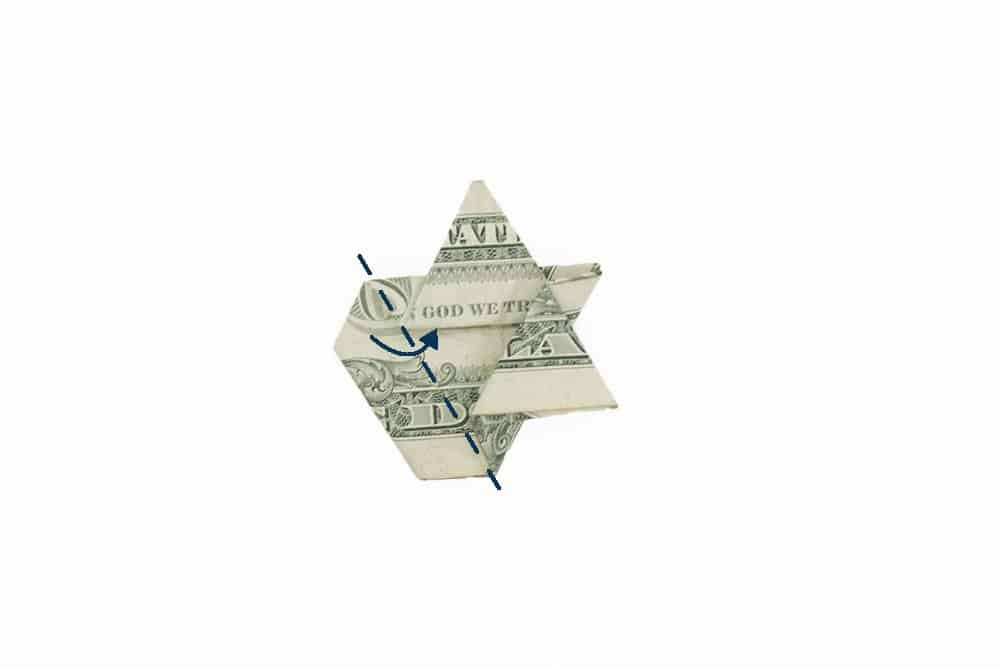
Fold the left bottom edge upwards toward the middle.
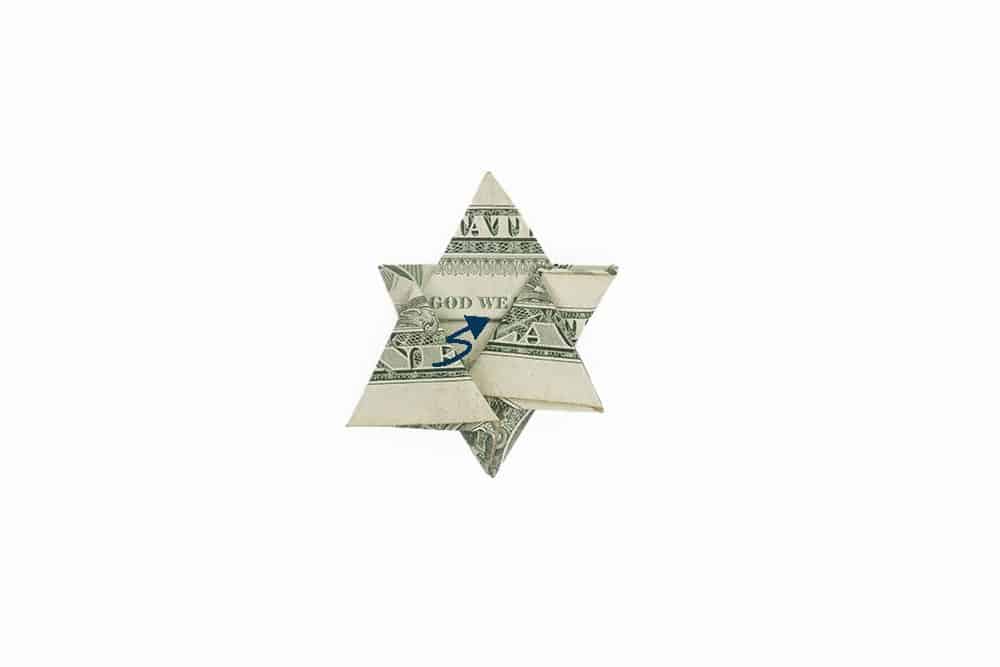
Tuck the topmost flap of the dollar star to the right flap then flip it over.
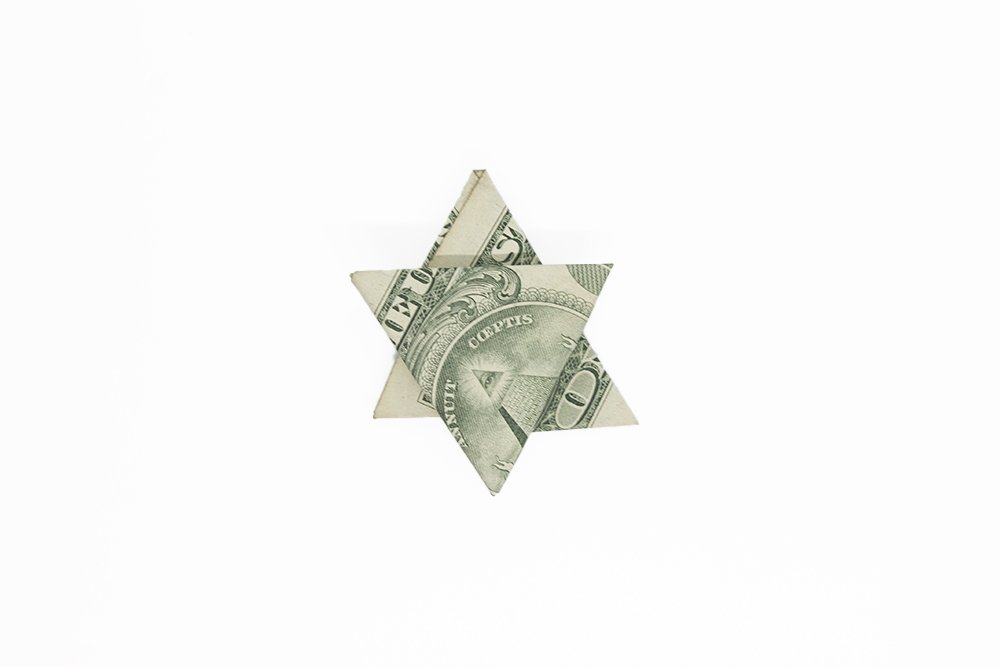
Congratulations your dollar bill is now folded into the shape of a star. For more awesome dollar bill origami instructions check out the articles below.
Extra Tips
- This guide will always be here so you could come back in case you forget a step. And if you're stuck with a particular step just drop a comment down below - we'll help ASAP.




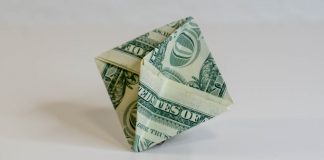

this fold is awesome!!
It looks so hard and it was a bit challenging folding it but once you got it, you got it!
my one stop guide for all things dollar folding
<3 informative
Made the dollar star in less than 2 minute :p EZ!