Introduction:
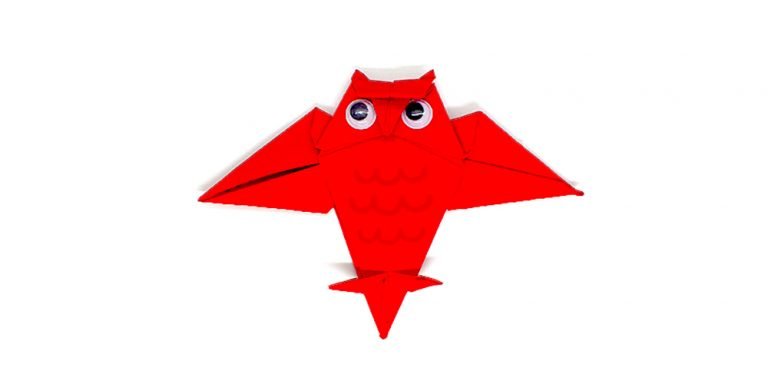
Owls are nocturnal birds known for their large heads and the sharp beak that points downward. For this instruction, we are going to make an origami owl. It may look pretty daunting to do, but this step-by-step instruction will help you make a beautiful origami bird.
For this origami owl instructions, you will need a piece of paper. You will need a pair of scissors for this origami activity. The scissors will be used to make incisions on the origami paper to form the owl.
Make a square base for the paper owl
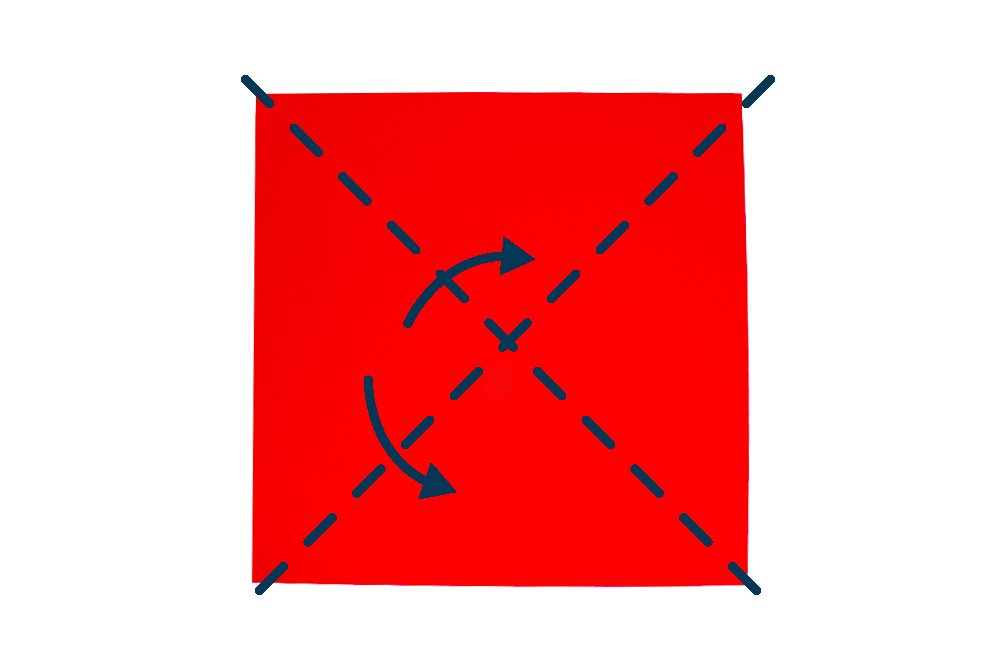
To make this origami owl, start with a square piece of origami paper. Lay it on flat surface and diagonally fold along the dashed lines. Crease the paper well and unfold.
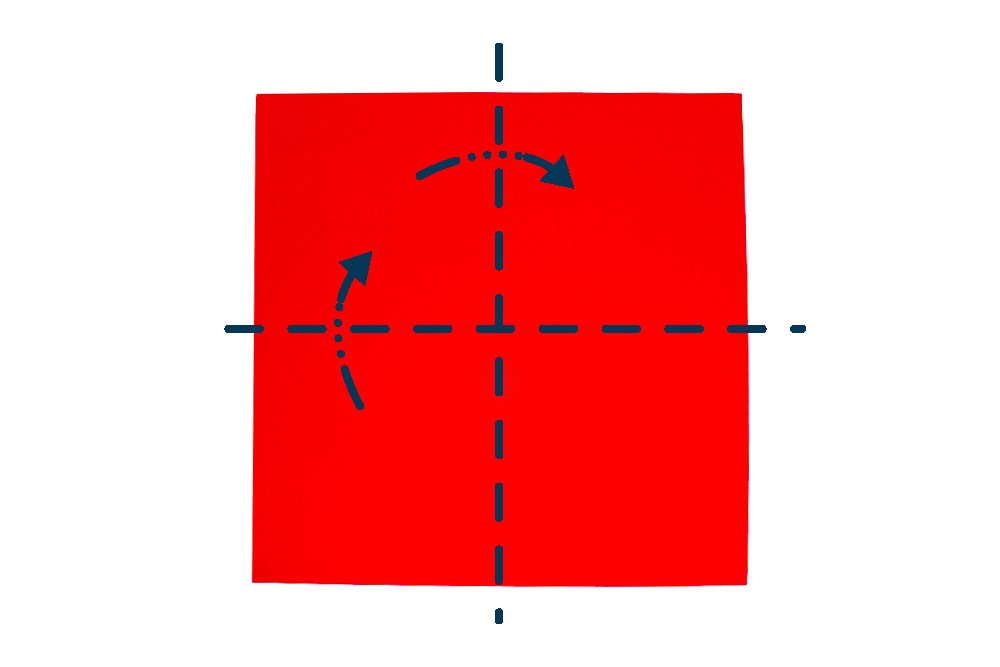
The next step is to make crease lines horizontally and vertically. Mountain fold the paper crosswise and lengthwise in half. Crease well and unfold.
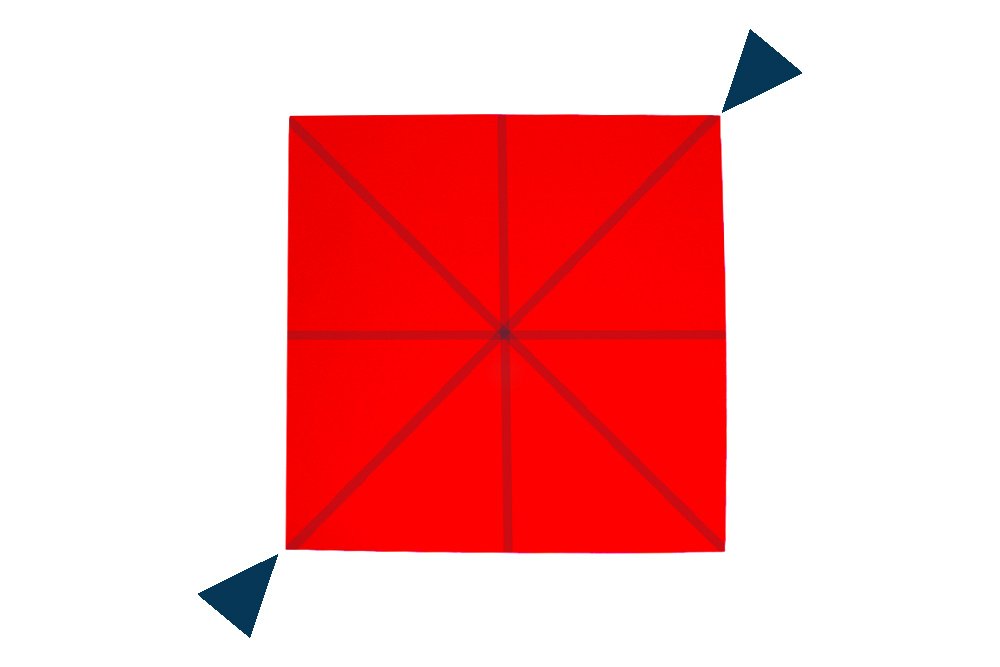
Use the crease marks made in steps 1 and 2 to form a square base. Collapse the paper along the crease marks made. It helps to hold the top right corner and the bottom left corner. Once you bring two corners together, flatten it.
Create a petal fold
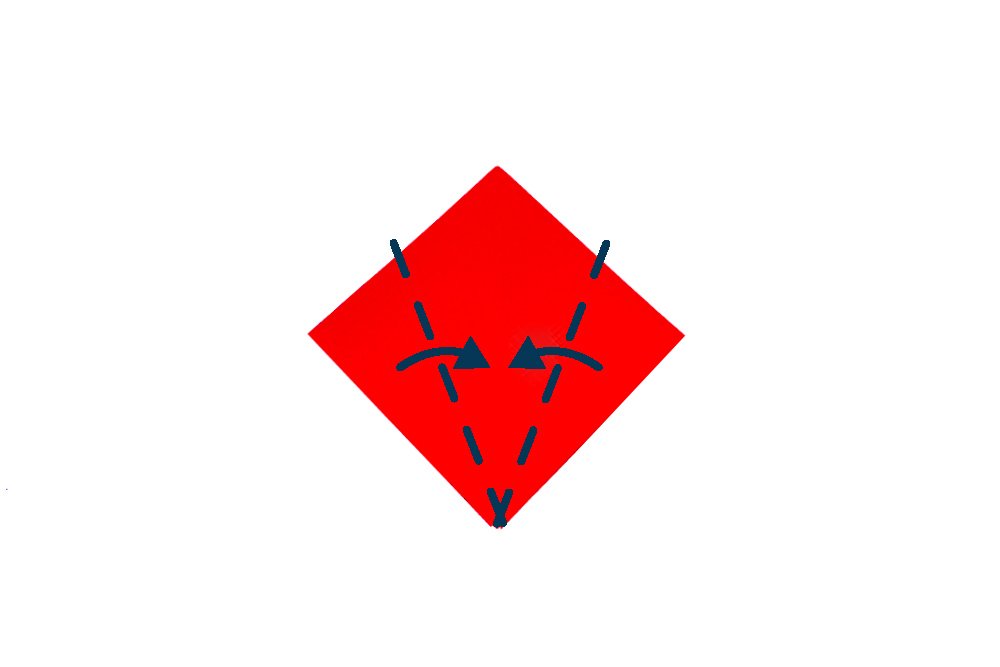
Bring the left and right corners to the middle crease. Fold the top layer ONLY.
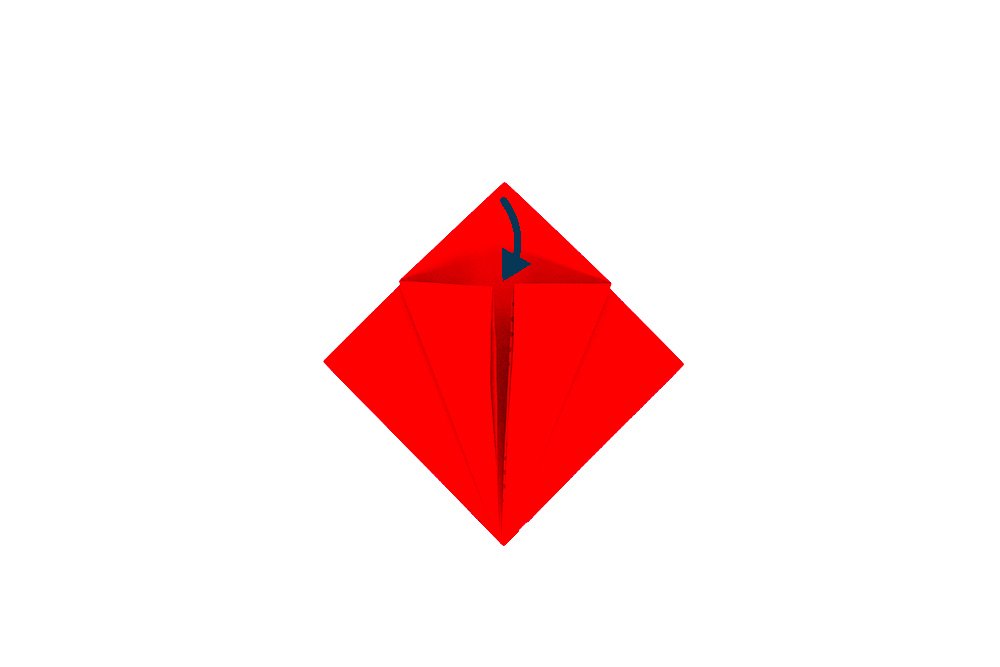
Bring the top corner of the origami paper down.
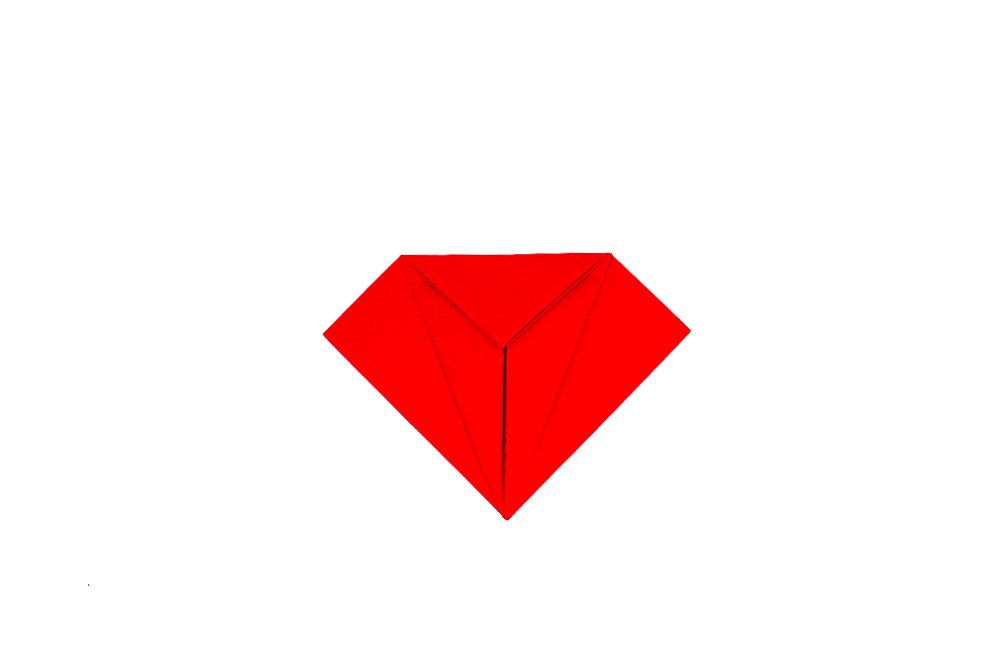
Crease the paper well and unfold the top, left and right flaps made.

Gently lift the bottom corner of the top layer ONLY.
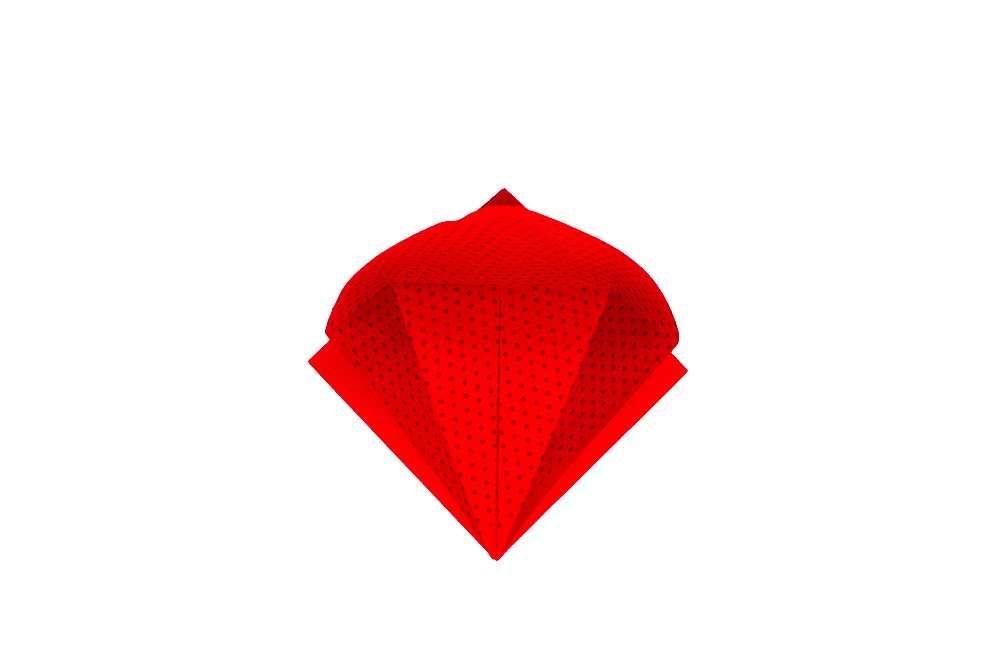
Once you are unable to lift it up further, squash it down and flatten. You have just made an origami petal fold!
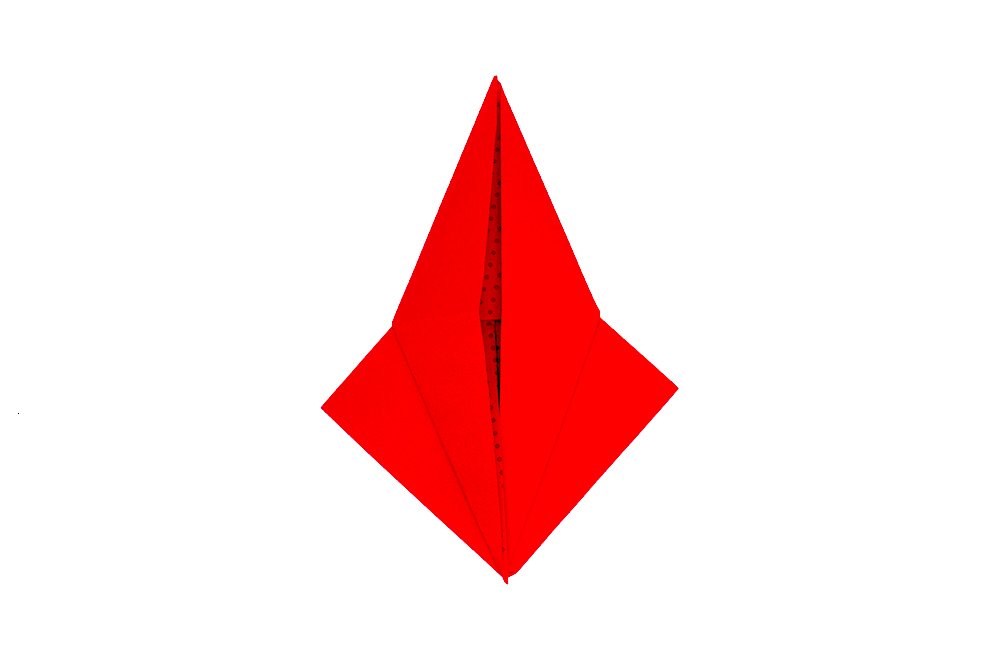
Like what we did from steps 4 and 8, fold the top, left and right corner to the middle then unfold. Lift upwards the bottom corner of the top layer then gently flatten it. Your origami bird base is done!
Make the wings of the origami bird
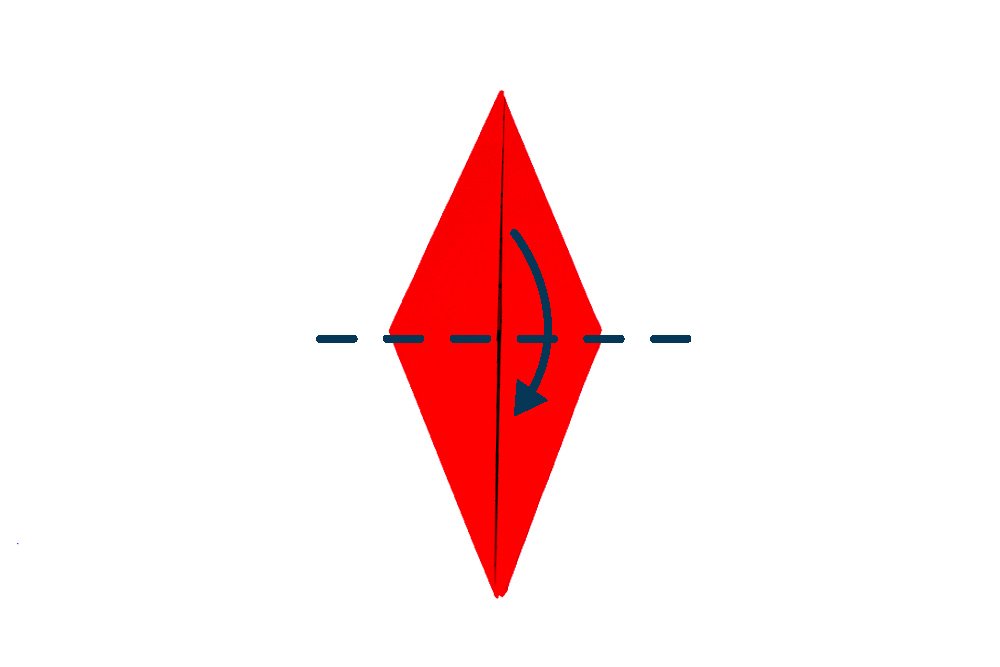
Bring the top layer downwards in half. Make sure to fold the top layer ONLY.
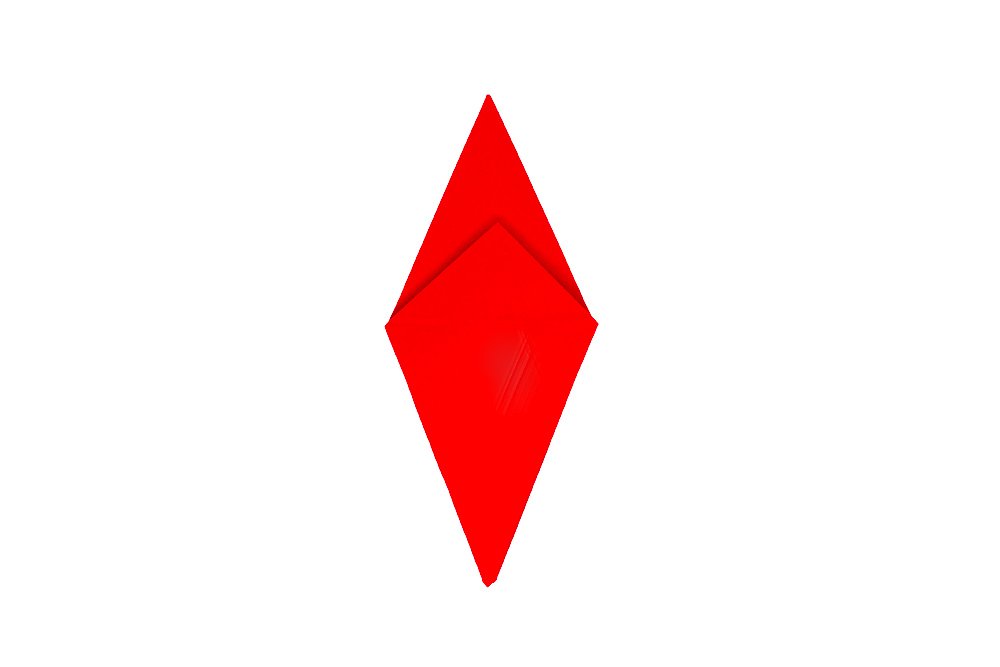
Turn the origami piece to the other side.

You need to repeat step 11 on this side. Bring the top layer downwards in half. Make sure to fold the top layer ONLY.
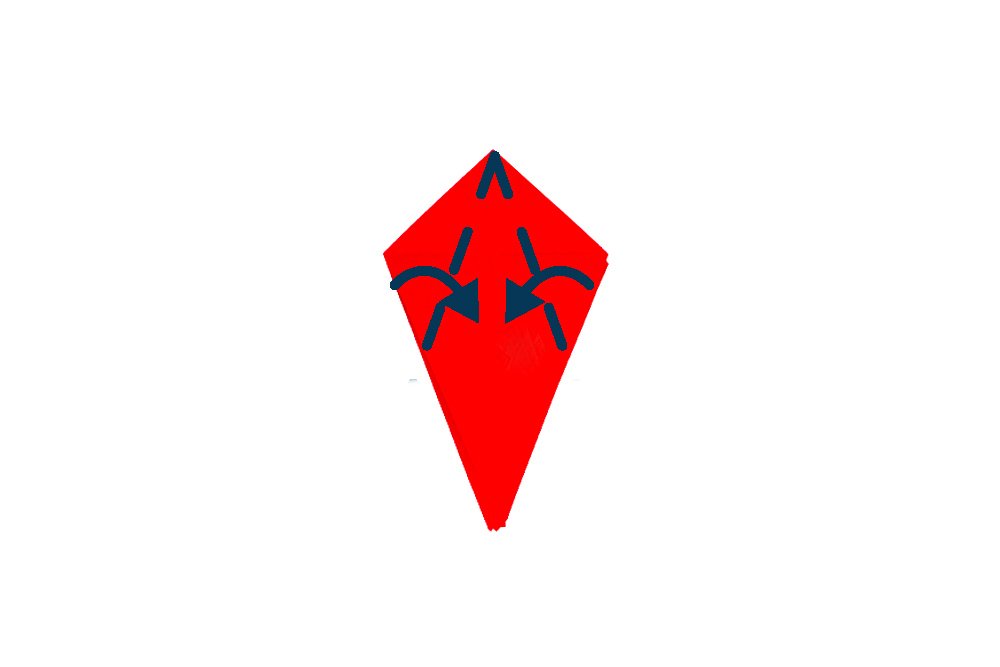
Move the left and right corners to the middle crease. Follow the dashed lines to know where to fold and make sure to fold the top layer ONLY.

Repeat the previous step on the back layer of the origami paper as well.
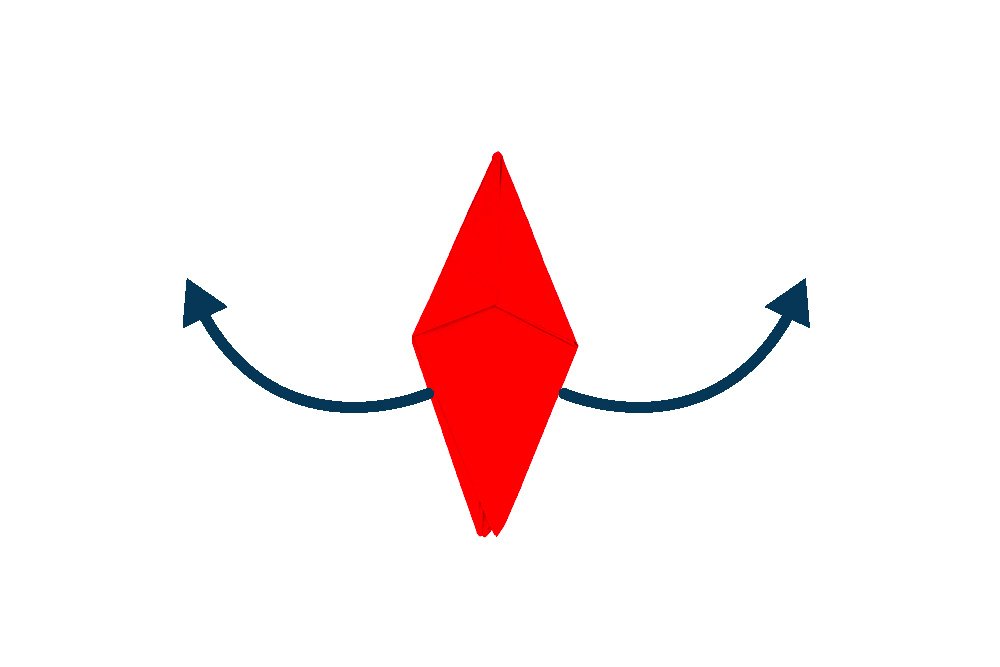
Form the wings by lifting up the inner flaps from the inside and twisting the wings forward, then squashing it down.
Form the head of the origami owl
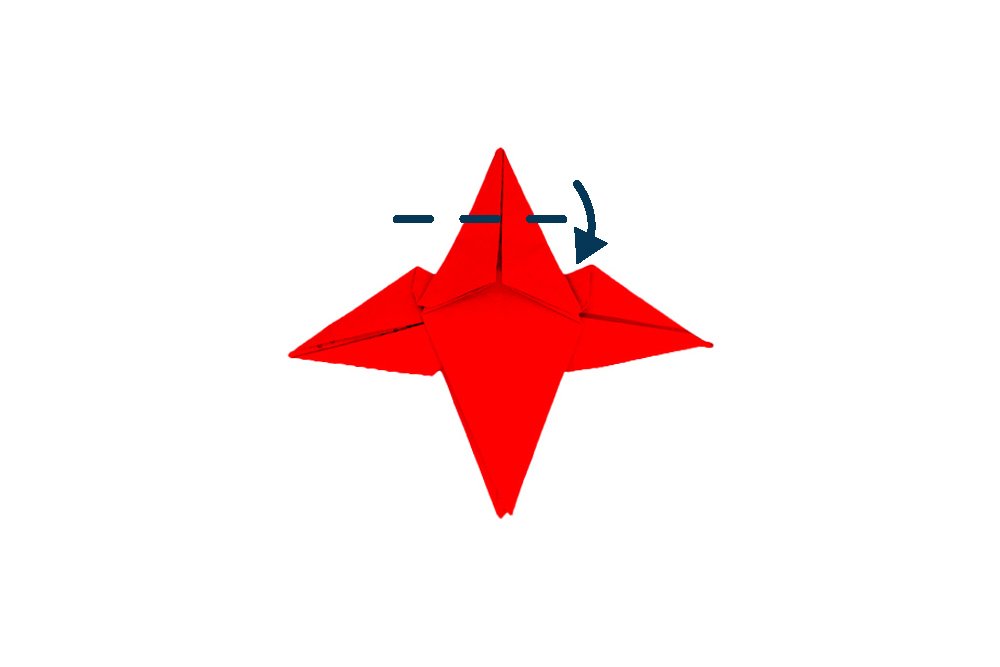
To form the head of the owl origami, bring the top corner downwards.
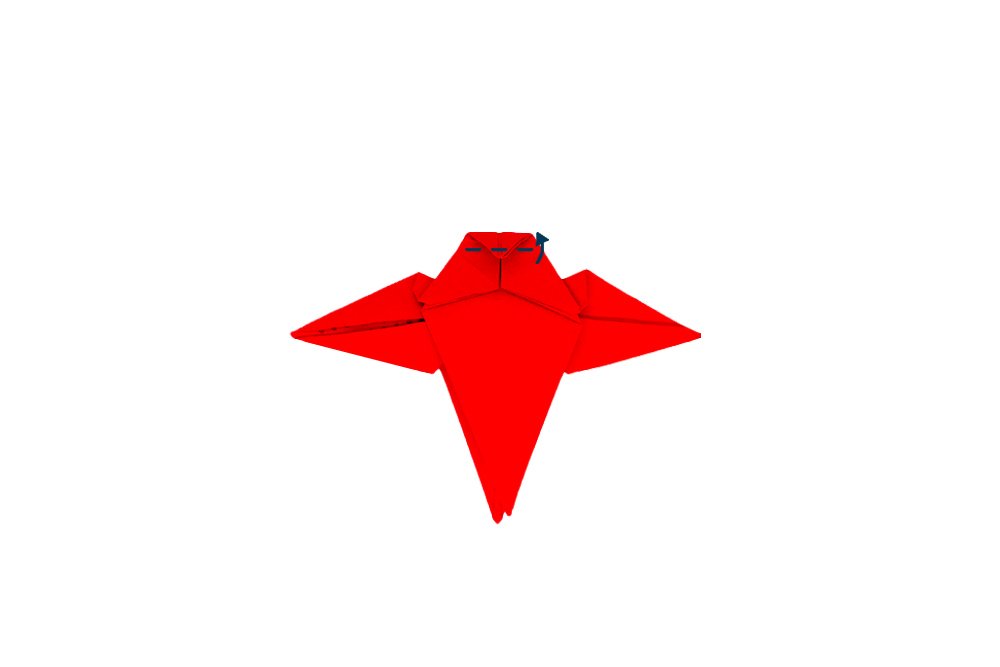
Lift and fold the top triangle flap upwards. Make sure to fold the top layer ONLY.
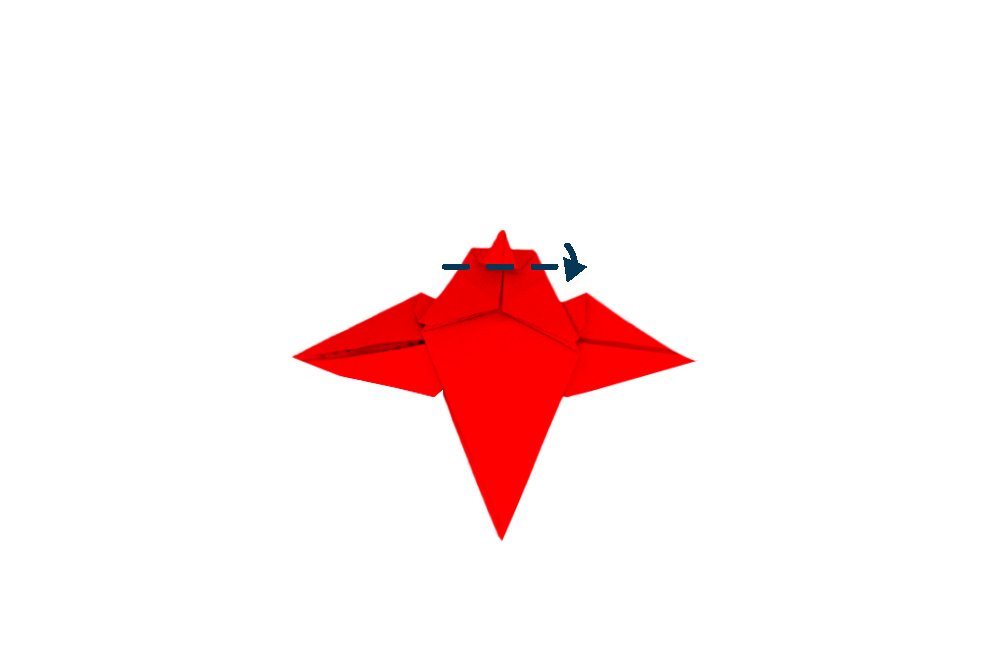
Again, fold the top corner downwards. the origami owl's head is done!
Make the legs and ears
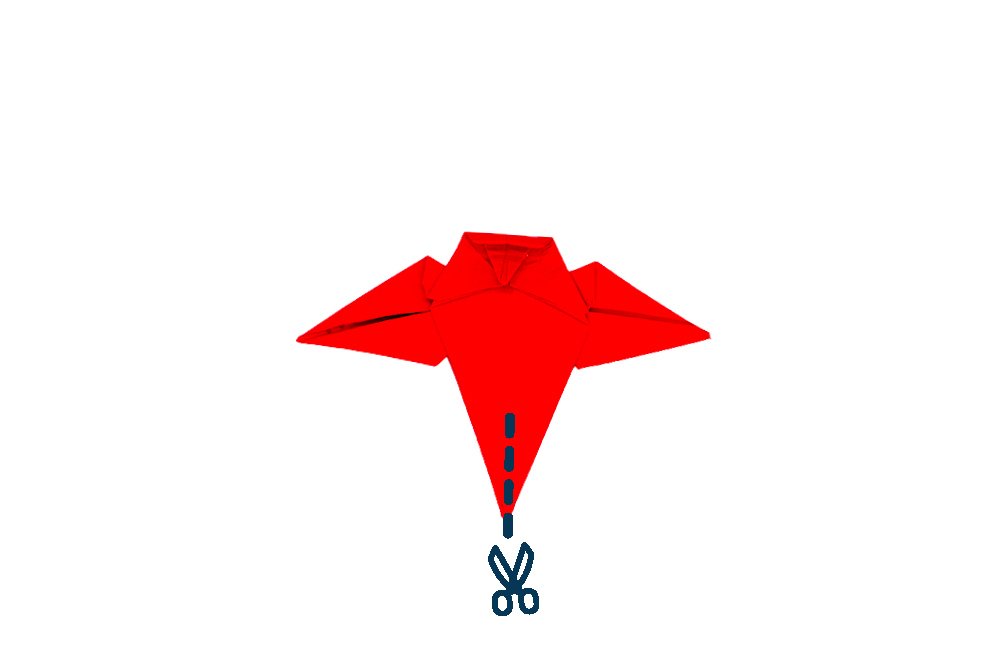
Get a pair of scissors and cut a slit on the bottom corner of the top layer. Make sure to cut the top layer ONLY.
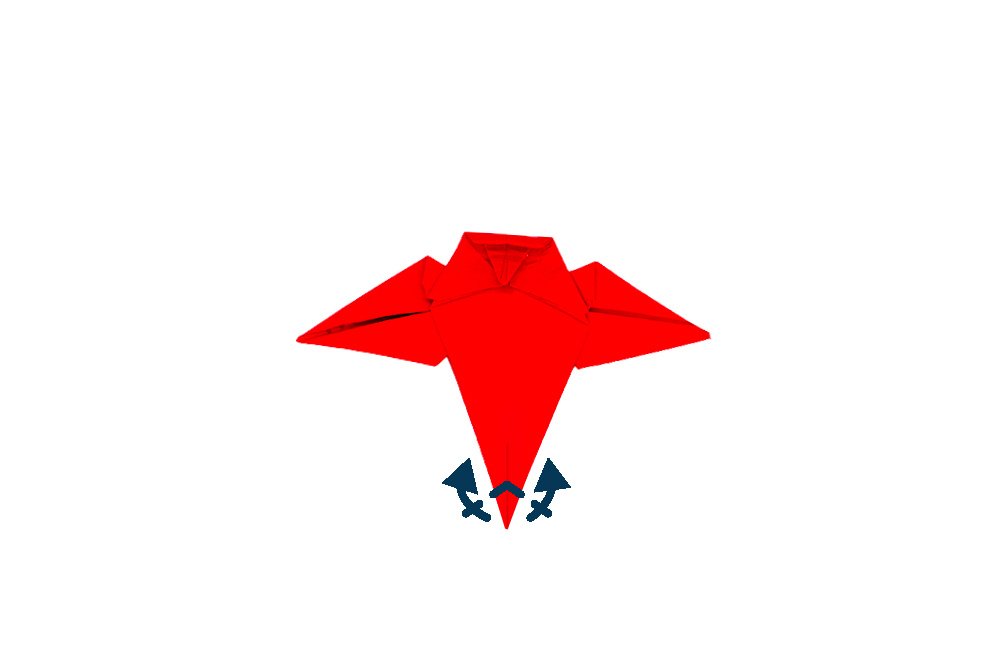
Form the feet by folding the top layer upwards. Make sure to fold the top layer ONLY.

Turn the origami piece over. Cut slits through the top layer. This will be the ears of the owl. Make sure to cut the top layer ONLY.
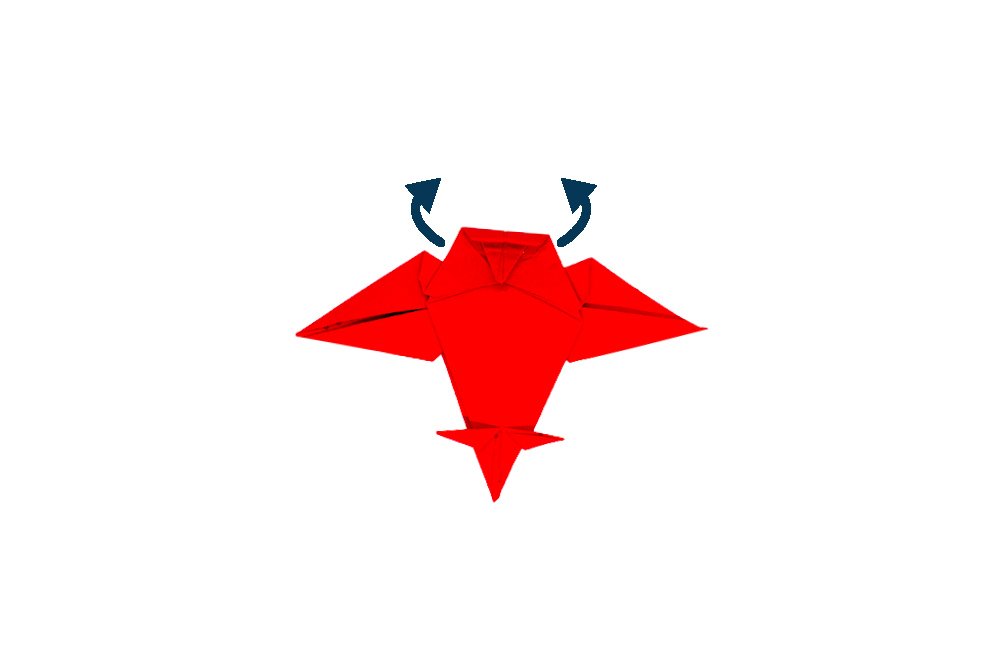
Flip it again to the front. The last step is to lift up the ears of the origami owl.

Your origami owl is finished!
Extra Tips
- We hope you find these origami owl instructions fun yet challenging! You can explore ways to make other bird origamis on our catalog.

